Creating an automation
This page walks through the common steps for creating any automation, then points you to the type-specific details for each form.
Before you start
- You need access to the project where you want to create the automation.
- For Dataset Refresh: the datasets you want to refresh must already be connected to a cloud source.
- For Data Consolidation: the source folder and destination dataset must already exist in your Data Library.
- For Messaging: the Dataset Views you want to attach must already exist in your project.
Step 1: Open the Automations tab
In the Data Library, click the Automations tab. This opens the list of automations for the current project.
If no automations exist yet, the page offers to create your first one. If automations already exist, the list appears.
Step 2: Click New automation
Click the New automation button in the top-right corner of the screen.
The New automation modal opens, showing the available types.
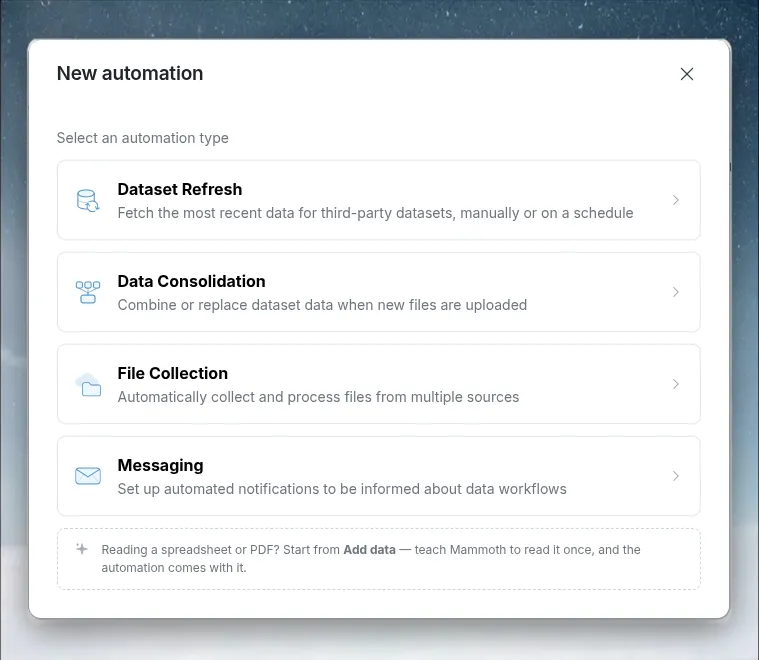
Step 3: Select a type
Click on the option for the automation type you want to create:
- Dataset Refresh—Refreshes cloud-connected datasets on a schedule
- Data Consolidation—Consolidates uploaded files into a dataset automatically
- Messaging—Sends email reports with attached views on a schedule
- File Collection—Collects files from external cloud sources into a Mammoth folder. Available on plans that include it
Clicking a card starts the step-by-step creation flow for that type.
Step 4: Complete the steps
Each type has its own steps. See the dedicated guides:
- Creating a Dataset Refresh automation
- Creating a Data Consolidation automation
- Creating a Messaging automation
- File Collection: Choose a cloud platform (Dropbox, Google Cloud Storage, Google Drive, Email (IMAP), SFTP, SharePoint, or OneDrive), pick the folders to collect from, optionally filter by file name, and choose the Mammoth destination folder. See File Collection for the options.
On the final review step, give the automation a descriptive name before you save it.
Step 5: Save the automation
On the last step, review the settings and click Save automation.
Expected result: The automation is created and appears in the list with status Active.
What happens after creation
- Dataset Refresh and Messaging: If you selected "now" as the start, the schedule starts immediately. Otherwise, the first run occurs at the scheduled time.
- Data Consolidation: The automation begins watching the source folder immediately. The next file uploaded to that folder triggers the first consolidation.
Editing an automation
After creation, you can edit an automation at any time from the detail panel or the three-dot menu. See Managing automations.