Messaging
Messaging sends scheduled email notifications with Dataset Views attached as CSV files. Set it up once, and your stakeholders receive fresh data in their inbox at every interval you configure.
Before you start
- The Dataset Views you want to attach must already exist in your project.
- You need the email addresses of all intended recipients.
Creating a messaging automation
Step 1: Open the creation modal
From the Data Library, click New Automation (for example, in the Data Hub header, a folder's empty state, or a resource's context menu), or click the equivalent action from the preview panel's Automation section. A modal opens showing the list of automation types to choose from; select Messaging.
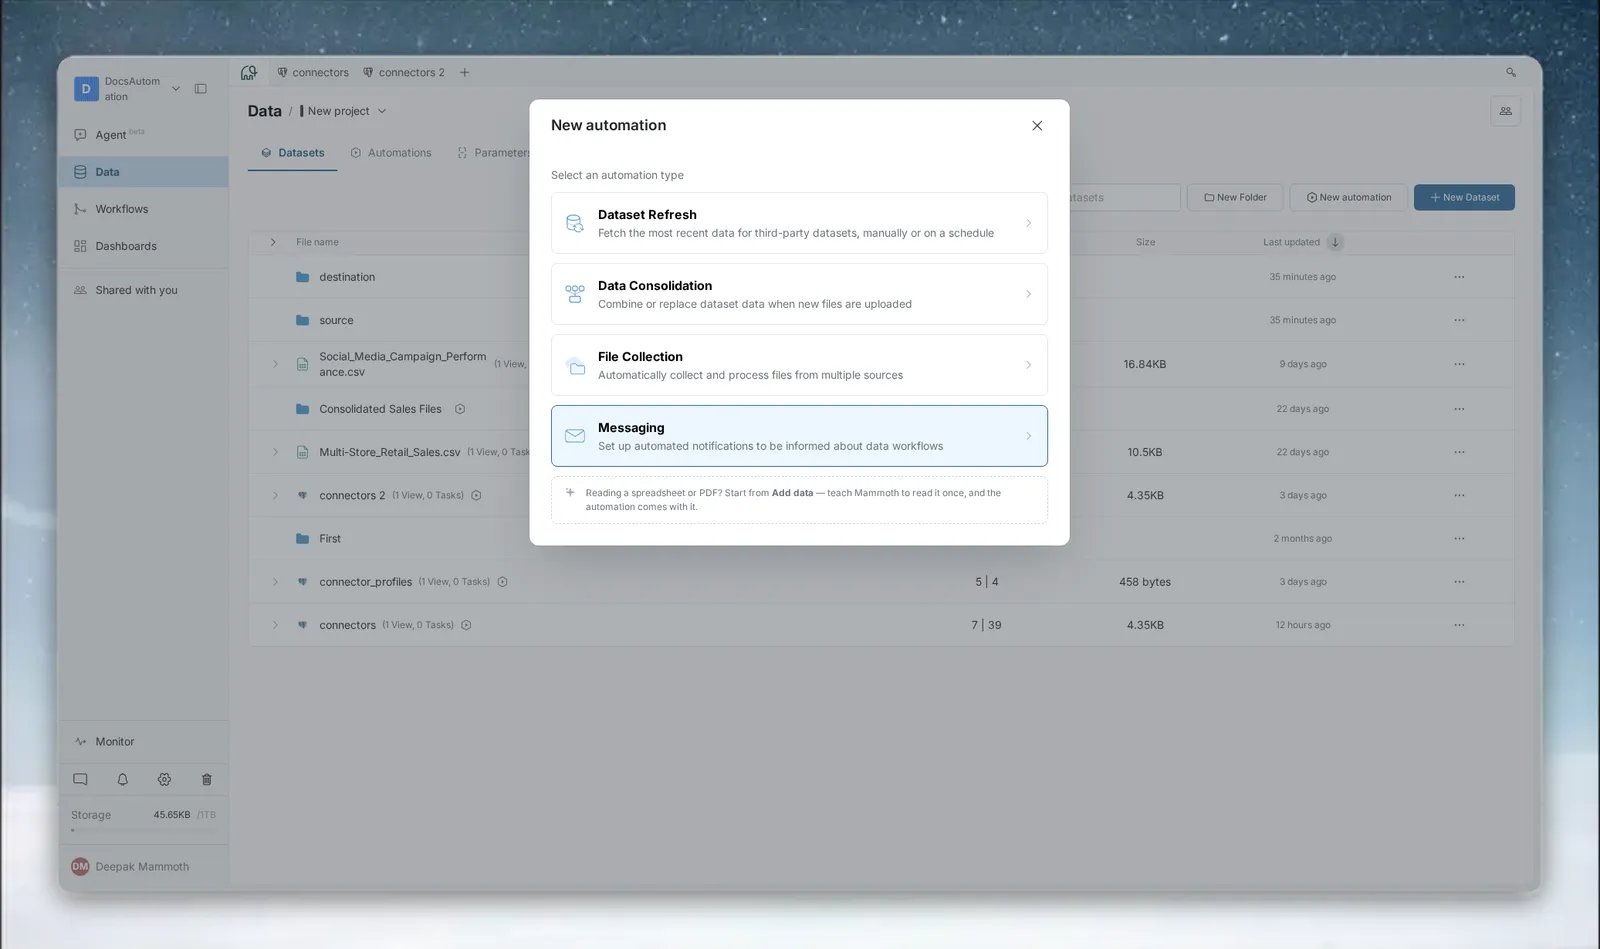
The modal then walks through a short wizard for Messaging: Write message → Set trigger → Review & save. A step indicator at the top of the modal shows your progress and lets you jump back to a previous step.
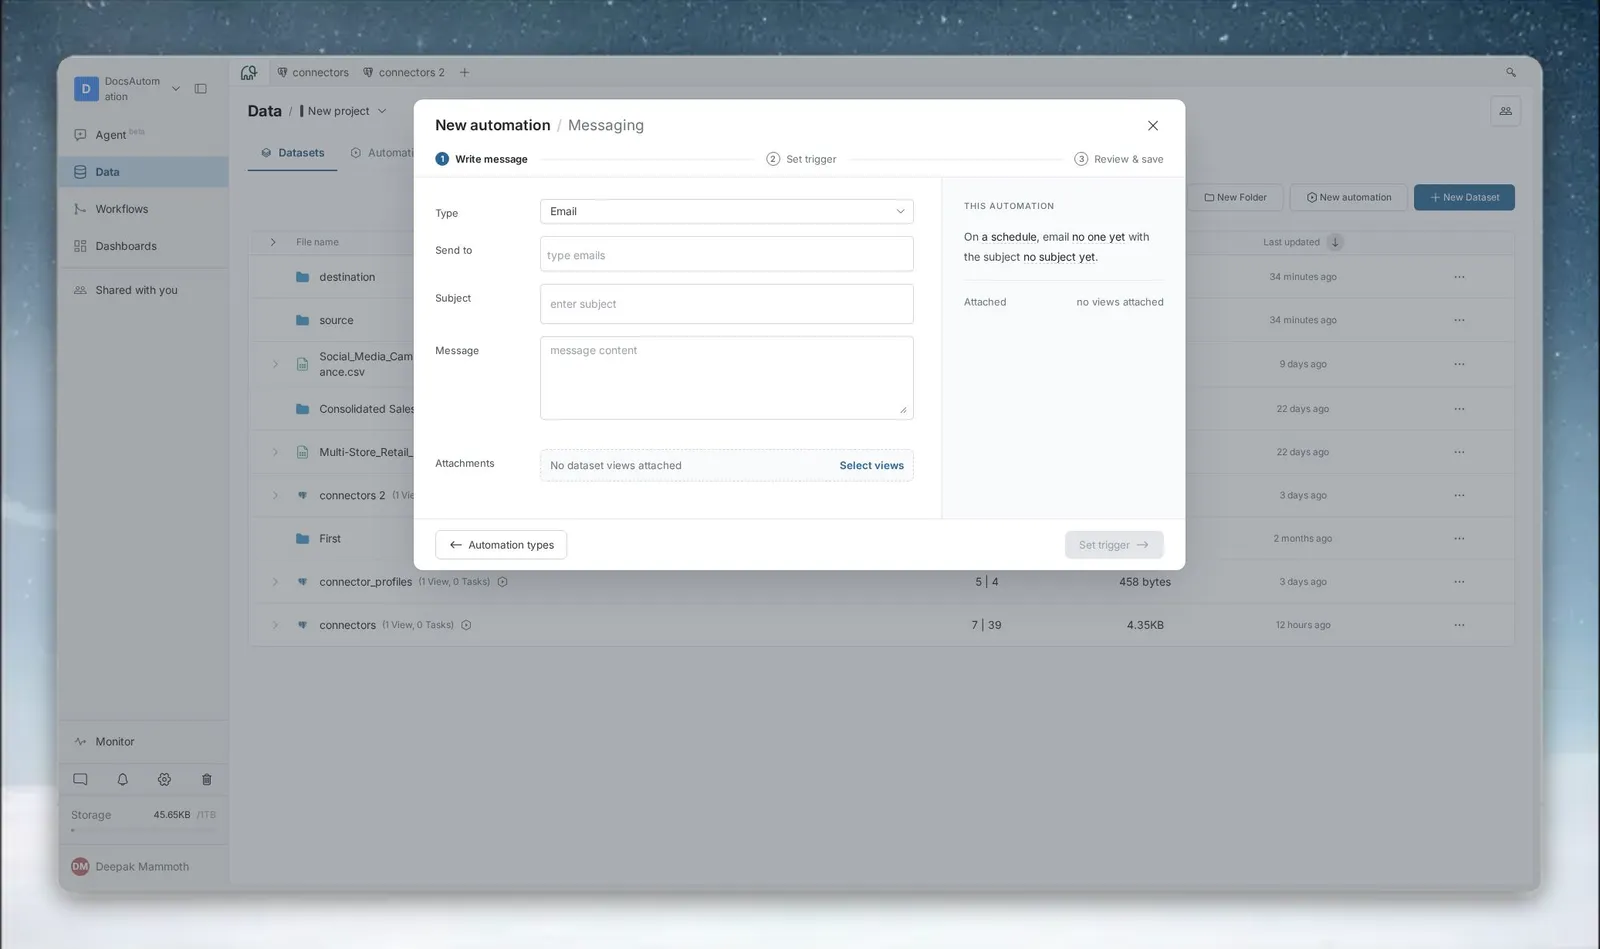
Step 2: Write the message
On the Write message step, fill in the following:
| Field | Required | Description |
|---|---|---|
| Type | Yes | Message type (currently only Email) |
| Send to | Yes | Enter recipient email addresses (one or more) |
| Subject | Yes | The email subject line |
| Message | No | Body text of the email |
| Attach Dataset Views | Yes | Select one or more Dataset Views to export and attach |
Attaching Dataset Views:
Click select views to attach and choose the views you want included. Each view is exported as a CSV file and attached to the email.
Row limit: The attached views can total at most 100,000 rows (see limits and quotas). If the combined row count is higher, Mammoth shows an error and you can't attach them. Choose views with fewer rows, or filter large views into smaller ones.
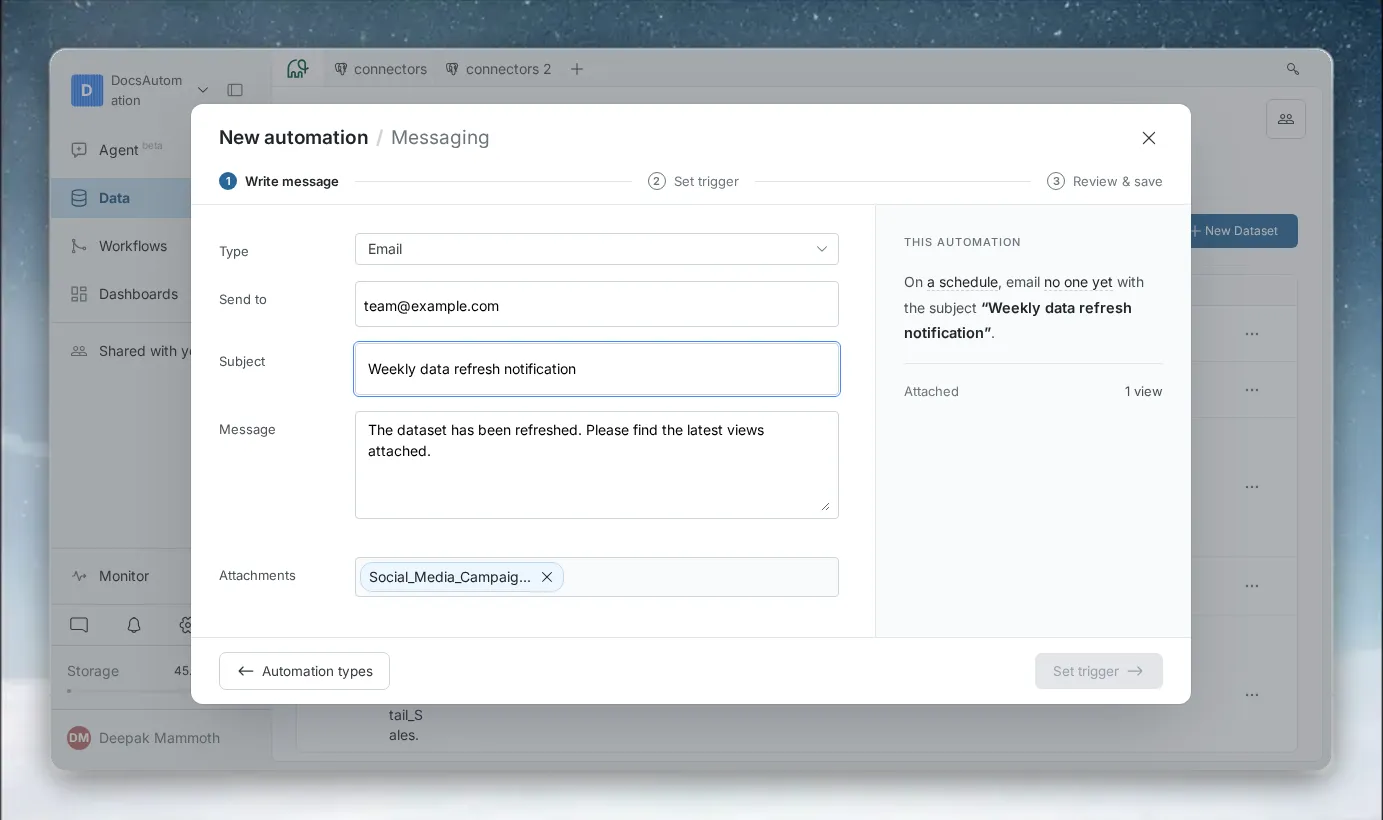
Click Write message (or the next step's label) to continue to the trigger step.
Step 3: Set the trigger
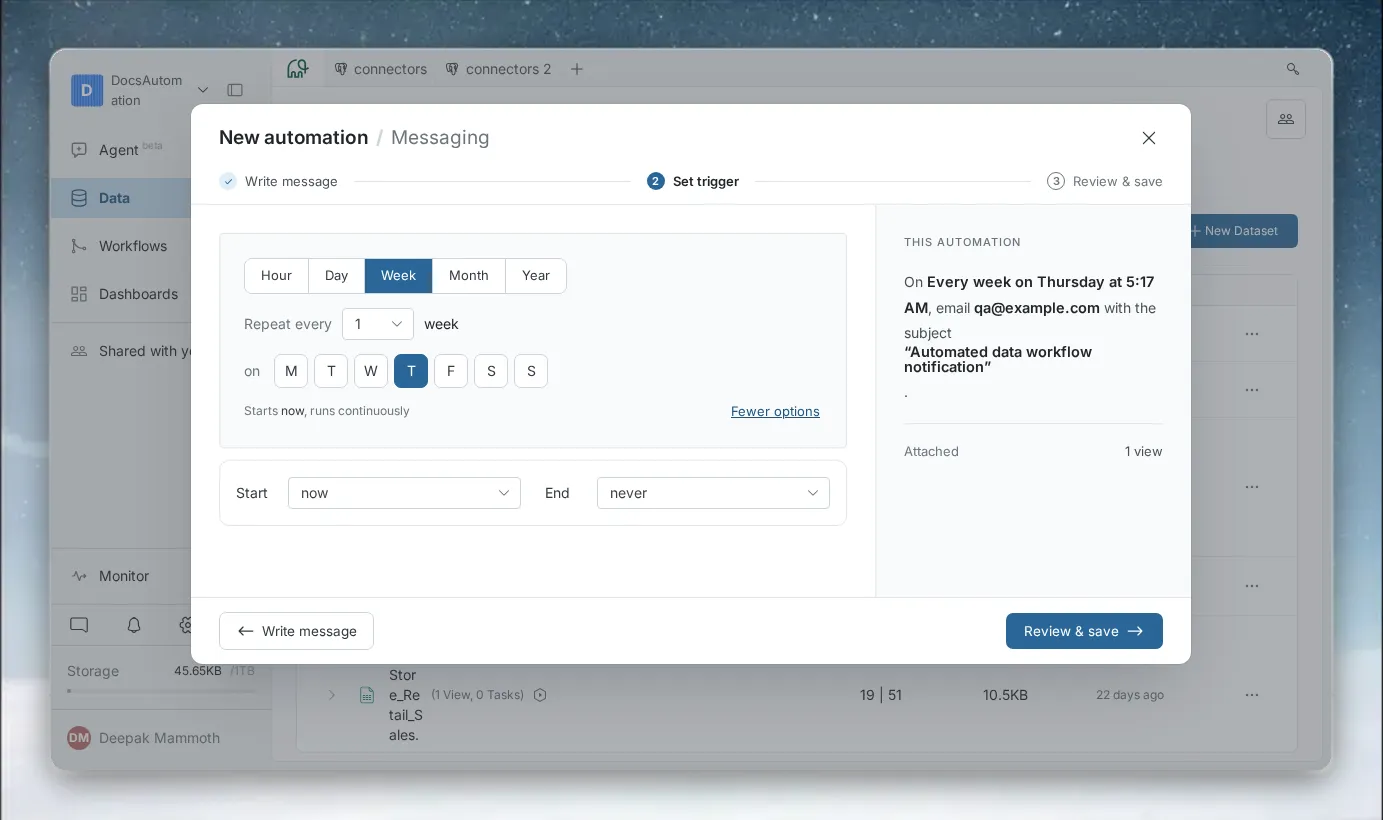
On the Set trigger step, set the schedule. Messaging sends on a recurring time-based schedule, with no manual-only option.
Schedule options:
| Setting | Description |
|---|---|
| Repeat every | Interval number + unit (hour/day/week/month/year; the shortest unit depends on your plan) |
| Start | now, or on a date (under the expandable additional options) |
| End | never, or on a date (under the expandable additional options) |
For weekly schedules, you also select which days of the week to send.
Step 4: Review and save
On the Review & save step, enter a name for the automation and an optional description, review the summary of your configuration (type, recipients, subject, attached views, schedule), and click Save automation.
Before saving, you can click Send test email to send an immediate test message to the configured recipients. This verifies:
- Recipients receive the email
- Attachments are correctly generated
- Subject and body content look right
The test email sends even if the automation hasn't been saved yet.
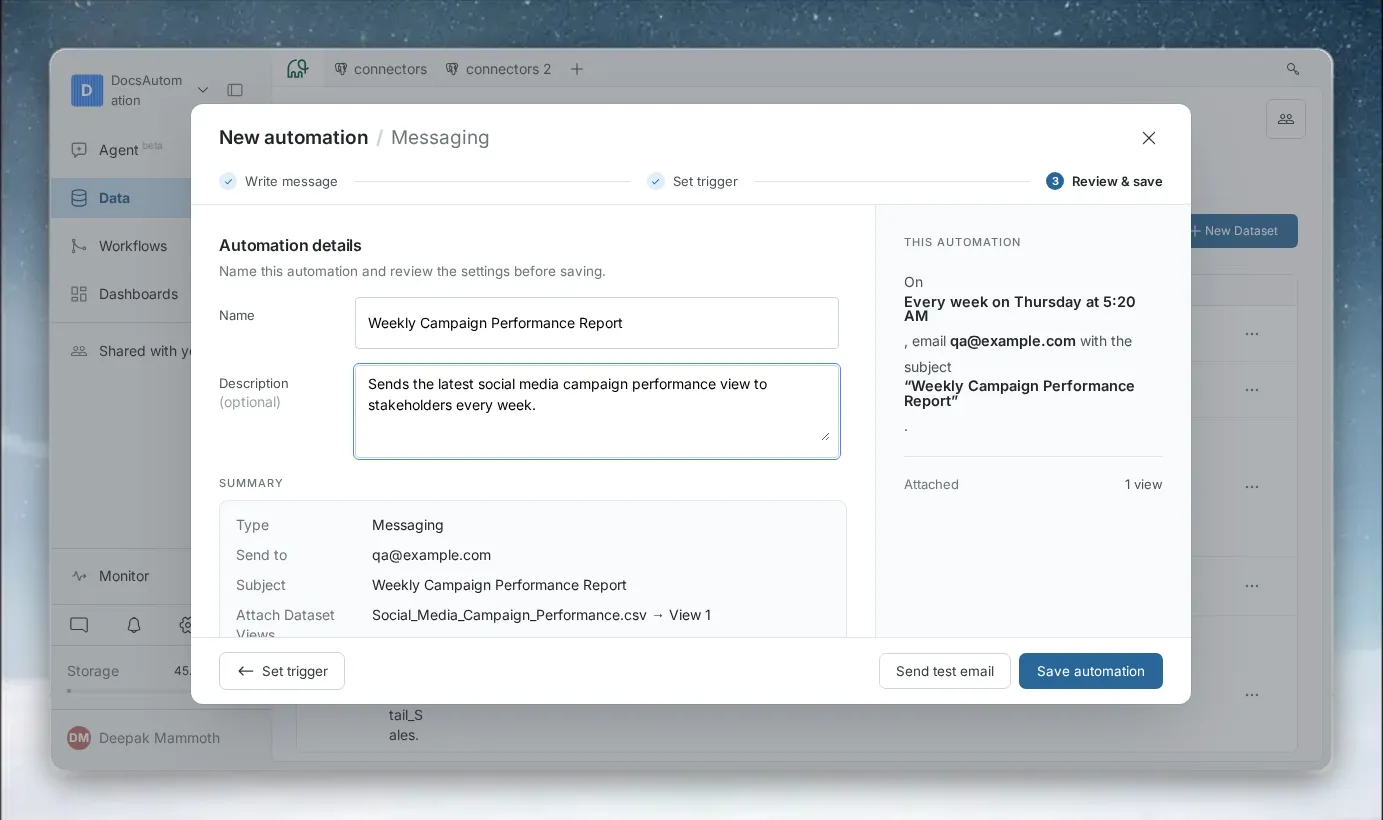
Once saved, the automation appears with its live status, and you can reopen it at any time to edit its message, recipients, schedule, or name/description, or to suspend, resume, run it manually, or delete it, from the same modal-based flow.
After creation
The automation appears in the list with status Active. The Details column shows a summary like: "priya@mammoth.io will receive an email message with 1 attached view every 3 hours."
The first email sends at the next scheduled interval (or immediately, if you chose "Start now").
Managing recipients
Recipients can unsubscribe from emails by clicking the unsubscribe link in the email footer. A recipient who unsubscribes is removed from future sends for that automation.
To update the recipient list, open the automation and click Edit.
Monitoring messaging runs
Click the automation row to open the detail panel. The Automation Summary shows:
- The schedule (e.g., "On schedule, every 3 hours")
- The next scheduled send time
- The end date (or "Never")
- The recipient(s)
The Last run result in the Overview section shows whether the last email was sent successfully.
Troubleshooting
Emails are not arriving
Cause: Recipients unsubscribed, the emails went to spam, or an address is wrong.
Fix: Check that recipients have not unsubscribed or filtered your emails to spam. Verify the addresses by opening the automation and clicking Edit.
Status shows Error
Cause: A Dataset View referenced in the automation was deleted.
Fix: Open the detail panel and check Last run result for the specific error. Edit the automation and select a new view.
You cannot attach a view
Cause: The attached views total more than 100,000 rows.
Fix: Filter the views to reduce the row count, or attach fewer views.