Workspace settings
Workspace Settings is the control panel for your Mammoth workspace. From here you manage who has access, what they can do, how much storage you're using, and how external tools connect to your data. This page is for Workspace Owners; Workspace Members can use only the actions listed in the permissions reference.
Open it from the bottom of the left sidebar. The link is visible to all users, but most actions require the Workspace Owner role. Settings opens with a list of sections on the left. Pick the section you need from the table below.
| Section | What you can do here | Who can use it |
|---|---|---|
| General | Rename workspace, monitor storage, manage projects, enable early access features | Owner (full); Members (view, and create projects) |
| User Management | Invite users, assign roles, manage project access | Owner only |
| Plan & Storage | View subscription, manage billing, free up storage | Owner only |
| API Keys | Generate API keys, add external service keys, register OAuth apps | Owner only |
| Connected apps | See and revoke third-party apps you allowed to access your Mammoth data | — |
General
The General section shows your workspace name and your role, a storage summary, the current plan, and the list of projects. Workspace Owners can also enable early access features from here.
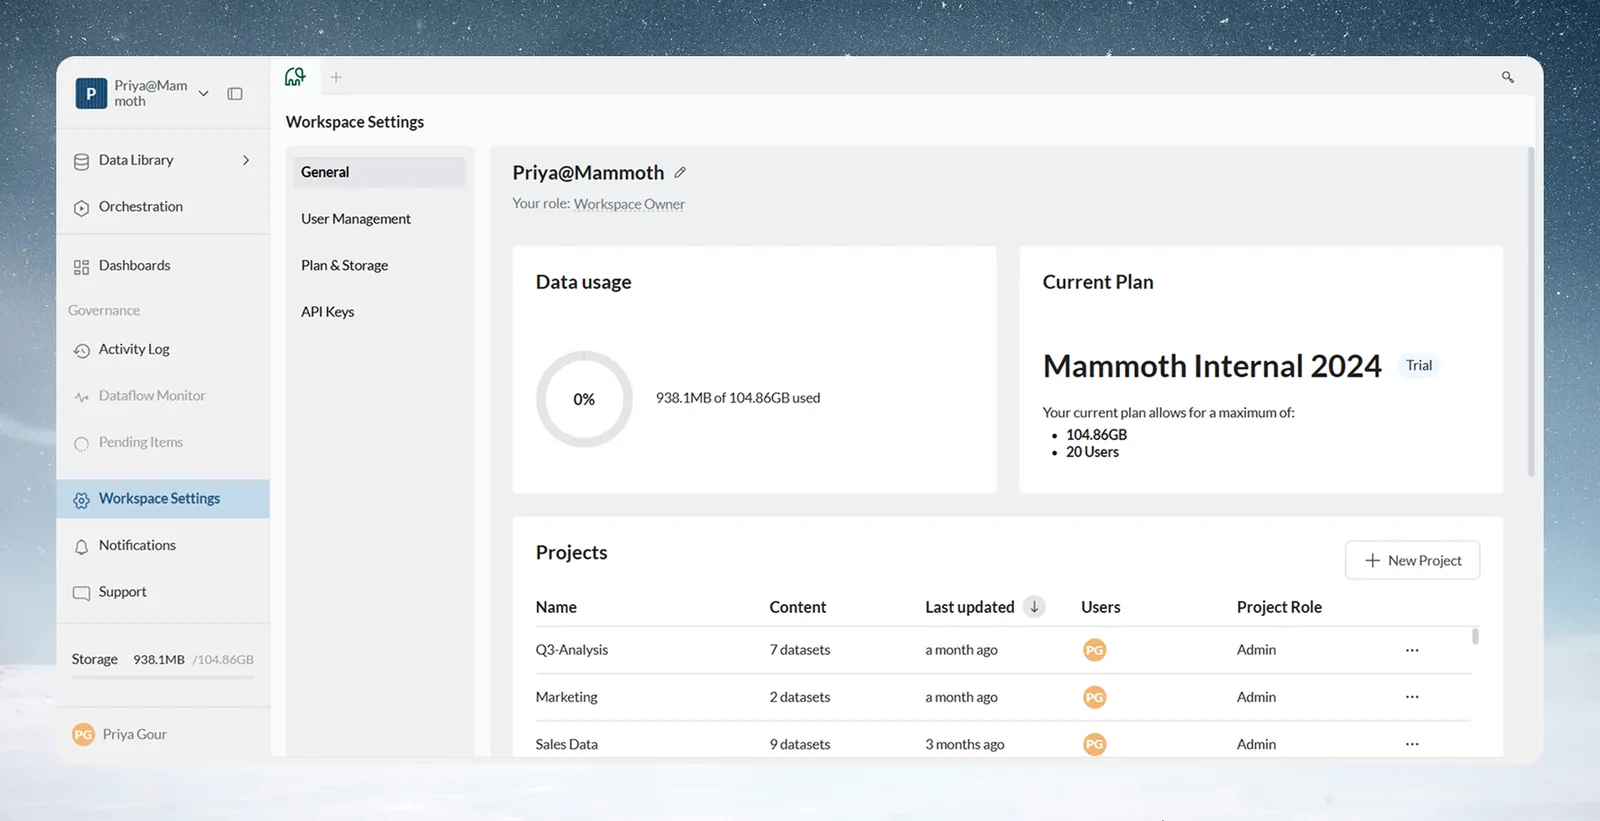
Rename your workspace
Click the pencil icon next to the workspace name to open the Rename Workspace dialog. Enter a different name and confirm.
- Maximum length: 63 characters
- Requires Workspace Owner role
Storage usage
The circular indicator shows how much of your allocated storage is in use. Hover over it for the exact figures.
| Usage level | What you see |
|---|---|
| Under 80% | Used and allowed storage |
| 80–99% | "Storage almost Full" warning: reaching 100% storage pauses automated data imports and pipelines |
| 100% | "Storage full" message: automated data imports and pipelines are paused |
A Contact Support button appears once usage reaches 80%, for Owners who can change the plan. For a dataset-by-dataset breakdown with delete controls, go to Plan & Storage, Manage storage.
Current plan
The Current Plan card shows your plan name, its status (Active or Trial), and the maximum storage and number of users the plan allows.
A Change Plan button appears for Owners on self-serve plans, except during a trial. It opens a plan comparison with a Monthly / Annually toggle. Non-self-serve plans do not show this button.
Projects
The projects table lists every project in your workspace.
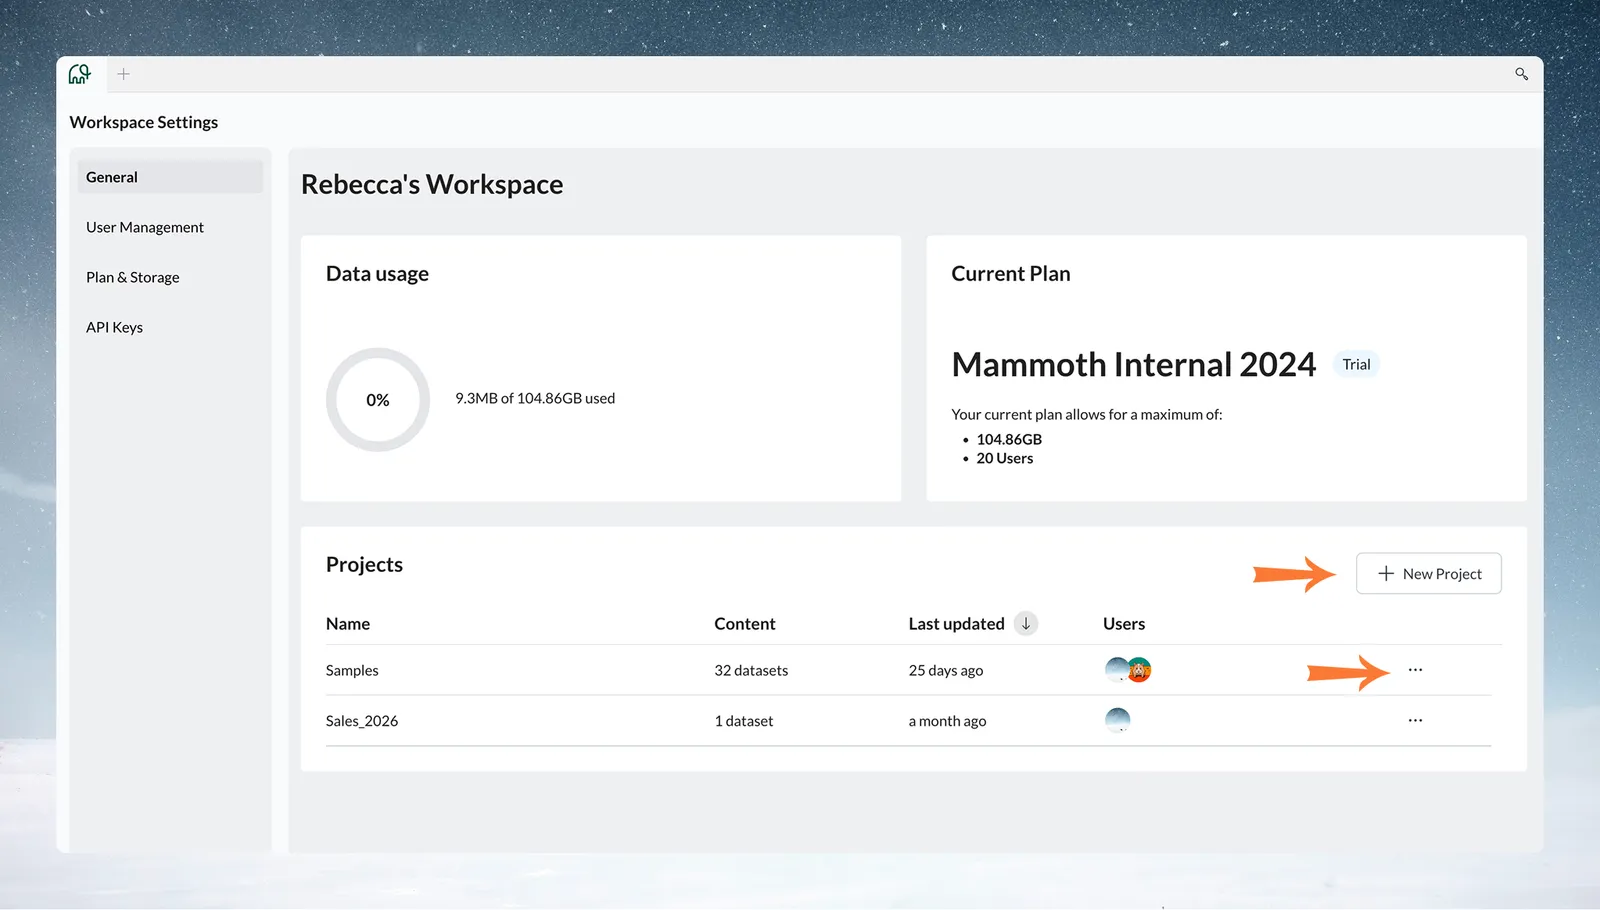
| Column | What it shows |
|---|---|
| Name | Project name (click to open it) |
| Content | Dataset count (e.g., "3 datasets") |
| Last updated | How recently the project was changed |
| Users | Avatars of the users who have access to the project |
| Project Role | Your role in that project: Admin, Editor, or— |
| ⋯ menu | Per-project actions |
Click New Project (top right) to create a new project. The ⋯ menu offers Project Settings, Manage Users, Leave Project or Join Project, and Delete Project, depending on your role. Editors see Delete Project greyed out.
Upcoming features
Info Workspace Owners on non-self-serve plans only
This section is not visible to Workspace Members, or on self-serve plans.
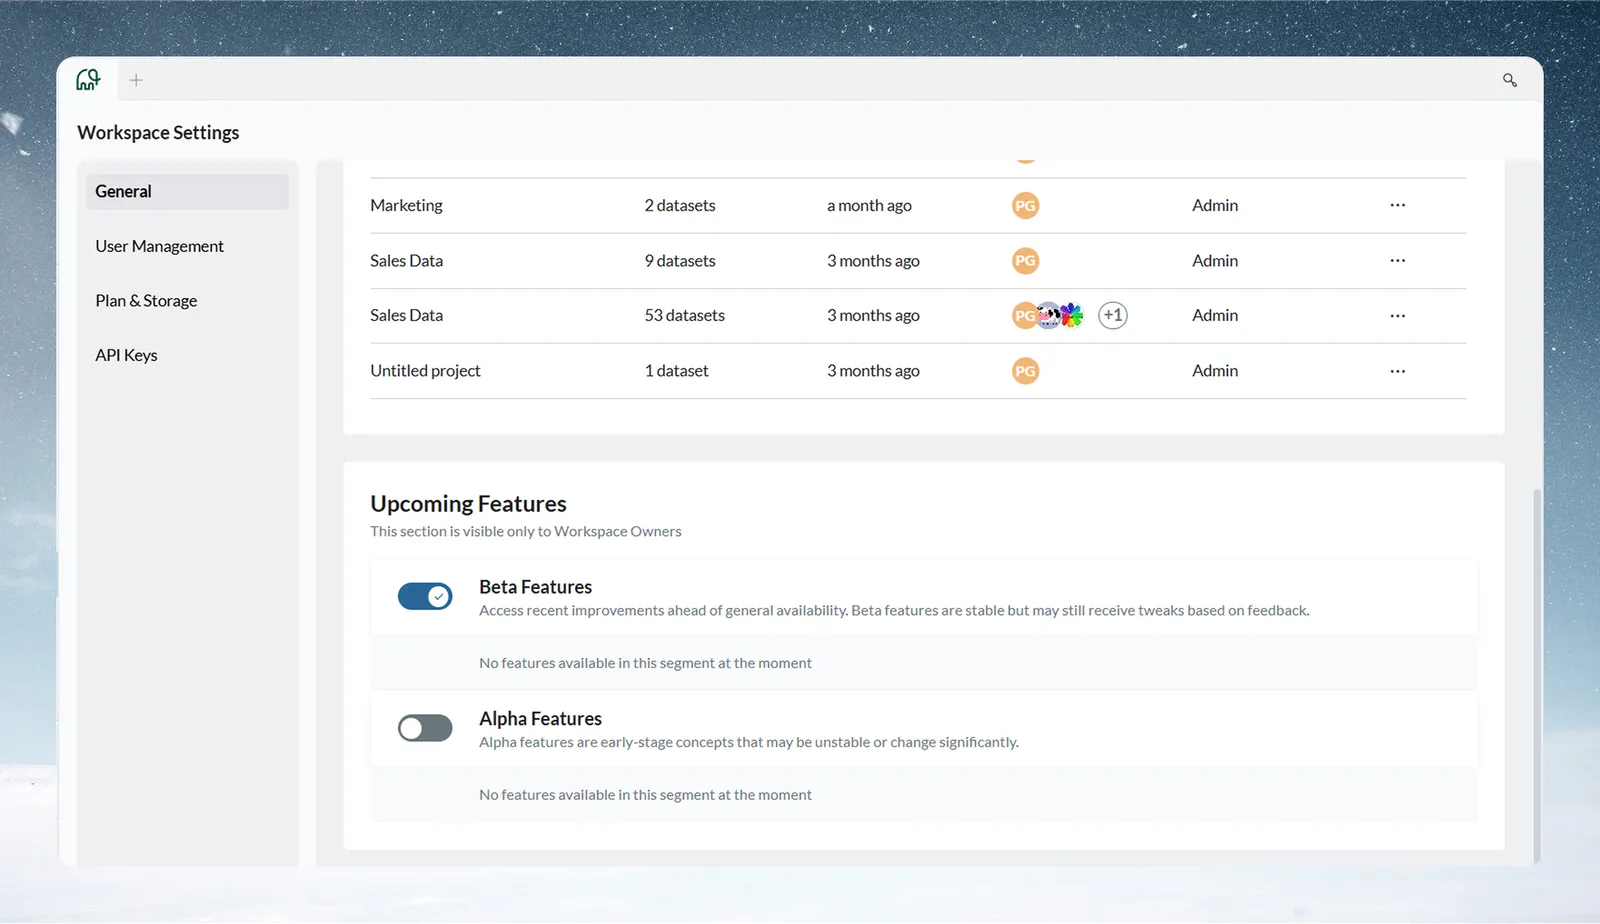
You see a toggle for each early access segment configured for your workspace, most commonly:
Beta Features: Stable improvements released before general availability. Safe for production use, but may receive minor adjustments based on feedback.
Alpha Features: Early stage concepts. These may change significantly or have rough edges. Best used for evaluation and feedback, not critical workflows.
Not every workspace sees both toggles. Which ones appear depends on what's been made available to your account. Switching a toggle takes effect immediately. When no features are available for a segment, the area shows "No features available in this segment at the moment."
User management
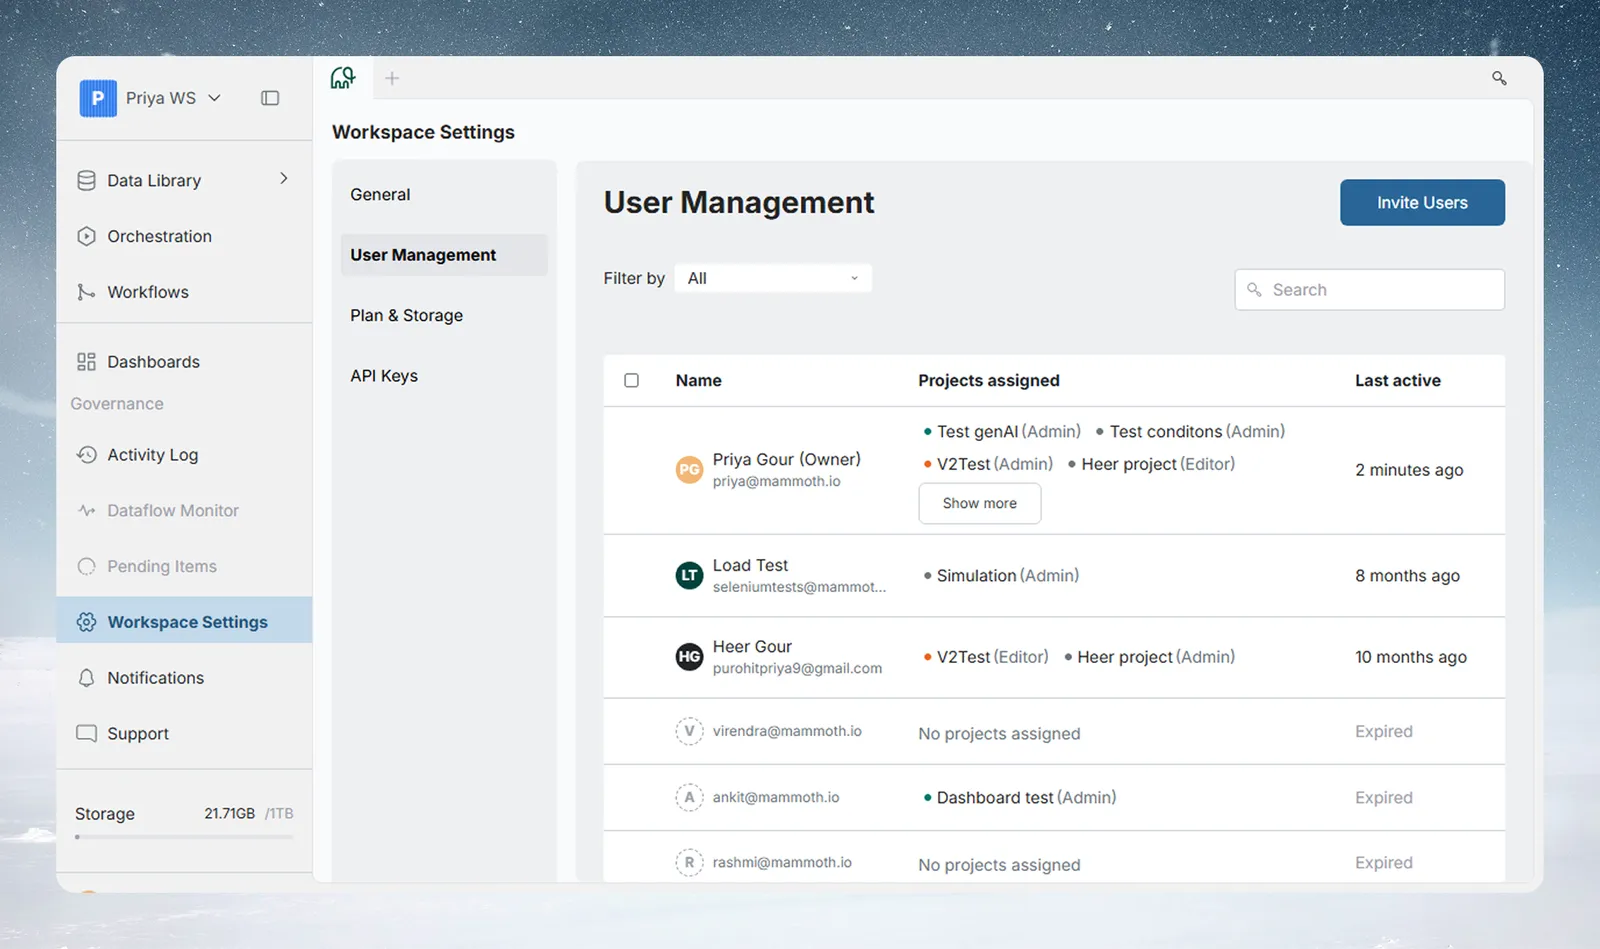
The User Management section is where you invite users, manage their workspace and project roles, and remove access.
Filters and search
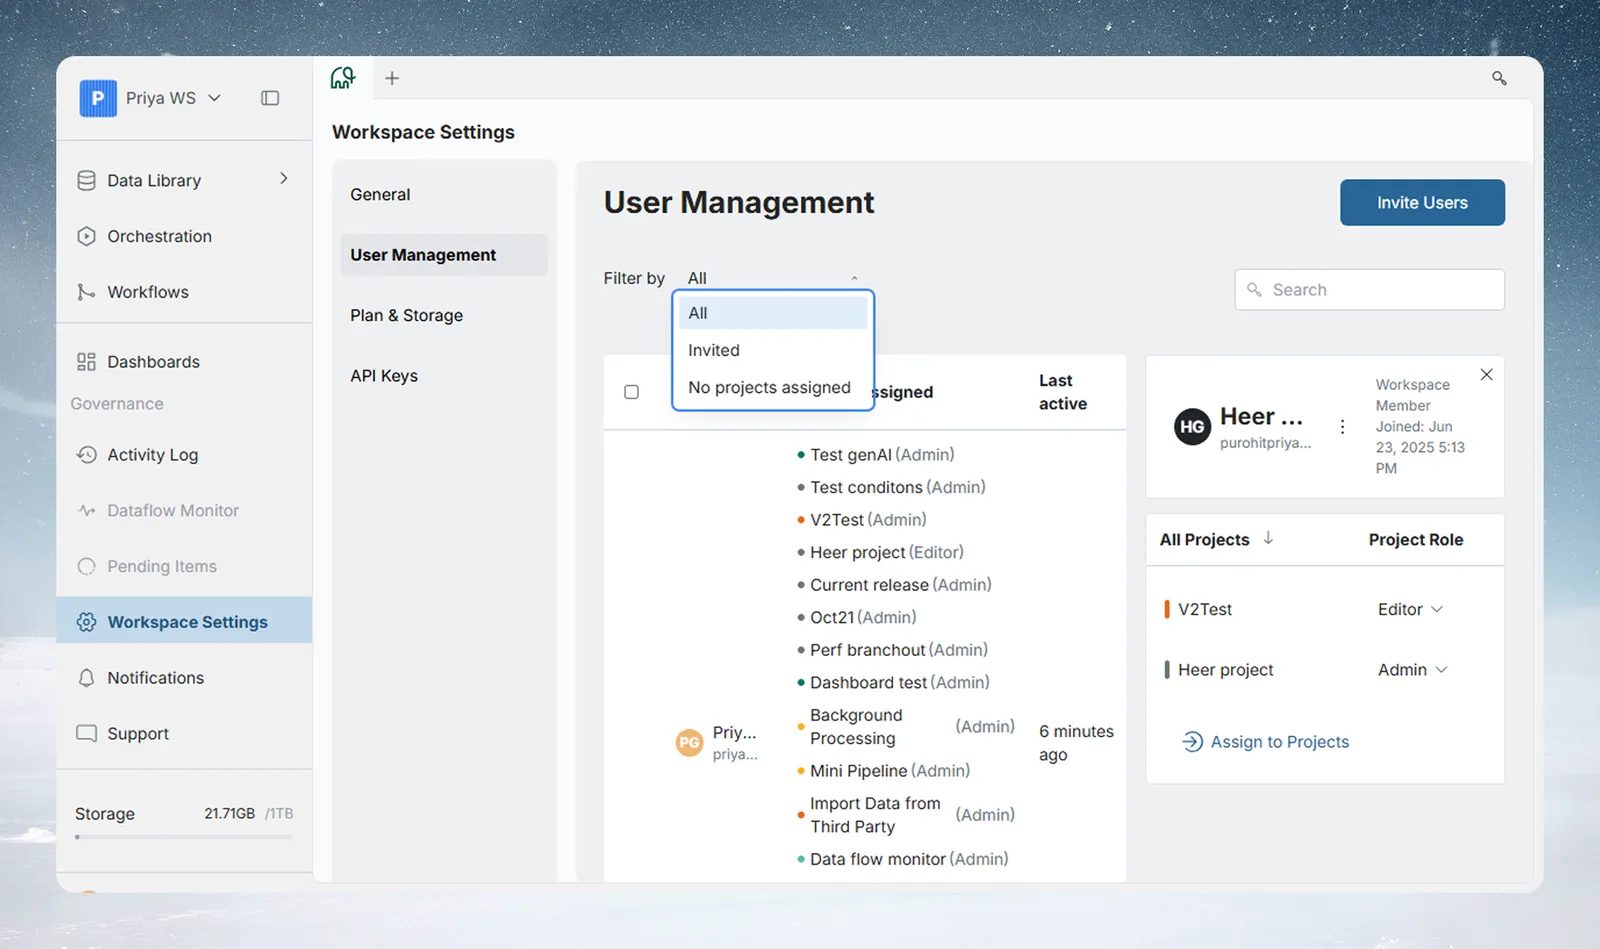
Use the Filter by dropdown to narrow the user list:
| Filter | Shows |
|---|---|
| All | Everyone in the workspace (default) |
| Invited | Users with pending, unaccepted invitations |
| No projects assigned | Users not yet added to any project |
A Search field appears once the workspace has 8 or more users, and filters the list as you type.
User table
| Column | What it shows |
|---|---|
| Name | User avatar, full name, email, and "(Owner)" label for the workspace owner. Click any header to sort. |
| Projects assigned | Each project shown as a colored dot, project name, and role. Use Show more / Show less when a user belongs to many projects. |
| Last active | Relative time (for example, "2 minutes ago"). Hover for the full timestamp. Users whose invitation has expired show "Expired" in grey. |
Click any row to open the User Side Panel.
Bulk actions
Select one or more users with the checkboxes to reveal the bulk action bar:
- Assign to Project: Opens a project multi-select. All selected users are added to the chosen projects at once.
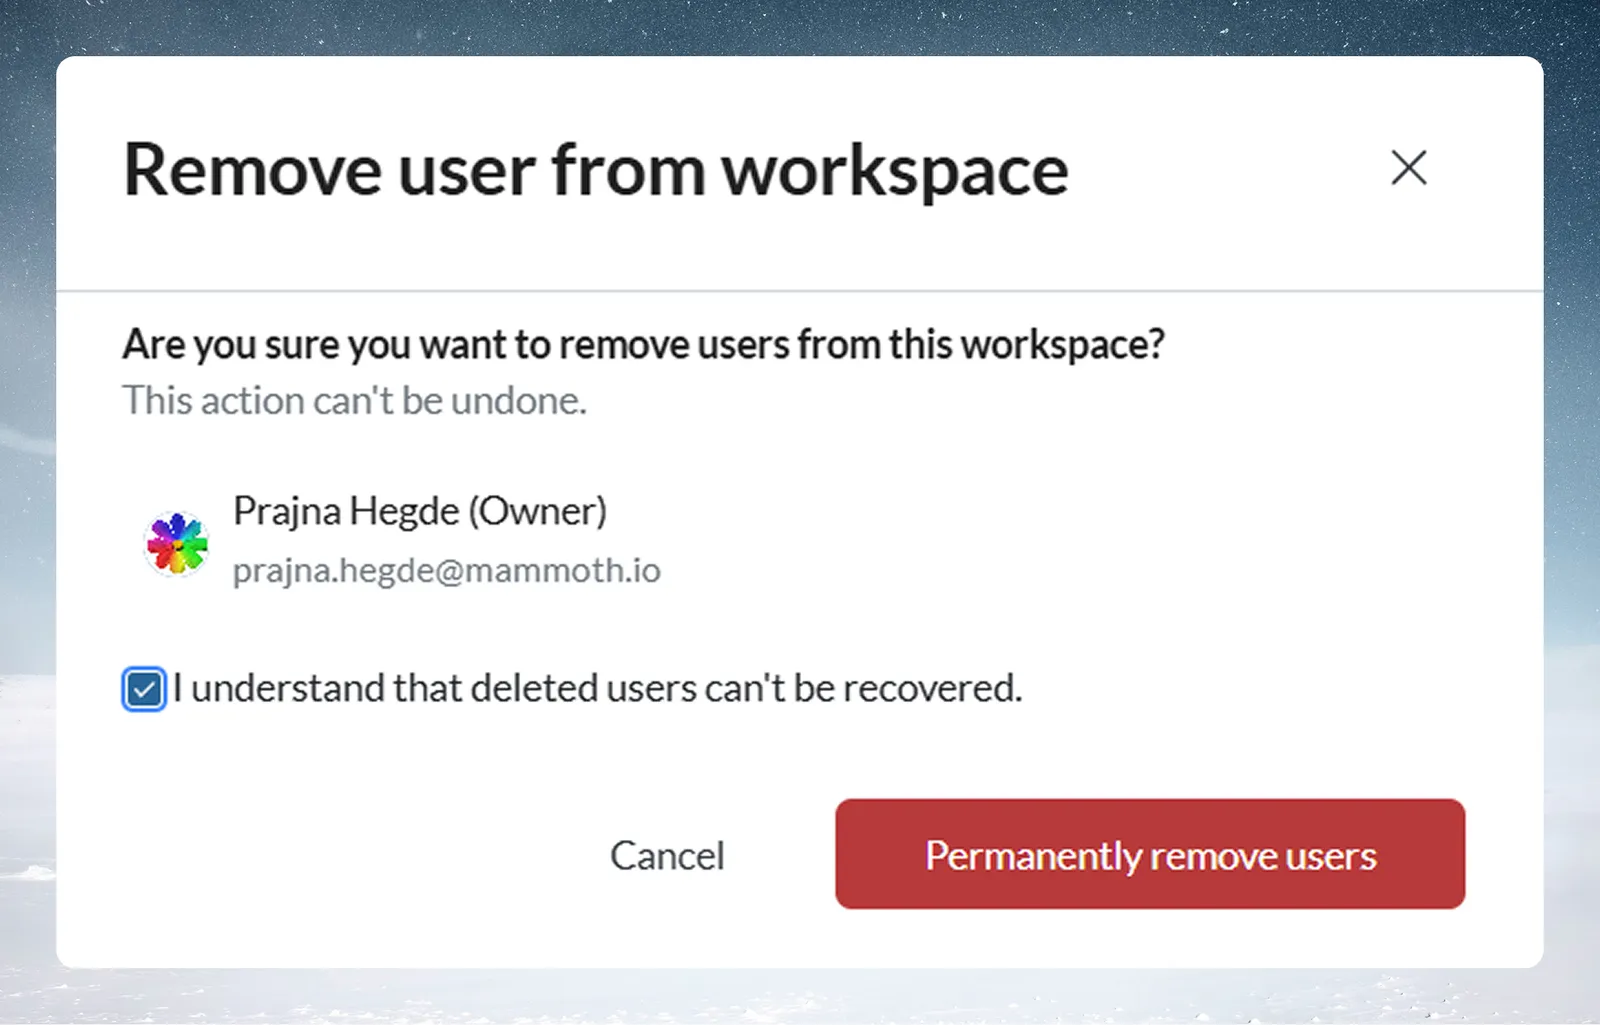
- Remove from workspace: Confirms and removes all selected users in one step.
User side panel
Click any user row to open their detail panel on the right.
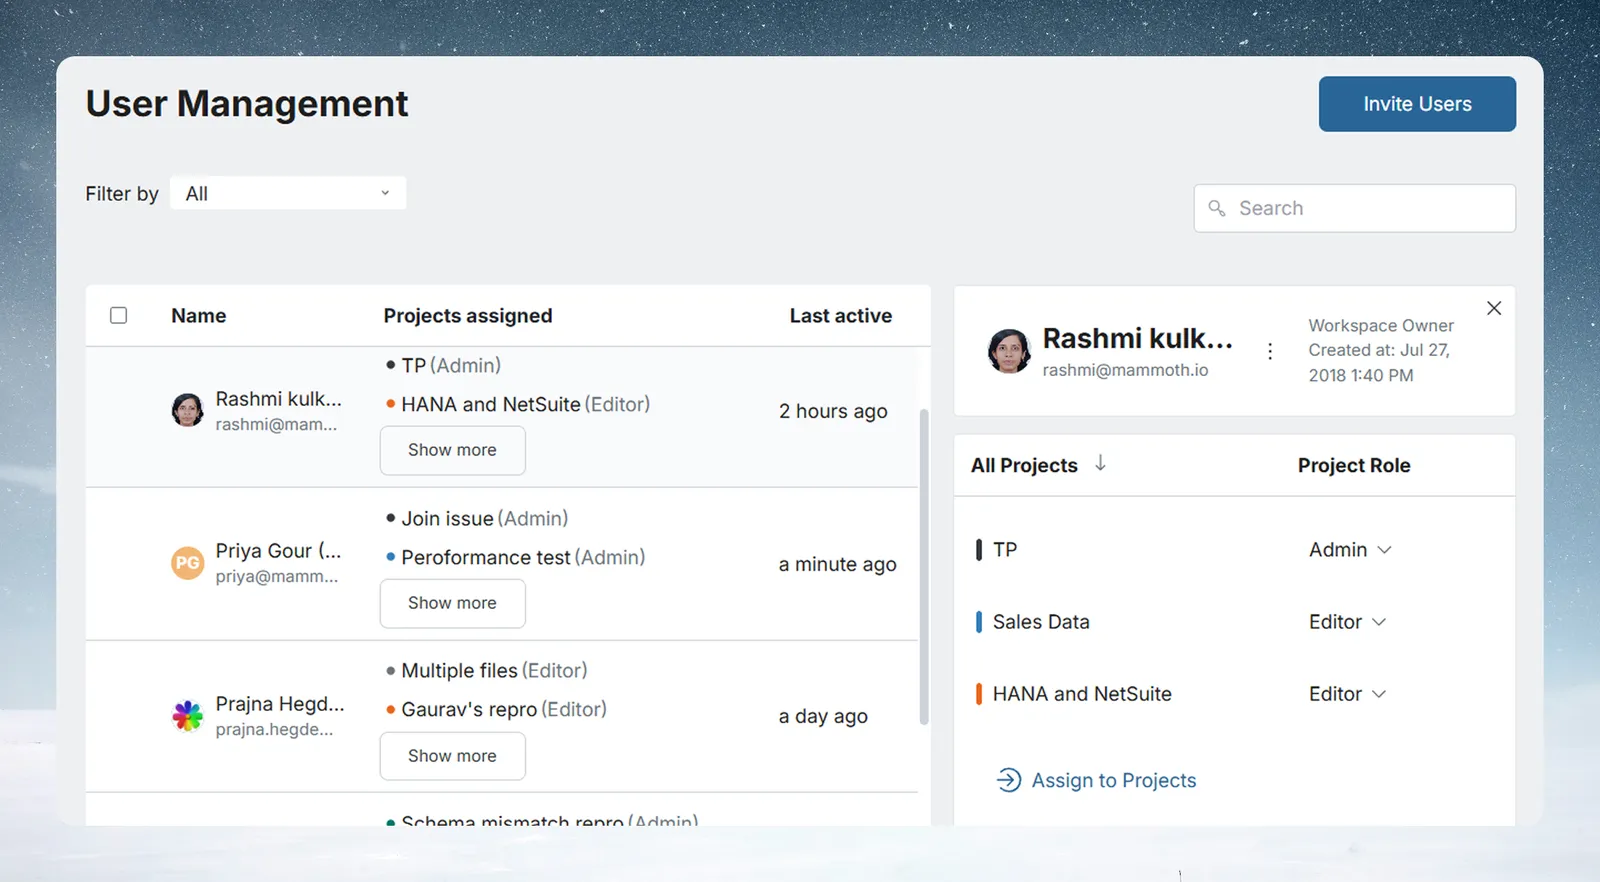
The panel shows:
- User avatar, full name, and email
- Workspace role: Workspace Member or Workspace Owner
- Join date
- Every project the user belongs to, with a role dropdown per project
- Assign to Projects button to add the user to more projects
Changing a project role
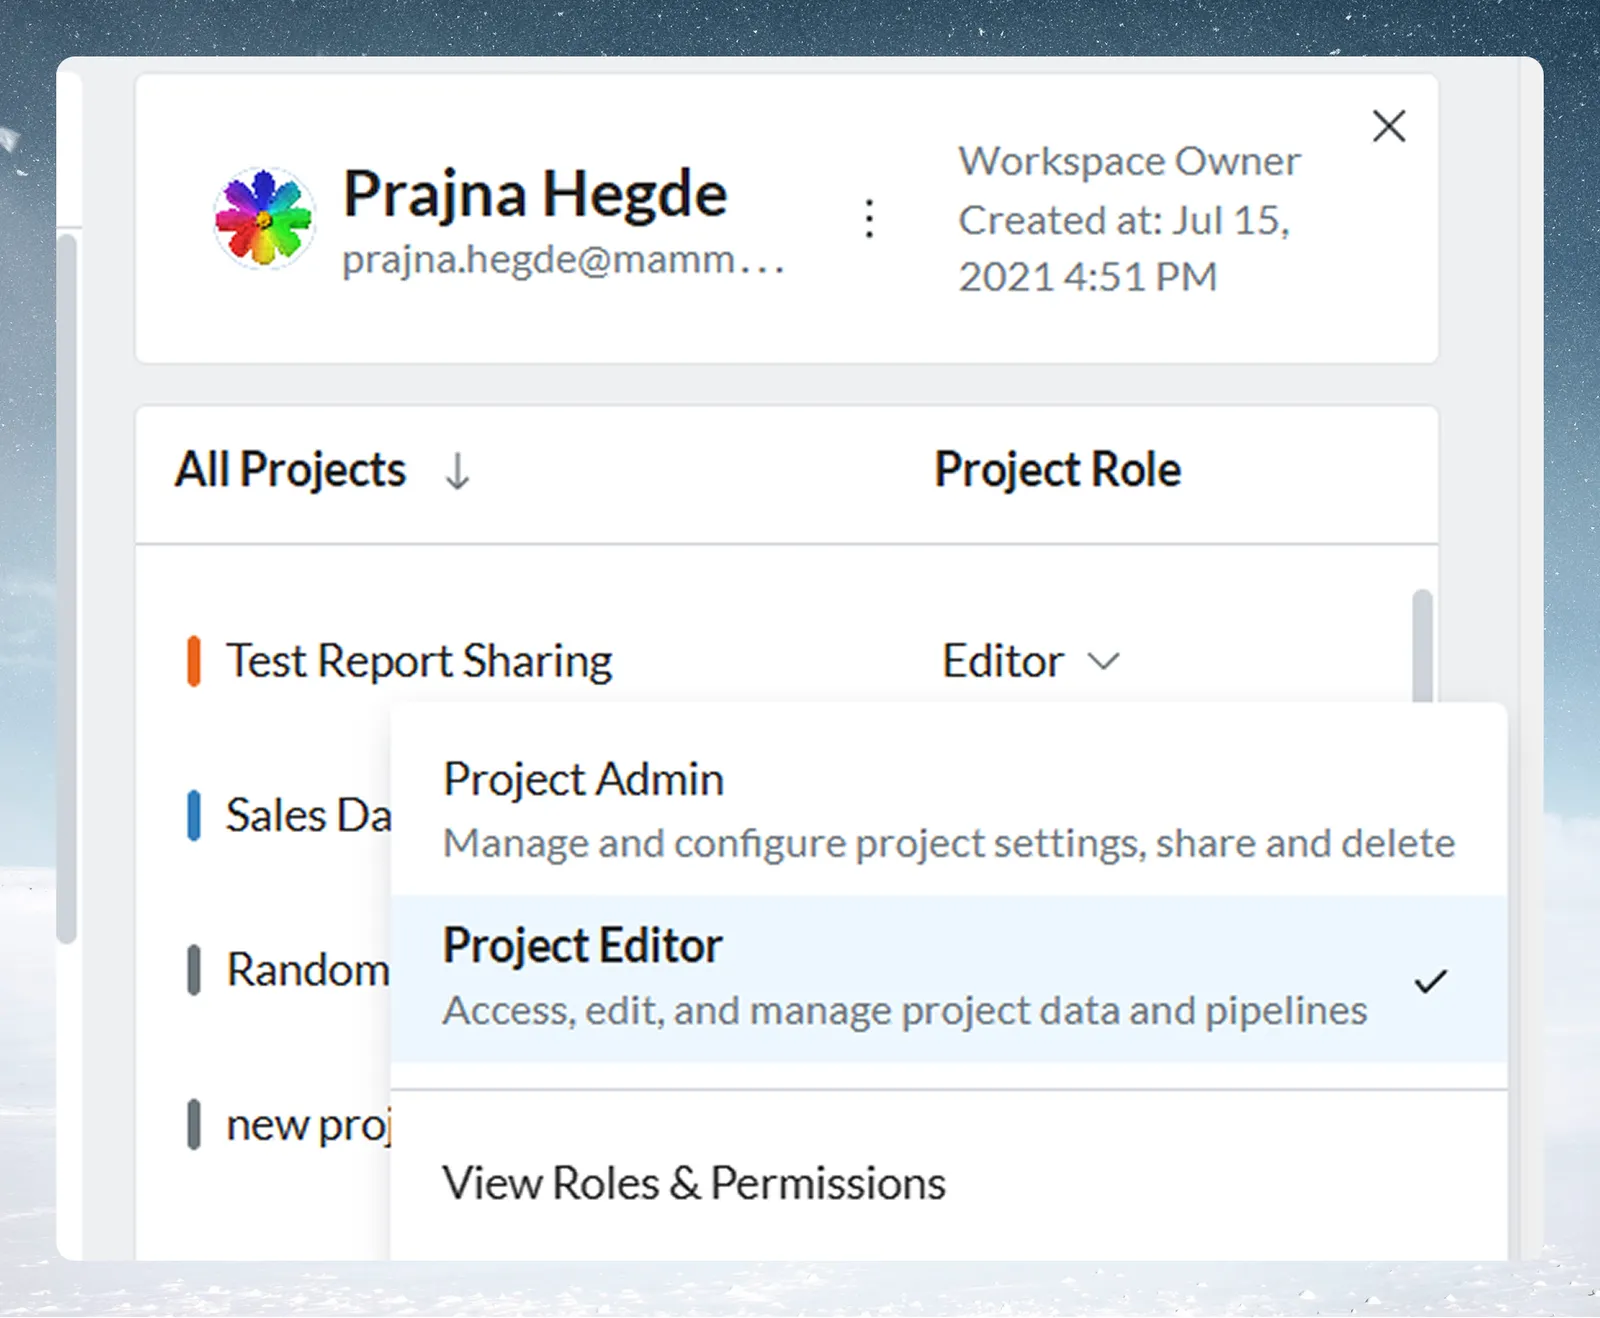
Click the role dropdown arrow next to any project name to change the user's role:
| Role | What they can do |
|---|---|
| Project Admin | Manage project settings and users, create and delete Live Connections, share and delete the project |
| Project Editor | Access, edit, and manage project data and pipelines |
The View Roles & Permissions link at the bottom of the dropdown opens the full permission matrix.
Removing a user from a project
Click the trash icon next to any project in the panel to remove the user from that project only. A confirmation prompt appears before the action is applied.
Tip: Workspace membership is unaffected
Removing a user from a project removes only their project access. They remain in the workspace and can be re-added to the project at any time.
Three-dot menu
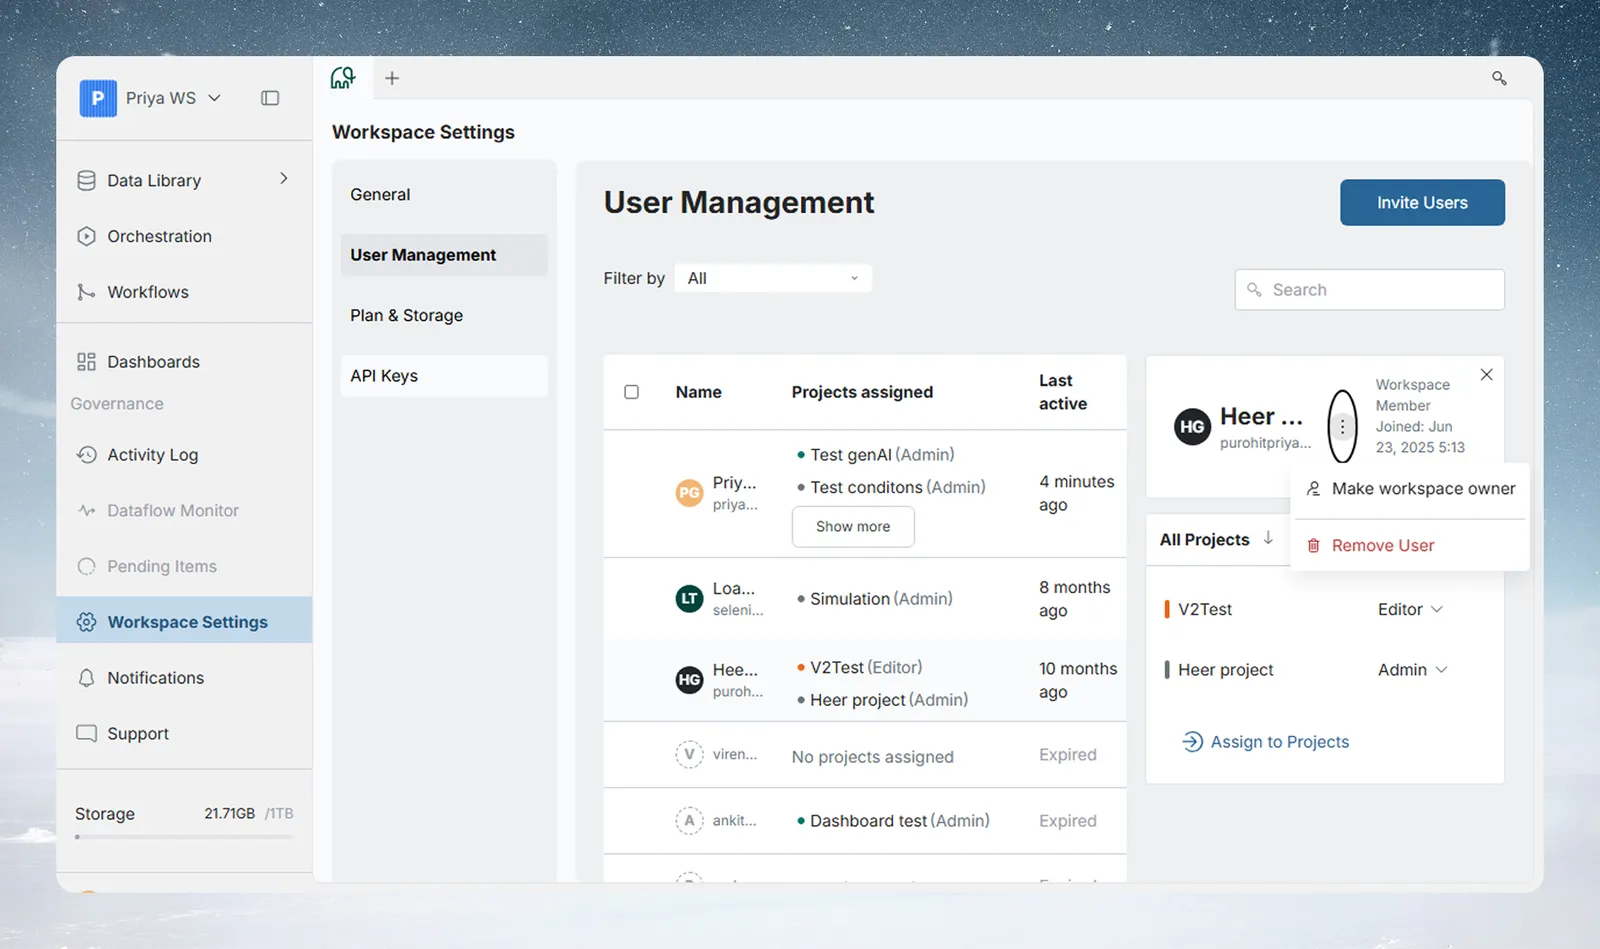
Options depend on whose profile you're viewing:
When viewing another member (as Owner):
- Make workspace owner: Adds the Owner role to this user. Their previous role (for example, Member) is replaced by Owner. Your own Owner role is unaffected, so a workspace can have multiple Owners. (This menu item toggles: viewing an existing Owner instead shows Make workspace member.)
- Remove User: Removes the user from the workspace entirely.
When viewing your own profile:
- Leave Workspace
- Delete Profile: Permanently and irreversibly deletes your Mammoth account. This opens a short wizard: a warning screen, then a review of the workspaces you own, then a final confirmation step where you must type "DELETE" before the account is removed.
warning: Delete Profile is irreversible
Deleting your profile permanently removes your account, all workspaces you own, their settings, users, data, and projects. This cannot be undone.
Inviting users
Prerequisite: You are a Workspace Owner.
Click Invite Users (top right) to open the Invite users to workspace dialog. Mammoth tells you in the dialog when you have reached your plan's user limit.
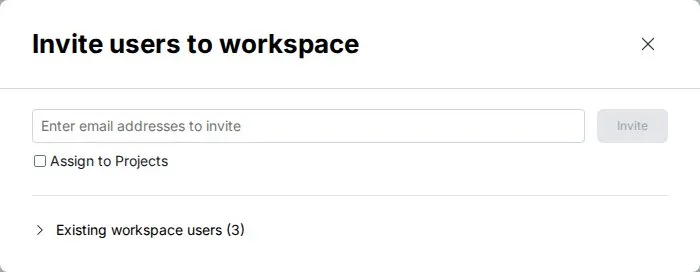
Email field: Enter one or more addresses separated by commas, semicolons, spaces, tabs, or newlines, up to 250 at a time. Mammoth validates format and flags duplicates or already-invited users. Click Invite to send the invitations.
Assign to Projects (optional): Check this to reveal a project multi-select. Invited users are added to the selected projects when they accept the invitation.
Existing workspace users: Expand this section to see all current members, change their workspace roles with the role selector, use Reinvite on pending invitations, or mark users for removal with the trash icon (use Undo to reverse a pending removal).
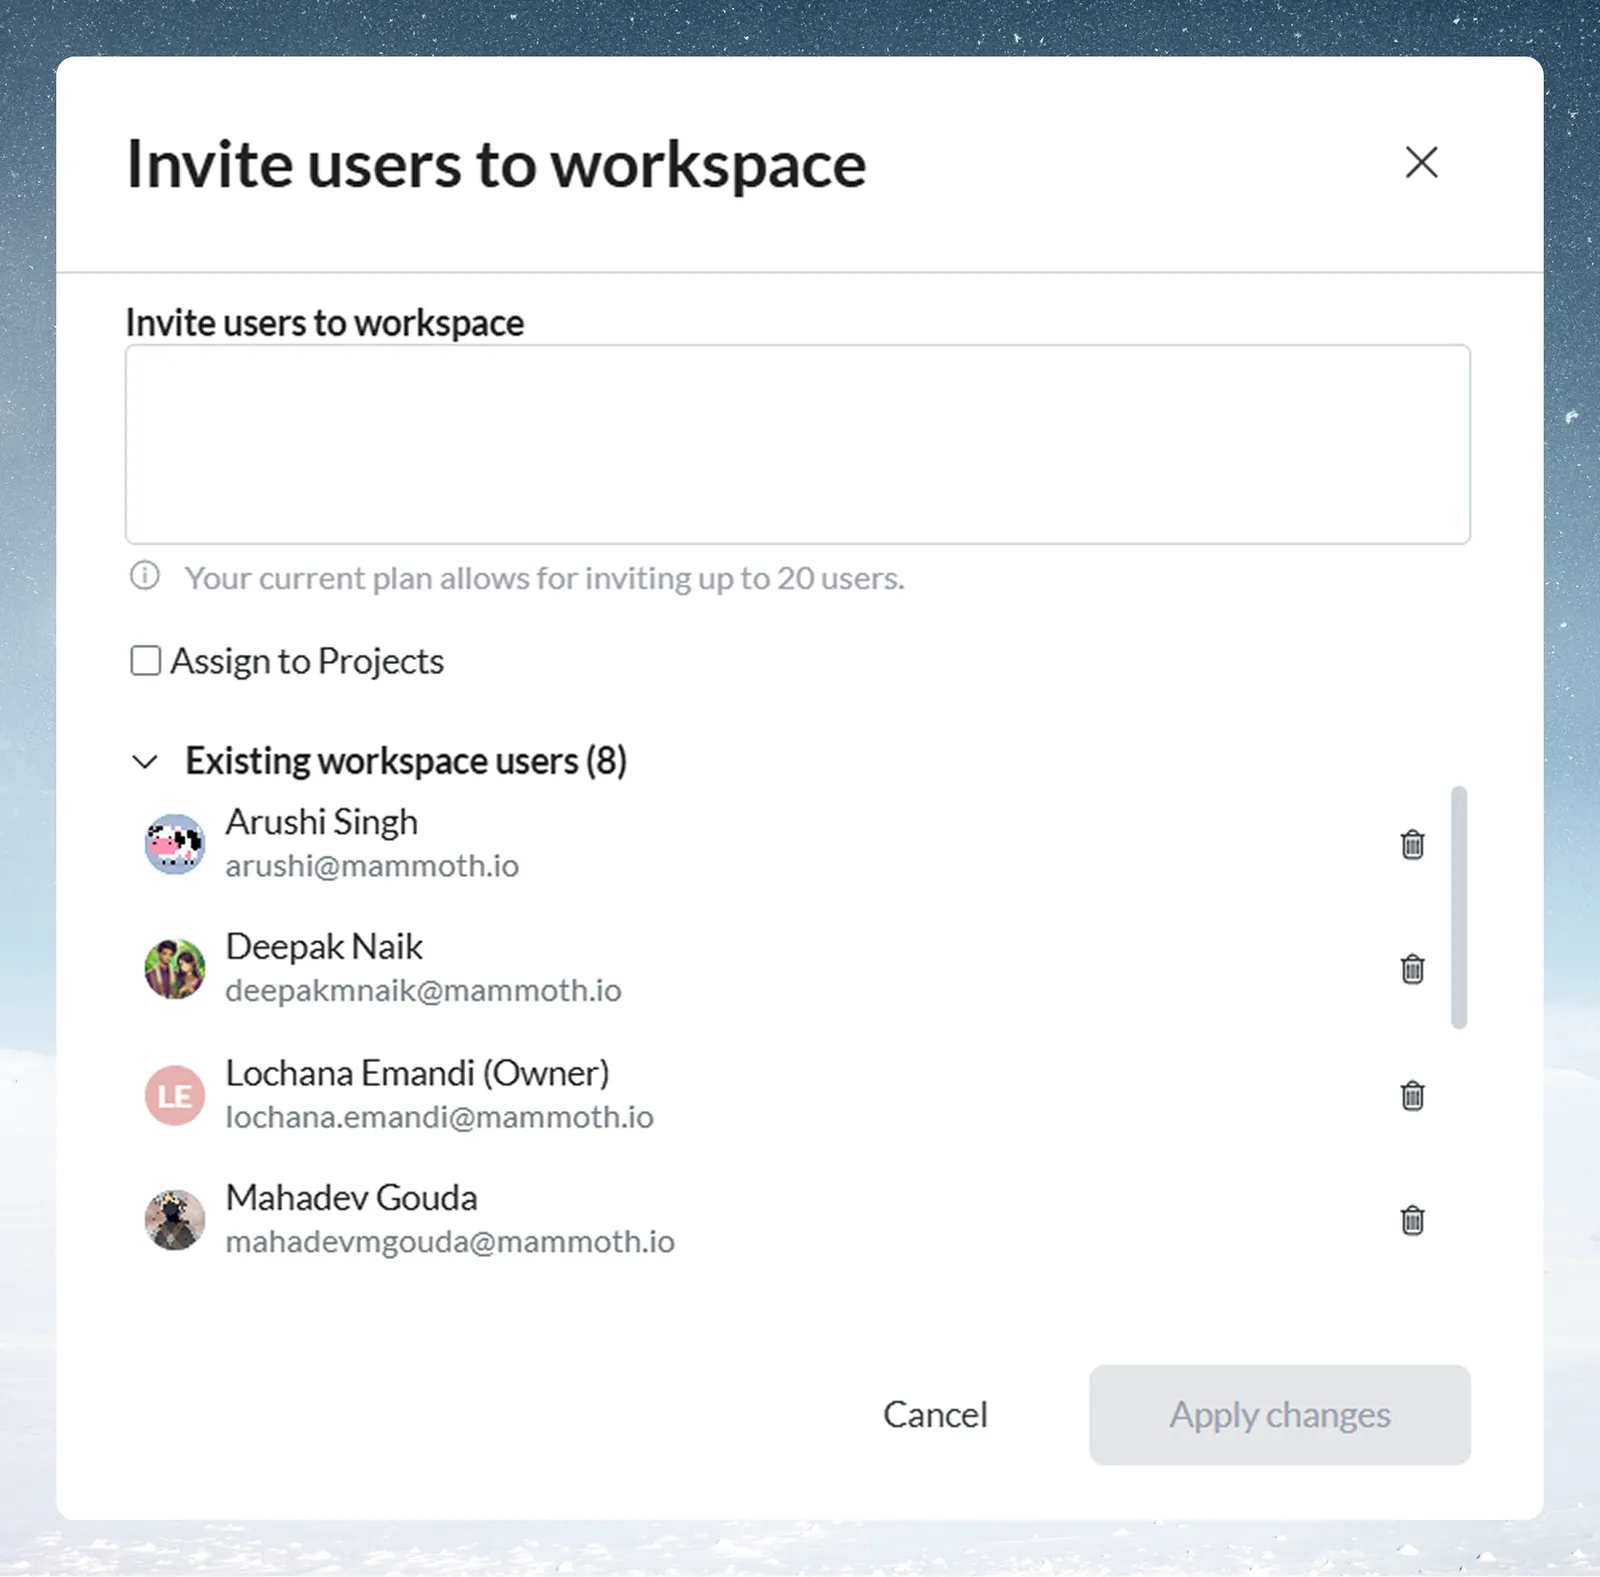
Apply changes appears only when you have marked users for removal. Click it to remove them.
Expected result: After you click Invite, invited users receive an email invitation and appear in the user table as invited.
Plan & storage
The Plan & Storage section shows your subscription details, storage consumption, and add-ons. Visible to Workspace Owners only.
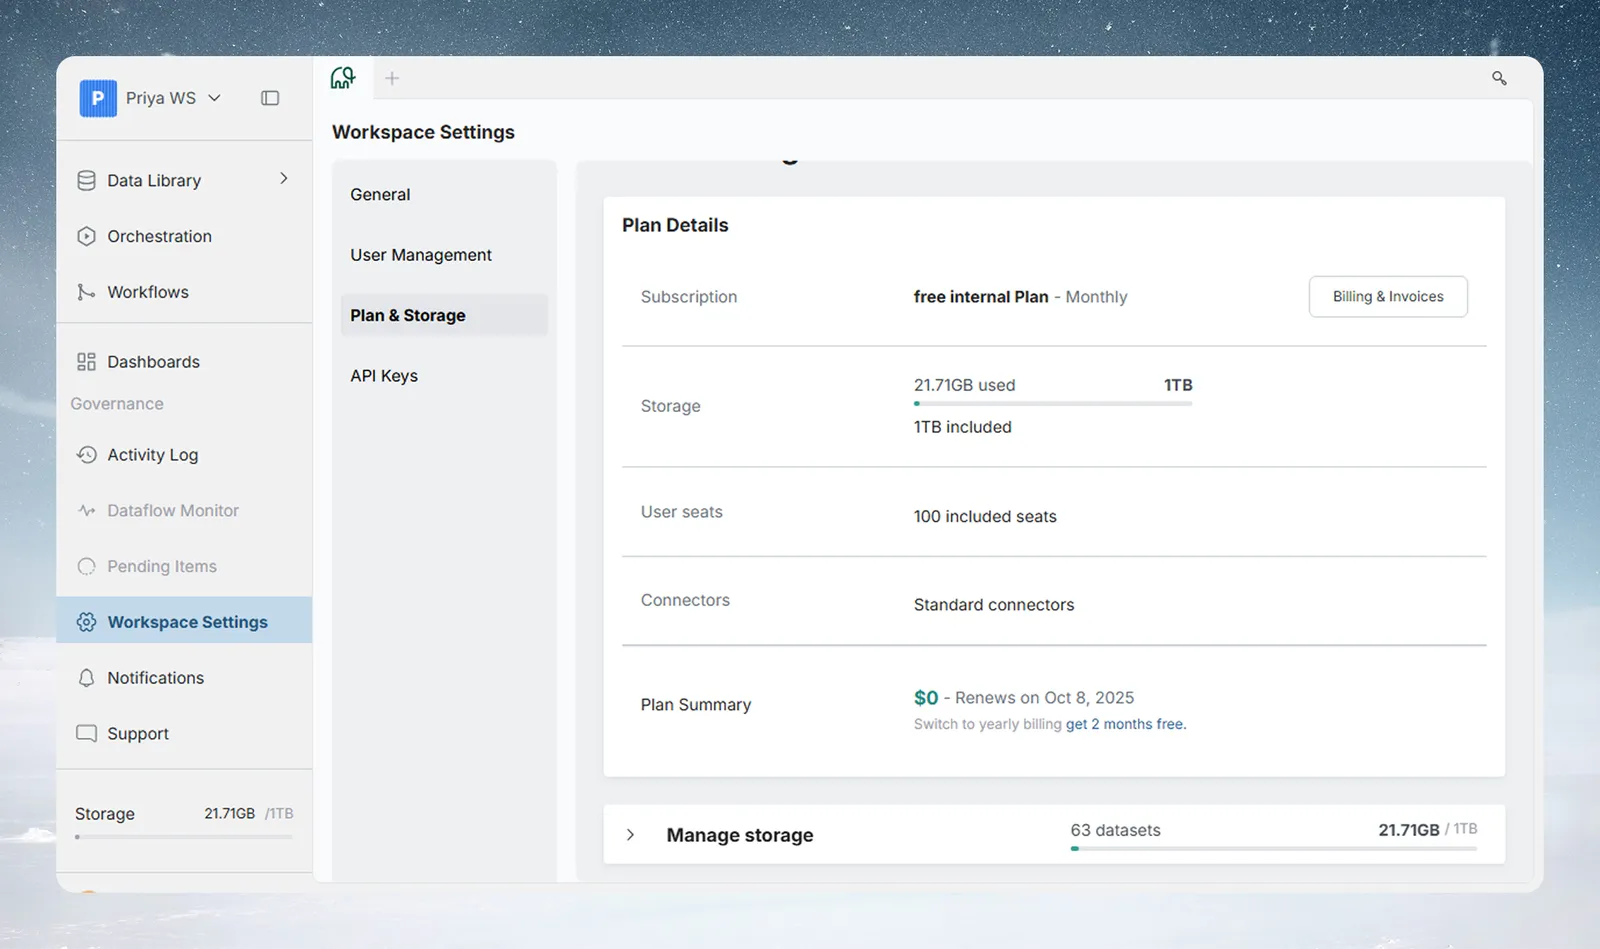
Plan details card
| Field | What it shows |
|---|---|
| Subscription | Plan name and billing frequency (for example, "Team Plan - Monthly") |
| Billing & Invoices | Button that opens billing and invoice details; Owners on paid self-serve plans, once any trial period has ended |
| Storage | GB used · GB allocated · color-coded progress bar |
| User seats | Seats included in your plan + any purchased add-ons |
| Plan Summary | Current plan cost and renewal date (Owners only) |
| Switch to annual billing | A link under the Plan Summary on monthly plans: "get 2 months free" |
This card is only shown for plans billed through Stripe. Other plans skip straight to Manage storage below.
Changing your plan
The Change Plan button (top right) appears for Owners on self-serve plans. During a trial or on the Free plan, the Plan Details card shows an upgrade button instead. The plan comparison includes:
- Monthly / Annually billing toggle
- Plan cards with pricing and a "Most Popular" badge on the recommended plan
- Free trial indicators where applicable
- A feature comparison table and an FAQ section
Add-ons
On plans with extra storage or additional user seats, the Storage and User seats rows show the extra amount, and the Plan Summary total reflects their cost.
Manage storage
The Manage storage accordion shows a summary in its header: the number of datasets and used / allowed storage. It's expanded by default on non-Stripe plans; on Stripe-billed plans it starts collapsed, and you click the header to expand it.
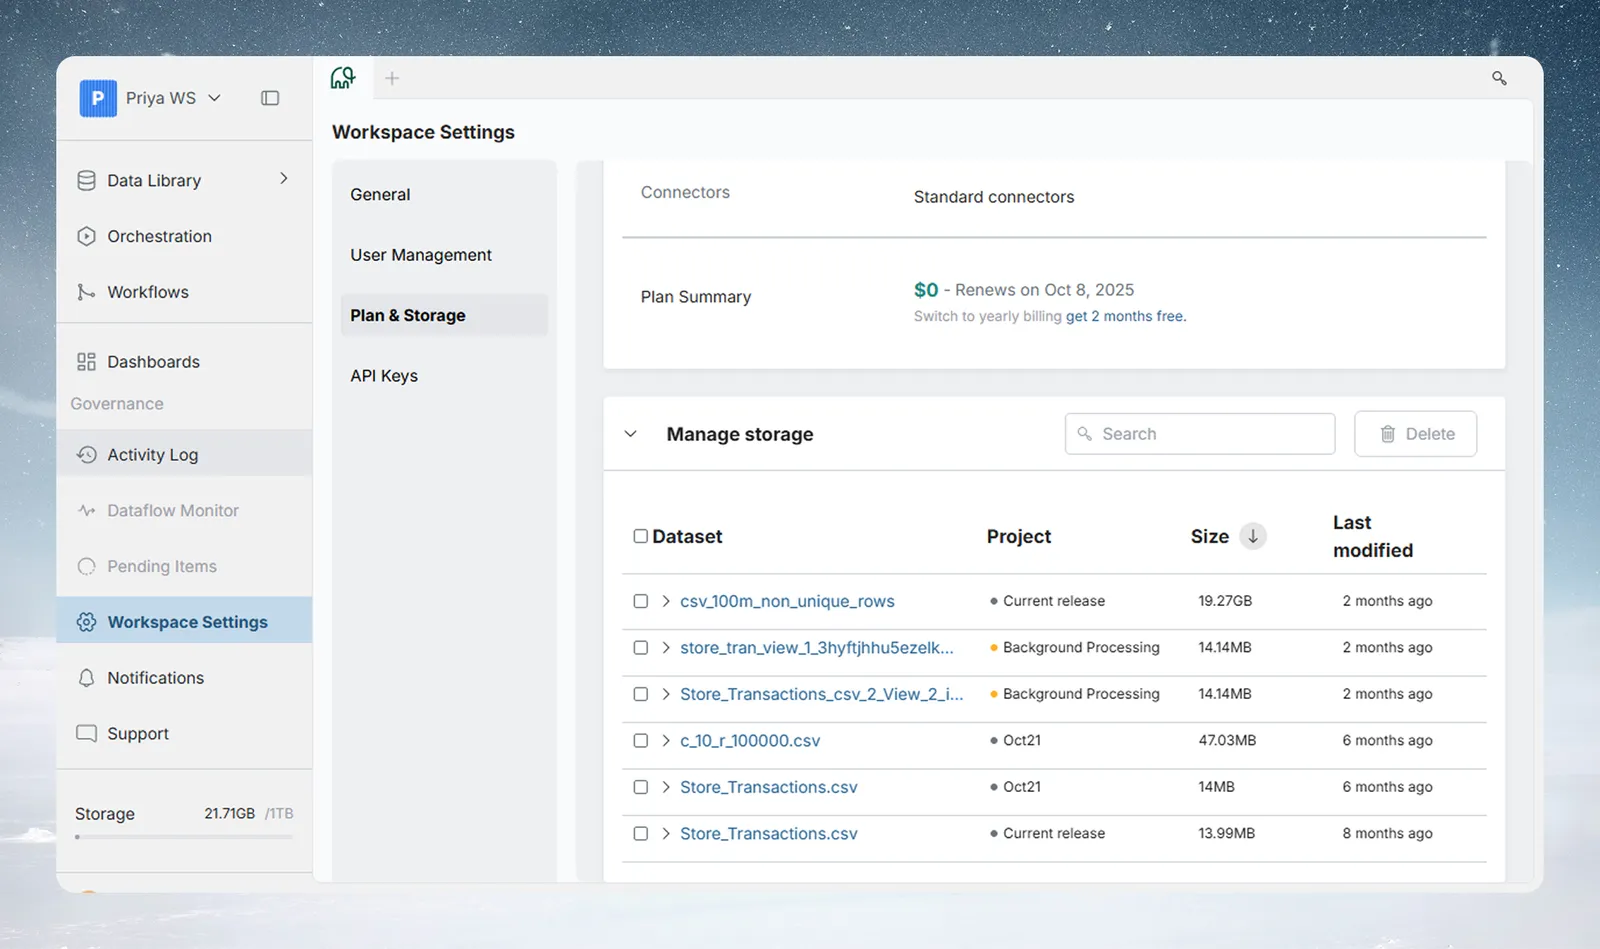
| Control | What it does |
|---|---|
| Search | Filters the list by dataset name (shown once there are 8 or more datasets) |
| Delete | Bulk-deletes selected datasets after confirmation |
| Size column | Sortable; defaults to largest first |
| Expand rows | Shows a dataset's individual views with their sizes |
Tip Finding wasted storage
Sort by Size descending to instantly see which datasets consume the most space. Expand a row to check whether individual views or batch files can be removed without deleting the parent dataset.
API keys
The API Keys section has three cards: API tokens for programmatic access to Mammoth, External API keys for third-party services like OpenAI, and OAuth apps for apps that let people connect their Mammoth account with Sign in with Mammoth. Managing them is Owner-only in Mammoth's Roles & Permissions reference (below).
API tokens
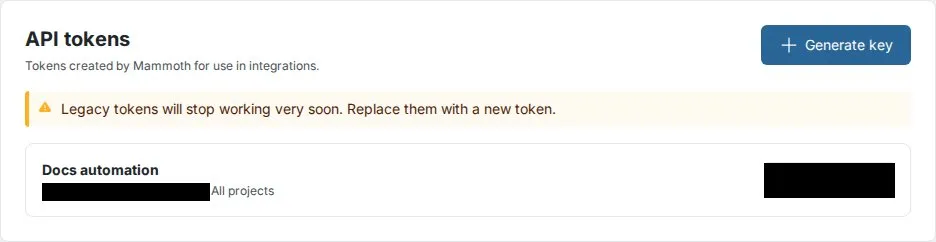
API tokens let scripts, pipelines, and BI tools authenticate with the Mammoth API using a token instead of a user session. The token starts with mm_ and is sent as Authorization: Bearer mm_...; see Authentication.
Creating an API key:
Prerequisite: You are a Workspace Owner, and the API tokens card is shown in your workspace.
- In the API tokens card, click Generate key
- In the Create API key dialog, enter a Name so you can recognize the key later
- Optionally turn on Project scoped and select a project to limit the key to that project. If you leave it off, the key works in every project in the workspace. Scope it to a project whenever the integration only needs that project's data.
- Click Create key
- Click Copy secret, store the secret, then click Done
Expected result: The key appears as a row in the API tokens card.
Danger: Save the secret before closing
Mammoth shows the secret once, in the API key created dialog. After you click Done it cannot be retrieved. Copy it to a password manager or secrets store immediately. To replace a compromised key, remove it and generate a new one.
Each row shows the key name and the project it is scoped to. Legacy tokens carry a warning that they will stop working; replace them with a new key. Legacy tokens also offer Copy key in the row menu.
Row actions: Edit (rename the key and change its project scope) · Remove
Availability: The API tokens card is shown only for workspaces that have the API tokens feature enabled.
External API keys
External API Keys store credentials for third-party AI providers that Mammoth features call on your workspace's behalf. Examples are Generative AI and Extract Text. Keys are workspace-scoped: all workspace members can use them, but only Workspace Owners can add or remove them.
Supported providers: OpenAI (ChatGPT), Anthropic (Claude), Google (Gemini), xAI (Grok)
Adding a key:
Prerequisite: You are a Workspace Owner.
- In the External API keys card, click Add external key
- Select the AI provider from the provider grid and click Next
- Choose the Model to associate with this key
- Optionally expand Preferences to configure provider-specific options (see below)
- Enter a Key Name, a display label that defaults to the model name
- Paste the API key into the masked field
- Click Add External Key. Mammoth validates the key automatically on submission.
Expected result: The key appears in the External API Keys table.
Each row shows the key name and the last four characters of the key.
Row actions: Remove
Info: Key values can't be edited
Once a key is added, nothing about it can be changed, including the display name. To replace a key or rename it, remove it and add a new one.
Provider preferences
Expanding Preferences shows optional toggles for the model you selected. Depending on the model, these can include Extended thinking, Reasoning effort, Web search, and Batch API. Check the Preferences panel for the model you've chosen; not every model exposes every preference.
For full setup instructions and model reference, see Generative AI: adding an external API key.
OAuth apps
The OAuth apps card lists apps registered for Sign in with Mammoth. Click Register app to register one. Only workspace admins can register or delete OAuth apps.
Connected apps
The Connected apps section lists third-party apps you allowed to access your Mammoth data. Each connection is limited to the project you chose, or covers all your projects. Click Revoke on a row to remove an app's access; the app loses access immediately, and you can connect it again from the app.
Roles & permissions reference
Open the permission matrix in the product by clicking View Roles & Permissions at the bottom of any project role dropdown in the User Side Panel. The modal has a Workspace Permissions tab and a Project Permissions tab.
The complete matrix for workspace, project, and dashboard roles is on the Access Control page.
Info:
Creating a new project and viewing the Activity Log are the only workspace-level actions available to Members. Every other action in Workspace Settings requires the Owner role.The Subscription group only appears in the modal on self-serve plans. On non-self-serve plans, the "Enable/disable upcoming features" permission appears in its place under General (and is only shown to Owners).
TIP:
When in doubt, assign Project Editor. Upgrade to Project Admin only when the user needs to manage project membership, create new Live Connections, or change project settings.
Enterprise plan
The Enterprise plan is arranged through sales and includes:
- Unlimited users and custom storage
- Event-driven automation
- IP allowlisting and VPC deployment
- Custom-built connectors
- 99.9% SLA and a named success manager
SSO and enforced MFA are plan features that the Pro plan includes. Contact your Mammoth account team or see the pricing page to learn more.
Tips and best practices
Be deliberate about Owner access. A workspace can have multiple Owners. Each Owner has full admin rights—billing, user management, API keys, and workspace deletion. Assign Owner only to people who genuinely need that level of control. Use the three-dot menu in the User Side Panel to promote a Member to Owner; the action takes effect immediately.
Add users to projects at invite time. Check Assign to Projects when sending invitations. This saves a follow-up step and ensures new members can start working the moment they accept.
Use the "No projects assigned" filter after bulk invites. It instantly surfaces anyone still waiting for project access.
Monitor storage from the accordion, not the gauge. The circular indicator on the General section shows total workspace usage. The Manage Storage accordion in Plan & Storage shows per-dataset sizes with delete controls—sort by Size to find what's taking up space.
Scope API keys to a project. When creating a key for an integration that targets one specific project, turn on Project scoped. This prevents the token from accessing other projects in the workspace even if the secret is exposed.
Label External API Keys with context. Since the key value is unreadable after creation, use the Name field to record what it's for—for example, "OpenAI PDF extraction - prod". This makes rotation straightforward.