Managing automations
After you create automations, you manage them from the Automations tab in the Data Library. This page covers how to view details, change status, run manually, edit, and delete.
The automation list
The Automations tab shows all automations in the current project in a table.
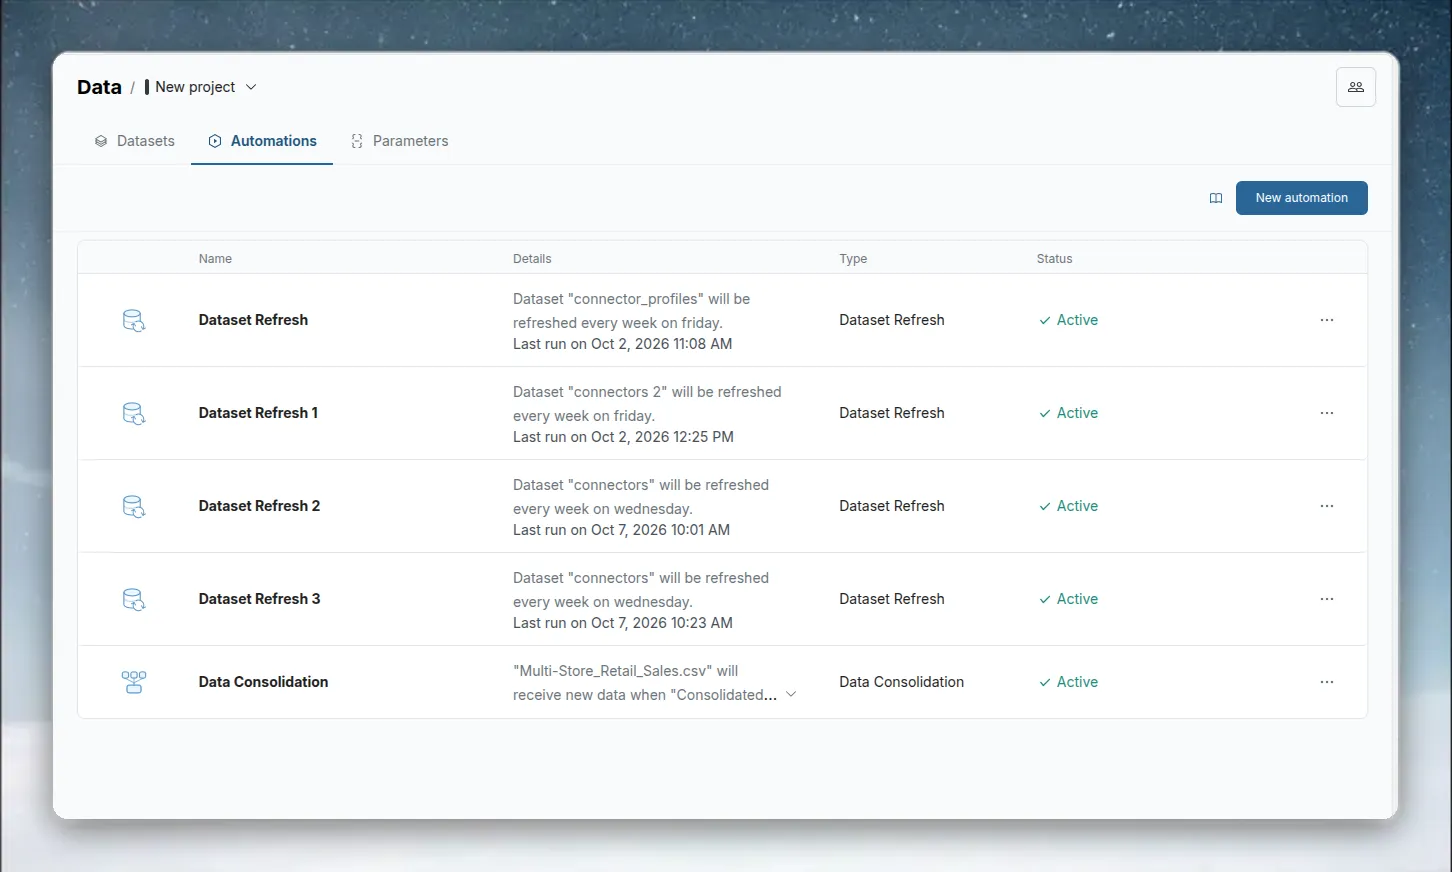
Columns:
| Column | What it shows |
|---|---|
| Name | Automation name and description (if set) |
| Details | One-line summary of what the automation does |
| Type | Dataset Refresh, Data Consolidation, File Collection, or Messaging |
| Status | Active, Suspended, or Error |
Click any row to open the detail panel on the right.
The detail panel
Clicking an automation row slides open the detail panel on the right side of the screen. It shows a full summary and gives you access to all management actions.
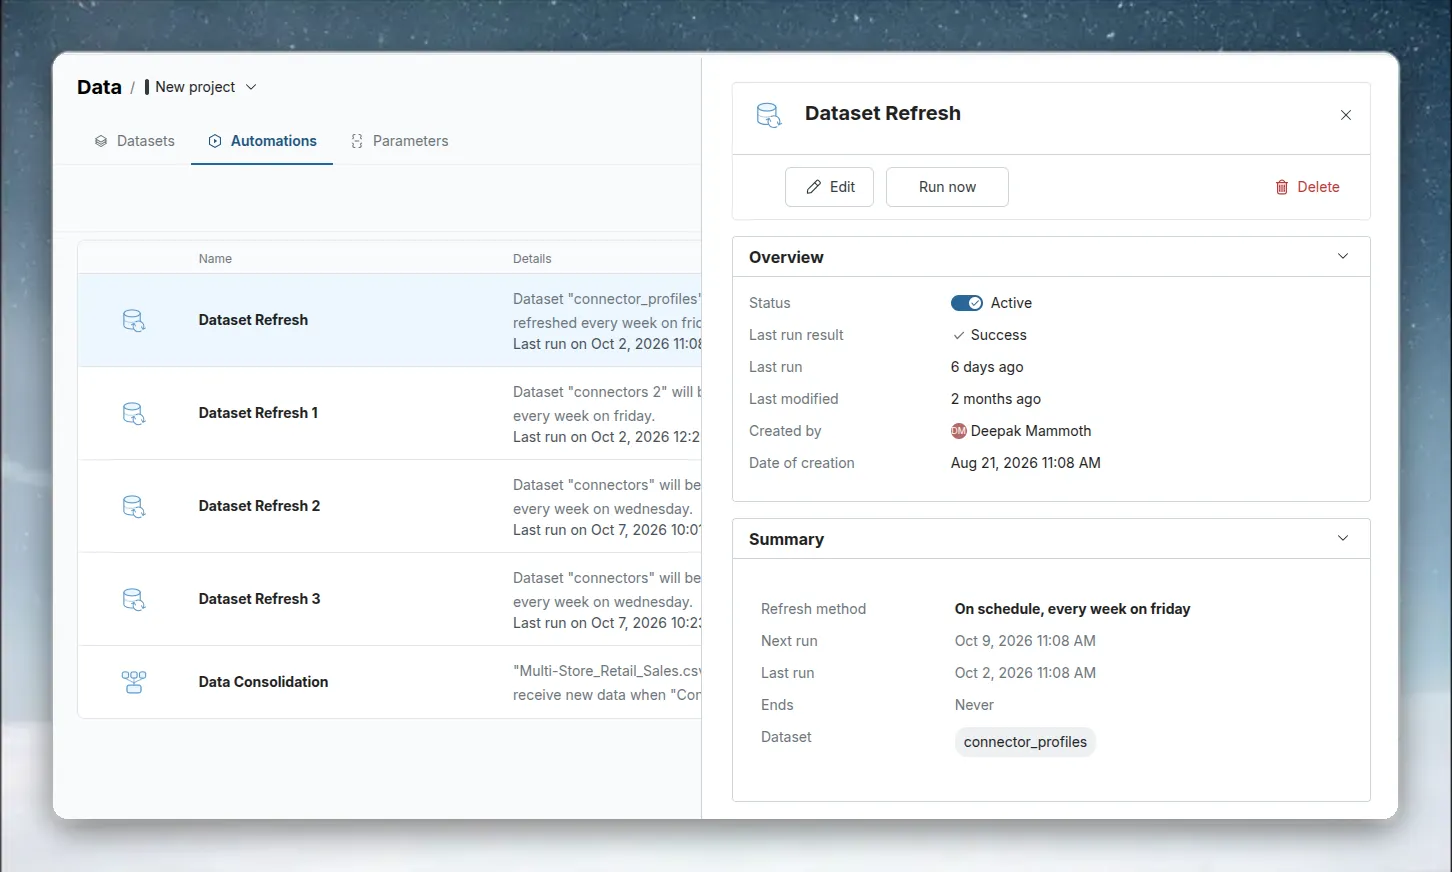
The detail panel has two main sections:
Overview
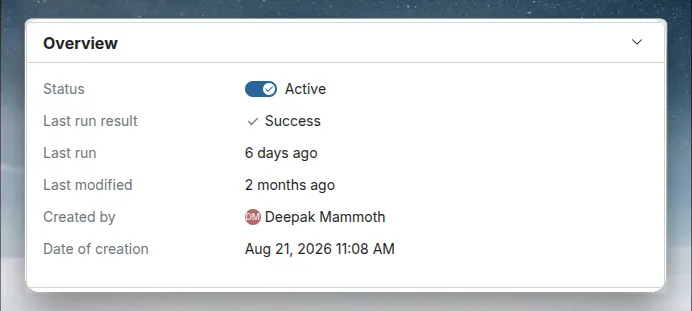
| Field | Description |
|---|---|
| Status | Toggle to activate or suspend the automation |
| Last run result | Whether the most recent execution succeeded or failed |
| Last modified | When the automation was last edited |
| Last updated by | Who last edited it |
| Created by | Who created it |
| Date of creation | When it was created |
Automation summary
Shows a type-specific summary of the automation configuration—schedule, datasets, recipients, etc.
Pausing and resuming
You can suspend (pause) an automation to stop it from running without deleting it.
To suspend:
- Open the detail panel → toggle Status off, or
- Click the three-dot menu (⋯) on the row → toggle Automation Status off
The status changes to Suspended. No further executions occur until you resume.
To resume:
- Toggle Status back on in the detail panel, or
- Toggle Automation Status back on in the three-dot menu
When you resume, the automation status returns to Active and re-queues for its next scheduled execution.
Running manually (run now)
You can trigger any Active automation immediately without waiting for the scheduled time.
From the detail panel: Click Run now.
From the three-dot menu: Click ⋯ on the automation row → Run now.
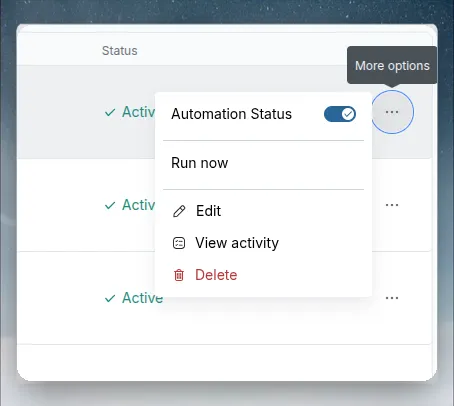
Note: Run now is only available when the automation status is Active. Suspended automations must be resumed before they can be run manually.
Editing an automation
Open the detail panel and click Edit, or use the three-dot menu → Edit.
The edit form is the same as the creation form for that type. You can change:
- Dataset Refresh: datasets, schedule, start/end dates, name, description
- Data Consolidation: source folder, destination dataset, name, description
- Messaging: schedule, recipients, subject, message body, attached views, name, description
- File Collection: sources, destination folder, schedule, name, description
Save your changes to apply them.
Deleting an automation
From the detail panel: Click Delete (shown in red).
From the three-dot menu: Click ⋯ → Delete.
A confirmation modal appears. Confirming moves the automation to Trash. You can restore it from the Trash section until it is deleted automatically.
Automation statuses
| Status | Icon | Meaning |
|---|---|---|
| Active | Green check | Running normally on its configured schedule or trigger |
| Suspended | Grey pause | Manually paused—no runs will occur |
| Error | Red warning | The automation has an error—check Last run result for details |
When an automation shows Error:
- Open the detail panel.
- Check Last run result—it shows the specific error.
- Common causes:
- A referenced dataset or folder was deleted
- A cloud connection expired (Dataset Refresh)
- A schema mismatch (Data Consolidation)
- A referenced view was deleted (Messaging)
- Edit the automation to fix the underlying issue, then use Run now to verify the fix.