Filter, Label & Replace
The Filter, Label & Replace category has functions for filtering rows, editing values, and standardizing data. The Transform menu organizes them into three groups: Filter, Label & Edit, and Replace.
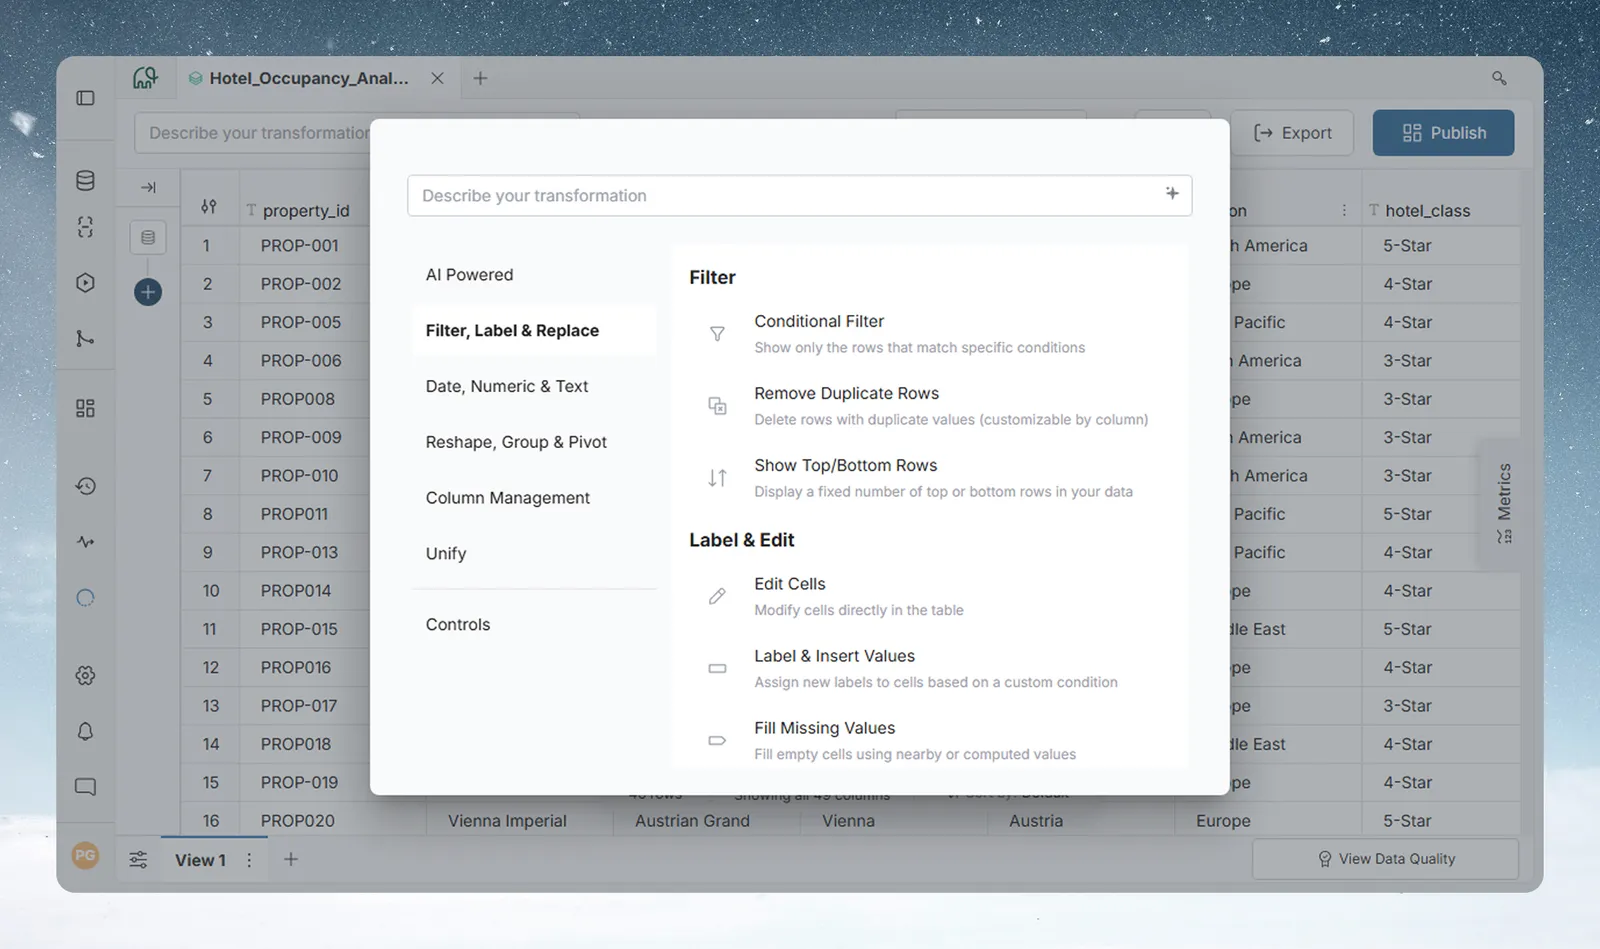
Filter
Conditional Filter
Conditional Filter keeps or removes rows based on one or more conditions you define. Apply it early in your pipeline to reduce the data volume that downstream tasks need to process.
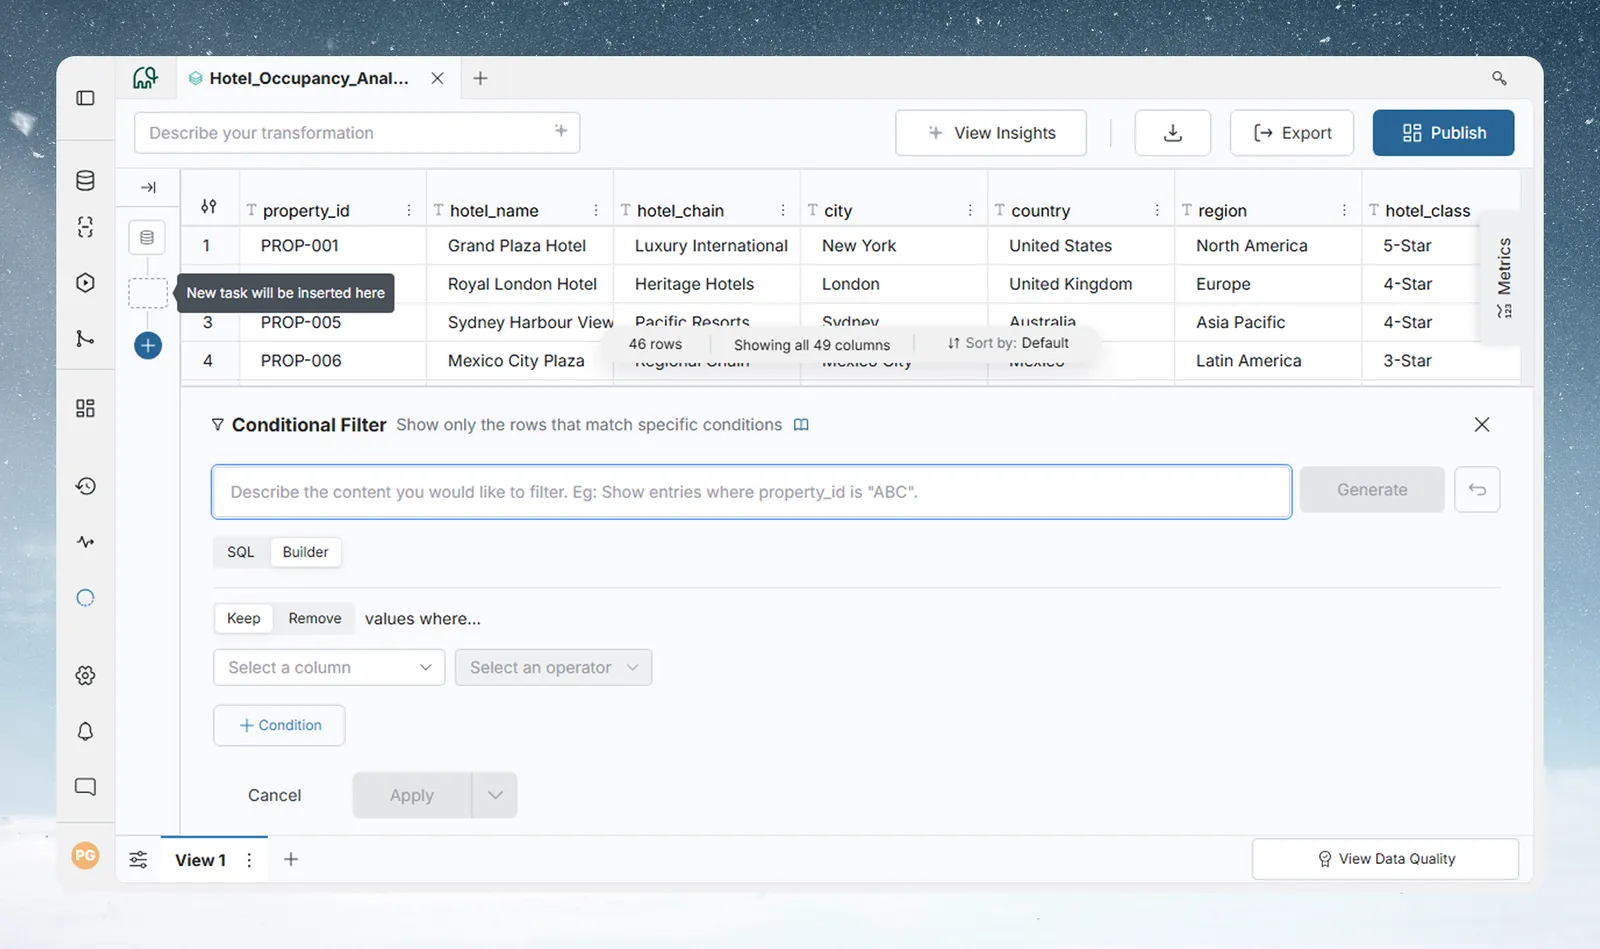
Opening Conditional Filter
Click the + button in the pipeline panel, navigate to Filter, Label & Replace, and select Conditional Filter.
The panel opens in Builder (visual) mode. If SQL mode is enabled for your workspace, a SQL / Builder toggle at the top switches between the two.
AI-assisted generation
Click the Describe what you want to generate bar, type a plain-English description (for example, "Show entries where hotel class is 5-Star and region is Europe") and click Generate. Mammoth builds the condition automatically in whichever mode is active. Use the revert button beside Generate to go back to the previous result.
Builder mode
Builder mode lets you define conditions using dropdowns without writing any SQL.
Keep / Remove toggle
At the top of the condition area, choose Keep or Remove in front of "values where…":
- Keep—only rows that match your conditions remain in the output.
- Remove—rows that match your conditions are excluded from the output.
This toggle applies to the entire task and all conditions within it.
Defining a condition
Each condition row has four parts:
| Part | Description |
|---|---|
| Column | Pick any column from the dataset. The column type (Text, Number, or Date) determines which operators are available. |
| Operator | The comparison rule. See operator tables below. |
| Comparison type | Choose what to compare against: a fixed Value, another Column Value, or a Parameter. |
| Input | For Value: type or select from auto-suggestions drawn from actual column data. For Column Value: pick a second column. For Parameter: select a named parameter. |
A Condition Summary below the builder restates the condition in words as you build it.
Text column operators
| Operator | Keeps rows where the column value… |
|---|---|
| is | exactly equals the specified value, or any one of several values you enter |
| is not | does not equal the specified value, or any of several values you enter |
| contains | includes the specified text, or any one of several texts you enter, anywhere |
| does NOT contain | does not include the specified text anywhere |
| starts with | begins with the specified text |
| ends with | ends with the specified text |
| does NOT start with | does not begin with the specified text |
| does NOT end with | does not end with the specified text |
| is Empty | is null or blank |
| is NOT Empty | has any non-null, non-blank value |
Numeric column operators
| Operator | Keeps rows where the column value… |
|---|---|
| is | exactly equals the number, or any one of several numbers you enter |
| is not | does not equal the number, or any of several numbers you enter |
| is less than | is strictly less than the number |
| is less than or equal to | is less than or equal to the number |
| is greater than | is strictly greater than the number |
| is greater than or equal to | is greater than or equal to the number |
| is MAX value | equals the maximum value in the column |
| is NOT MAX value | does not equal the maximum value |
| is MIN value | equals the minimum value in the column |
| is NOT MIN value | does not equal the minimum value |
| is Empty | is null |
| is NOT Empty | has any non-null value |
| in between (exclusive) | falls between two numbers, not including the endpoints |
Date column operators
| Operator | Keeps rows where the column value… |
|---|---|
| is | equals the specified date |
| is NOT | does not equal the specified date |
| is later than | is after the specified date |
| is on or later than | is on or after the specified date |
| is earlier than | is before the specified date |
| is on or earlier than | is on or before the specified date |
| in between (exclusive) | falls between two dates, not including the endpoints |
| is Empty | is null |
| is NOT Empty | has any non-null value |
Comparison types
The dropdown between the operator and the value input controls what the column is compared against:
| Type | Use case |
|---|---|
| Value | Compare against a fixed value you type in. Auto-suggestions appear based on actual column data. |
| Column Value | Compare the selected column against another column in the same dataset. Useful for row-level comparisons (e.g. keep rows where actual_sales is greater than target_sales). |
| Parameter | Compare against a project parameter. |
Case sensitive
A Case sensitive checkbox appears below the condition rows when at least one Text column condition is defined. When unchecked (default), comparisons like is, contains, and starts with are case-insensitive. Check it when exact casing matters.
Multiple conditions (AND / OR logic)
Click Condition to add a second condition row.
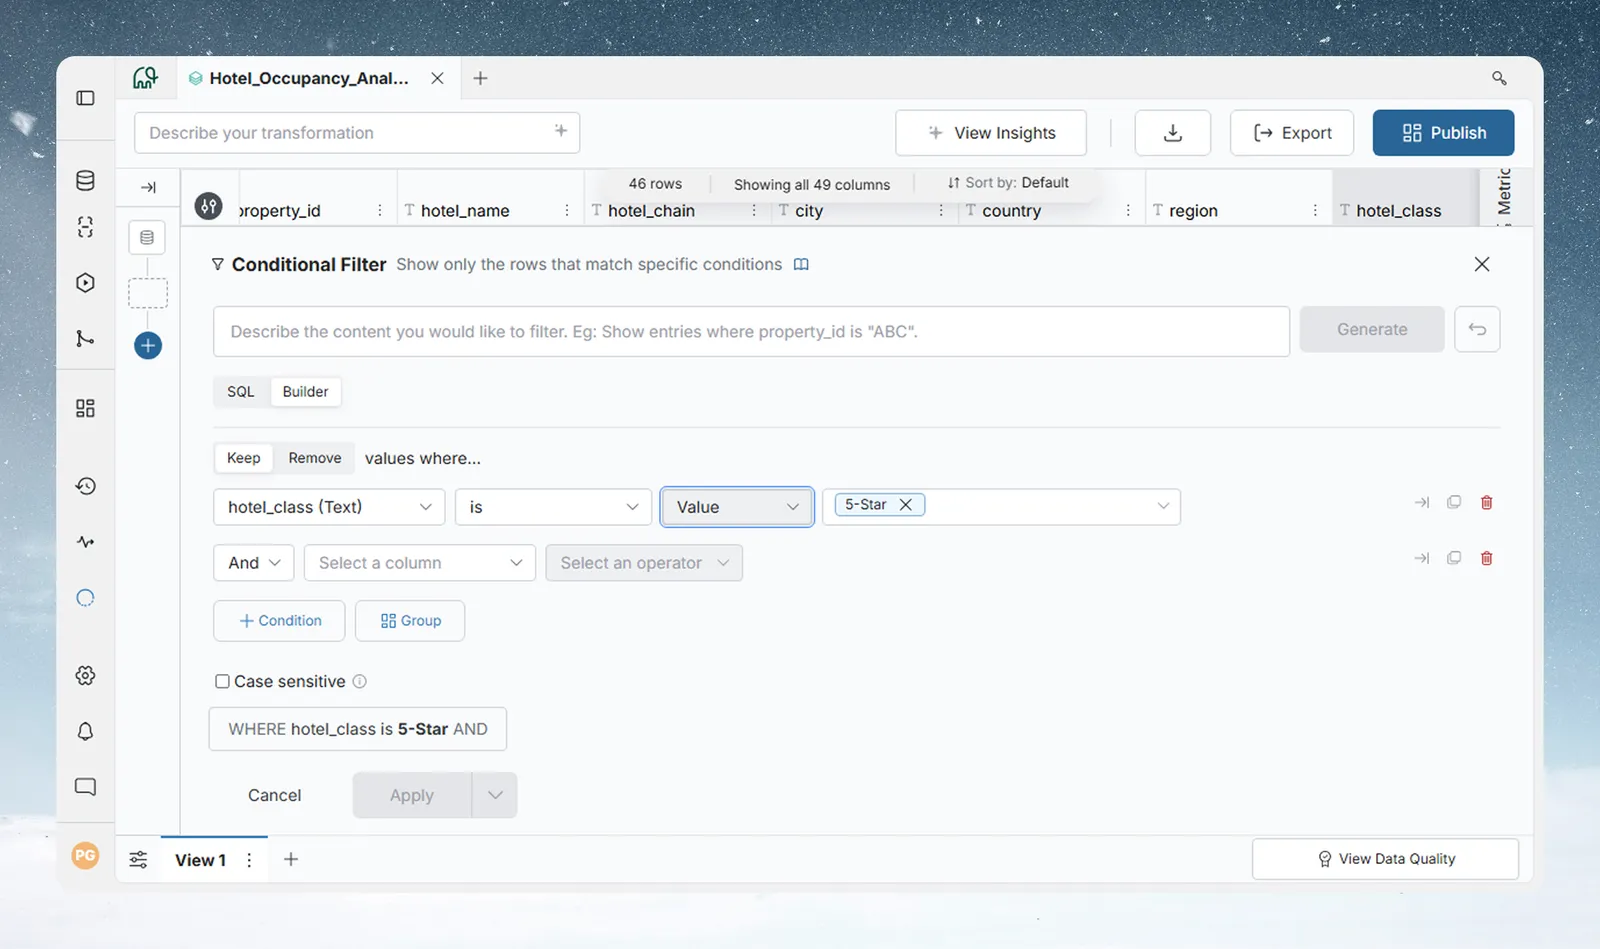
Once there are two or more conditions, an And / Or dropdown appears on the second row. Choose:
- And—both conditions must be true for a row to pass.
- Or—either condition being true is sufficient.
When there is more than one condition, each condition row has icons on the right:
| Icon | Action |
|---|---|
| Nest | Place inside parentheses—move this condition into a nested group |
| Unnest | Place outside parentheses—move this condition out of its group (only inside a group) |
| Copy | Duplicate this condition row |
| Trash | Remove this condition row |
Grouping conditions
Click Group (available once there are two or more conditions) to create a nested condition group. Groups let you build compound logic such as (A AND B) OR (C AND D)—where the AND/OR inside the group is evaluated first, and the group result is then combined with the outer conditions.
SQL mode
If SQL mode is enabled for your workspace, switch to SQL to write a raw SQL WHERE expression.
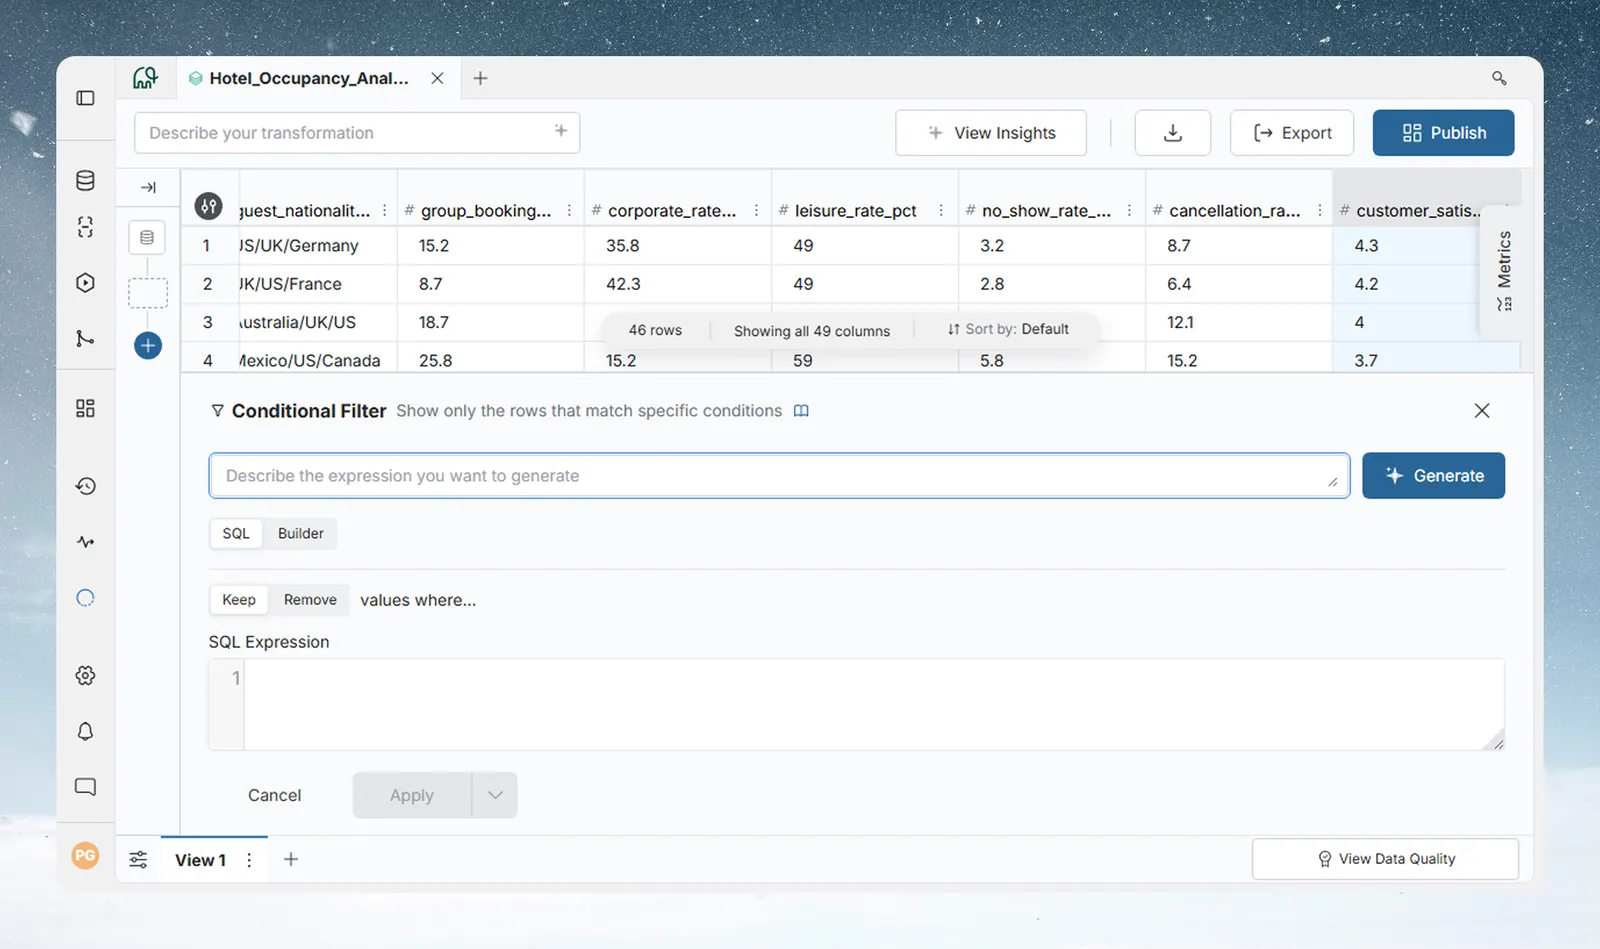
The SQL Expression area accepts any valid SQL WHERE clause using your column names directly. The AI input bar at the top still works in SQL mode—clicking Generate populates the SQL Expression field rather than the visual builder.
Use SQL mode when:
- You need a complex expression that the Builder cannot represent.
- You want to paste in a pre-written SQL condition.
- You are migrating logic from another tool.
Applying the filter
Click Apply to run the task and add it to the pipeline. In Draft mode the button reads Add to Pipeline instead and stages the task without running it.
Creating a Conditional Filter from an Explore Card
You can also create a Conditional Filter directly from a column's Explore Card—select one or more values in the card and choose Keep all values like this or Remove all values like this from the card's context menu. The filter is pre-configured with those values.
Remove Duplicate Rows
Remove Duplicate Rows removes rows that are considered duplicates based on a scope you define.
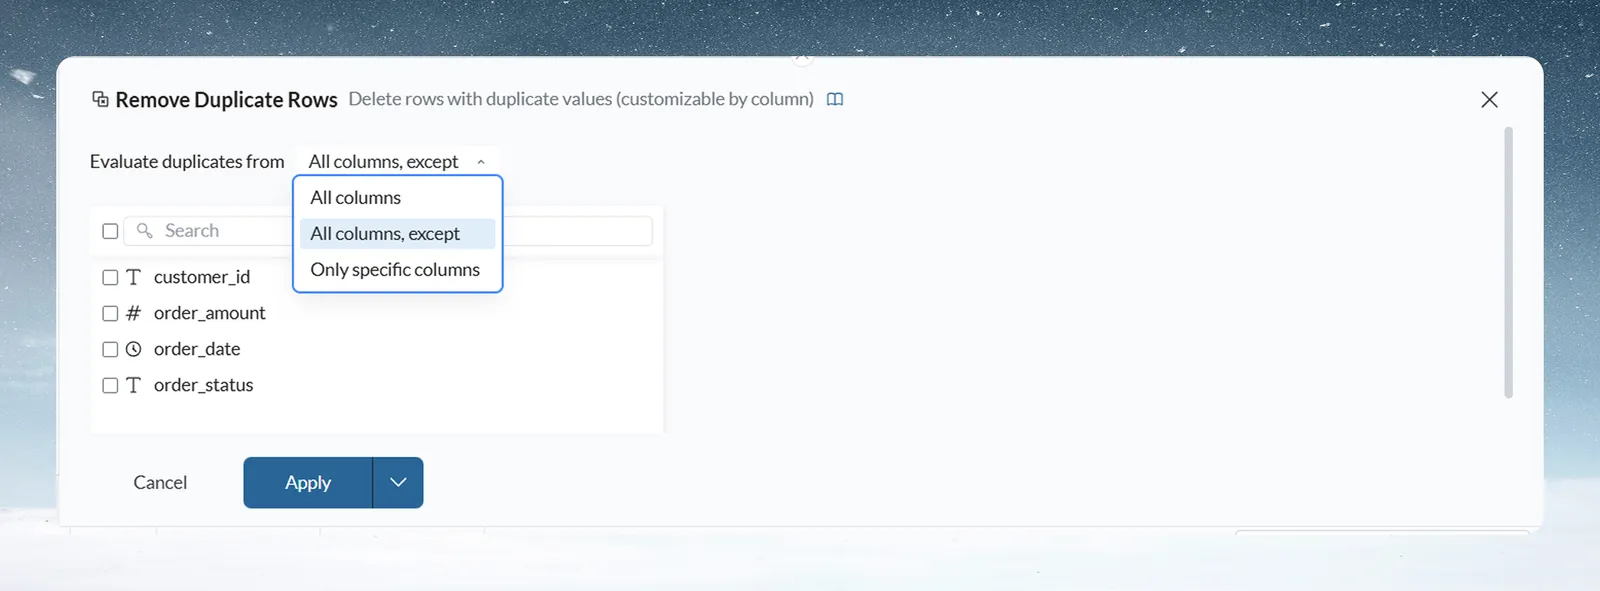
Evaluate duplicates from:
- All columns—a row is a duplicate only if every single column value matches exactly.
- All columns, except—a row is a duplicate if all columns match except the ones you exclude. Check the columns to exclude from the comparison. Use this when columns like timestamps or auto-generated IDs differ between otherwise identical records.
- Only specific columns—a row is a duplicate if the columns you select match.
Show Top/Bottom Rows
Show Top/Bottom Rows keeps only a fixed number of rows from the top or bottom of your dataset.
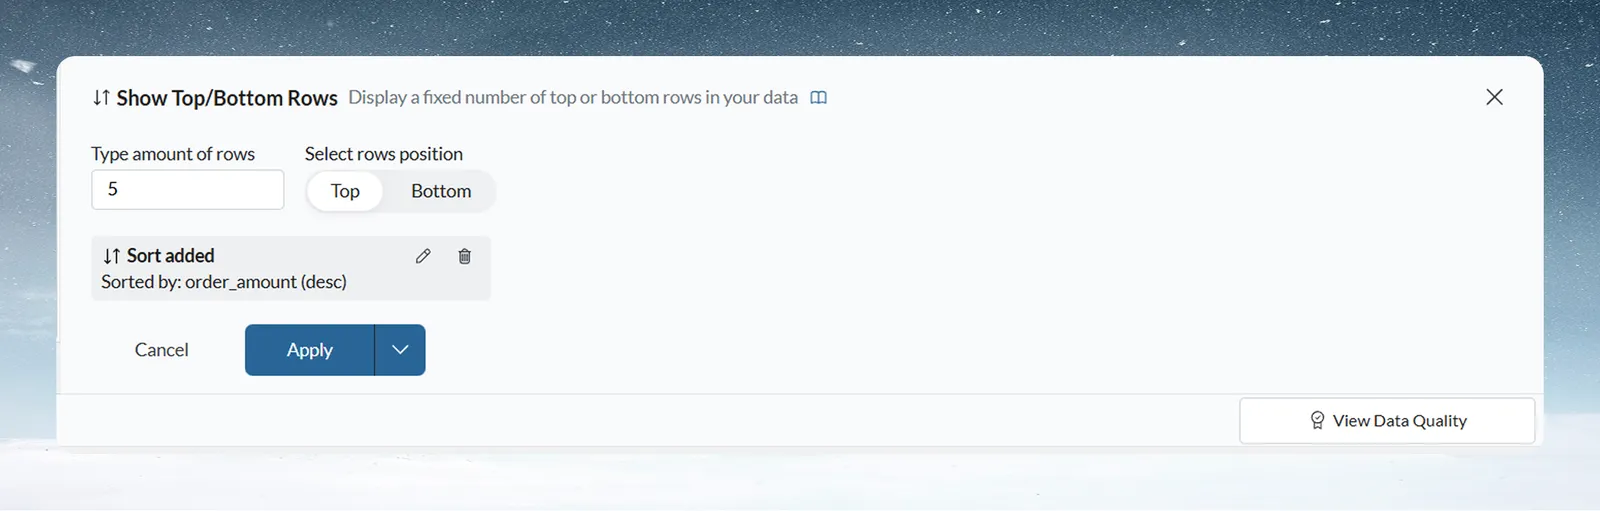
How to configure:
- Type amount of rows—enter how many rows to keep.
- Select rows position—choose Top for the first N rows or Bottom for the last N rows.
If a sort is active, a Sort added chip appears showing which column the data is currently sorted by. This determines what "top" and "bottom" mean—for example, sorted by order_amount ascending, Top 10 gives the 10 lowest values. You can edit or remove the sort from the chip.
Label & Edit
Edit Cells
Edit Cells lets you directly modify individual cell values in the data grid.
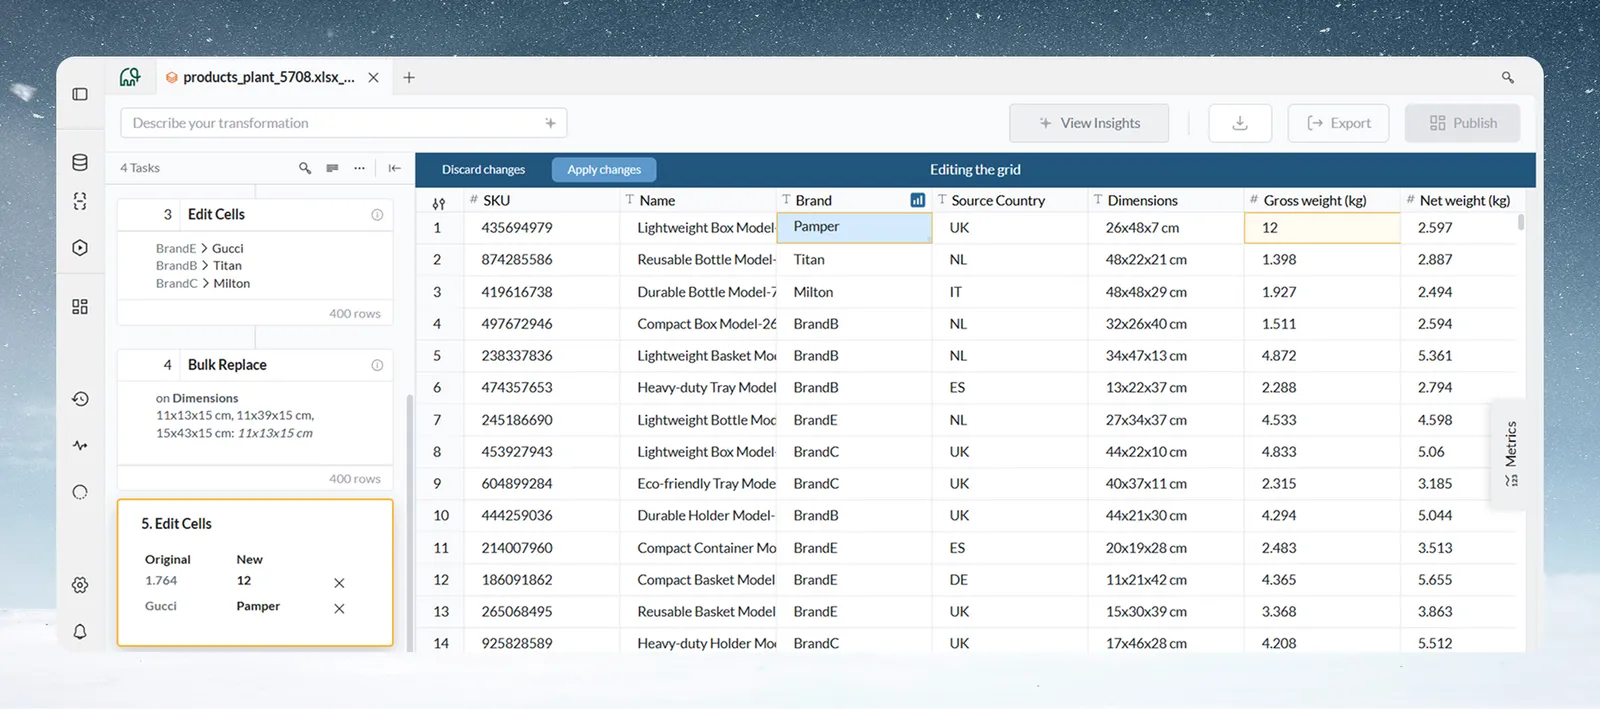
Selecting Edit Cells puts the View into Editing the grid mode—a blue bar appears at the top with Discard changes and Apply changes buttons. Double-click a cell to edit it directly. As you make changes, edited cells are highlighted. The task card in the pipeline panel shows a running list of all edits as Original → New pairs, each with an X to remove that specific change.
When done, click Apply changes (or Add to Pipeline in Draft mode) to commit everything as a pipeline task, or Discard changes to cancel. Use Edit Cells for targeted, one-off corrections where a transformation rule would be unnecessary.
Label & Insert Values
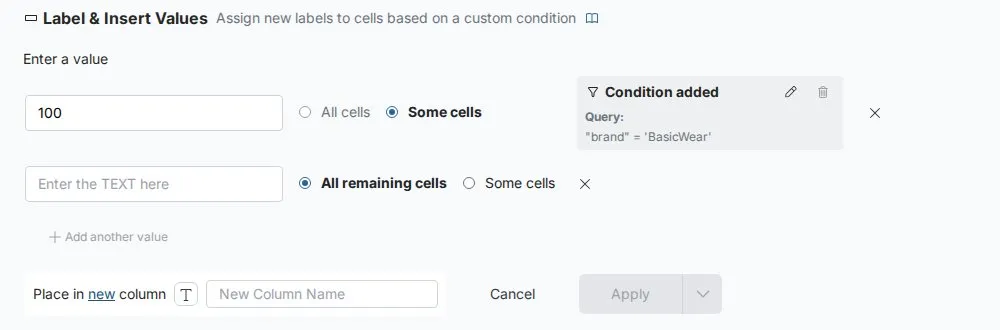
Label & Insert Values inserts a value into rows—either every row, or only rows that meet a condition.
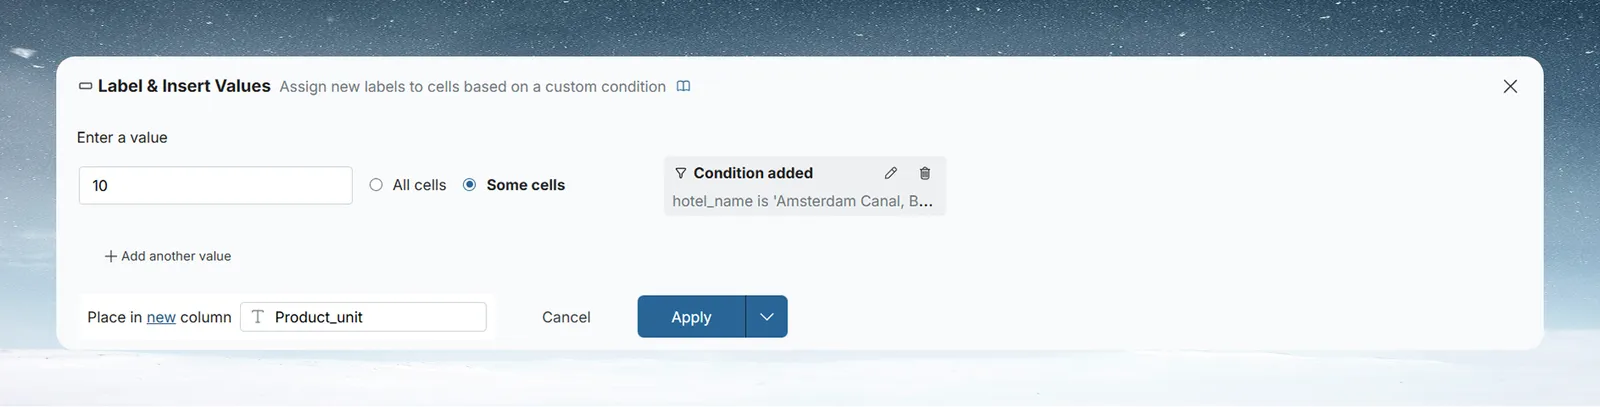
How to configure:
- Enter a value—type the value to insert. The input adapts to the column type you choose to write into. For a date column, choose a date option or pick a date and time.
- All cells / Some cells—choose whether the value applies to every row or only to rows matching a condition.
- Selecting Some cells reveals an Add Condition button. Clicking it opens a condition modal where you can describe the condition in natural language or build it manually with column and operator dropdowns.
- Once set, a Condition added chip shows the active condition with edit and delete icons.
- Add another value—insert a different value for other rows. Each earlier value needs a condition (Some cells); the last value then applies to All remaining cells. Drag values to reorder them.
- Place in new column—the word new opens a menu: keep New to type a column name and choose its data type, or choose Existing to pick a column from the dropdown.
Opening from an Explore Card:
Click the three-dot menu on any value bar in an Explore Card to see Replace all values like this—this opens Label & Insert Values with the selected value pre-filled as a condition, targeting only rows containing that value.
Fill Missing Values
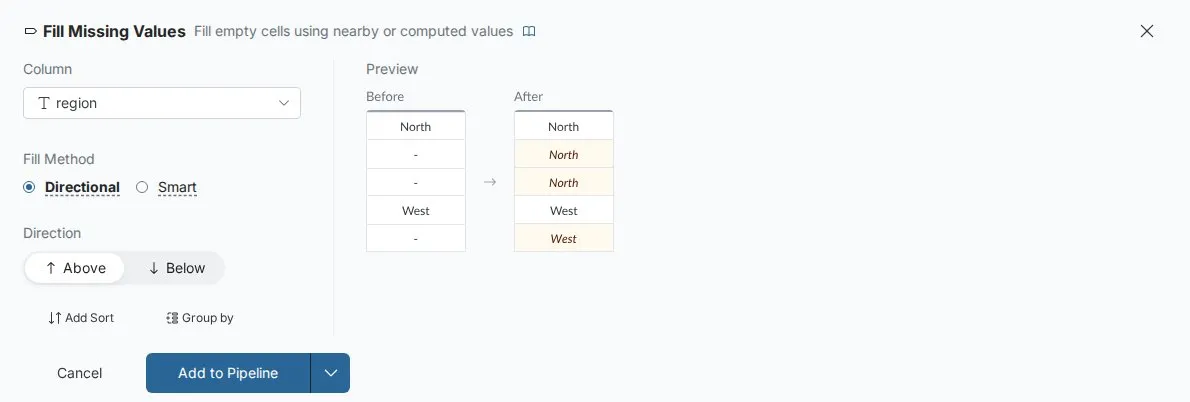
Fill Missing Values fills empty cells in a column using values from neighboring rows.
How to configure:
- Select column—choose the column with empty cells.
- Fill Method: Directional copies the closest value above or below in the column. Smart predicts each empty cell from patterns in your complete rows, and appears only when the feature is enabled for your workspace.
- Direction (Directional only):
- Above—fills each empty cell with the nearest non-empty value above it.
- Below—fills each empty cell with the nearest non-empty value below it.
- The Preview panel shows how the selected method behaves before you apply it.
- Add Sort—optionally define a sort order first, which controls what counts as "above" or "below." (Directional only.)
- Group by—optionally restrict filling to within groups, so a value only fills from within the same group rather than across the entire dataset. (Directional only.)
Replace
Bulk Replace
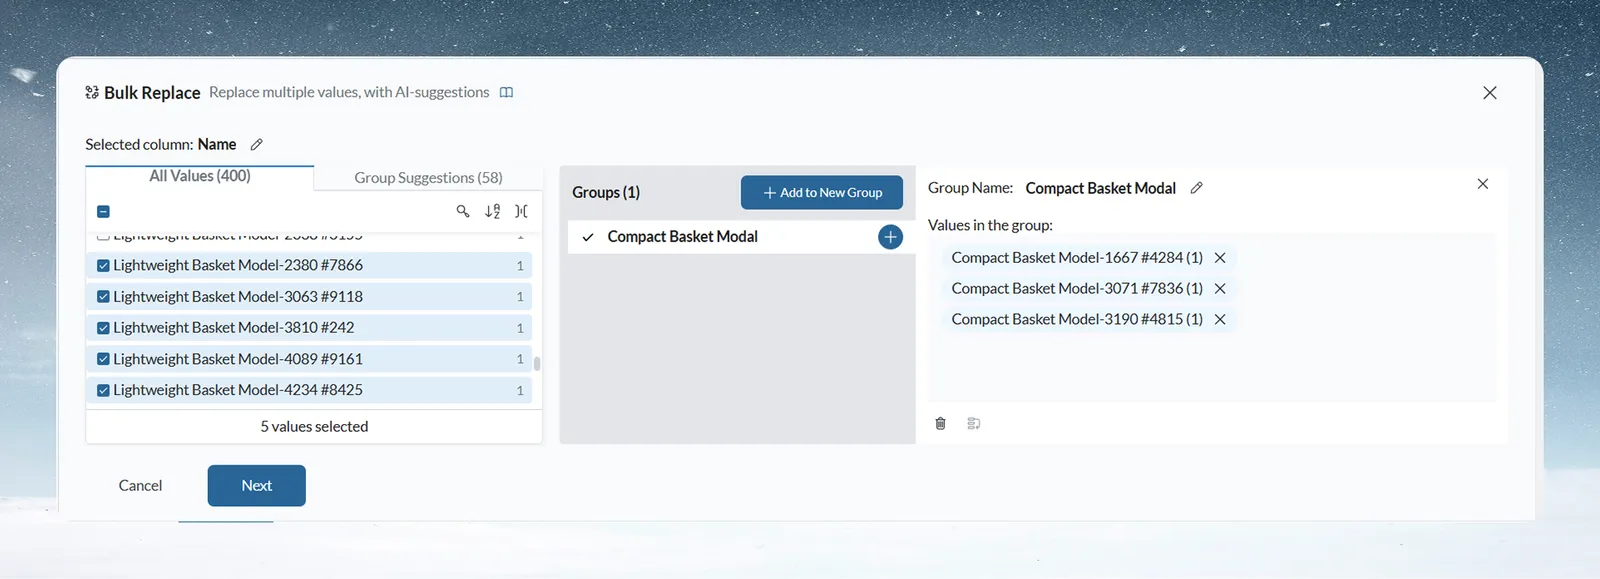
Bulk Replace replaces multiple values in a text column with standardized equivalents using AI-suggested groupings.
How it works:
Step 1—Choose groupings: The panel has two tabs. All Values lists all unique values in the selected column with their row counts. Group Suggestions proposes groupings with suggested replacement names. Review the suggestions, adjust group names, move values between groups, and create additional groups if needed. The Grouping Settings menu lets you change how suggestions are generated (Smart, Spelling Match, Similarity, or Common Patterns). Use Sort Alphabetically or Sort by Quantity to order the values. Inside a group, Add Dynamic Value sets a rule (for example, contains, starts with or is Empty) so that matching values are added to that group. When satisfied, click Next.
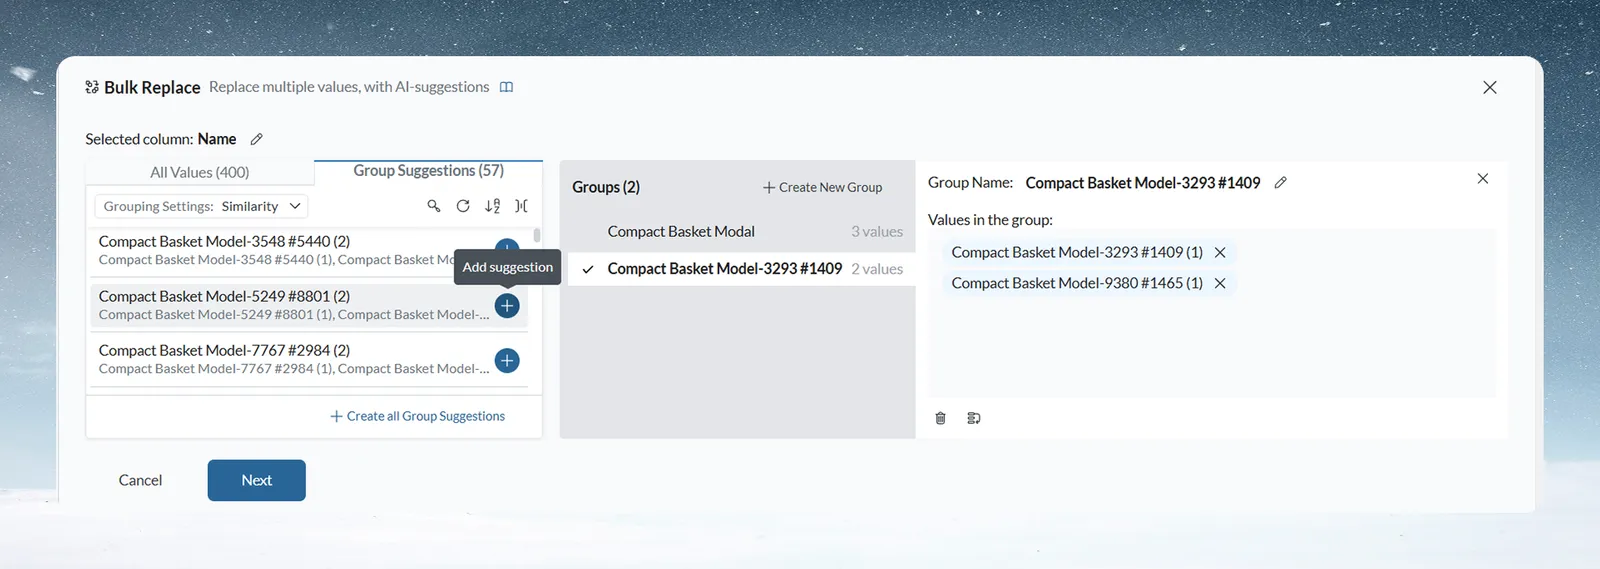
Step 2—Apply rule: A summary step lets you choose where the result goes and add a condition if you want to apply the rule to specific rows. Click Previous to go back, or Apply to finish.
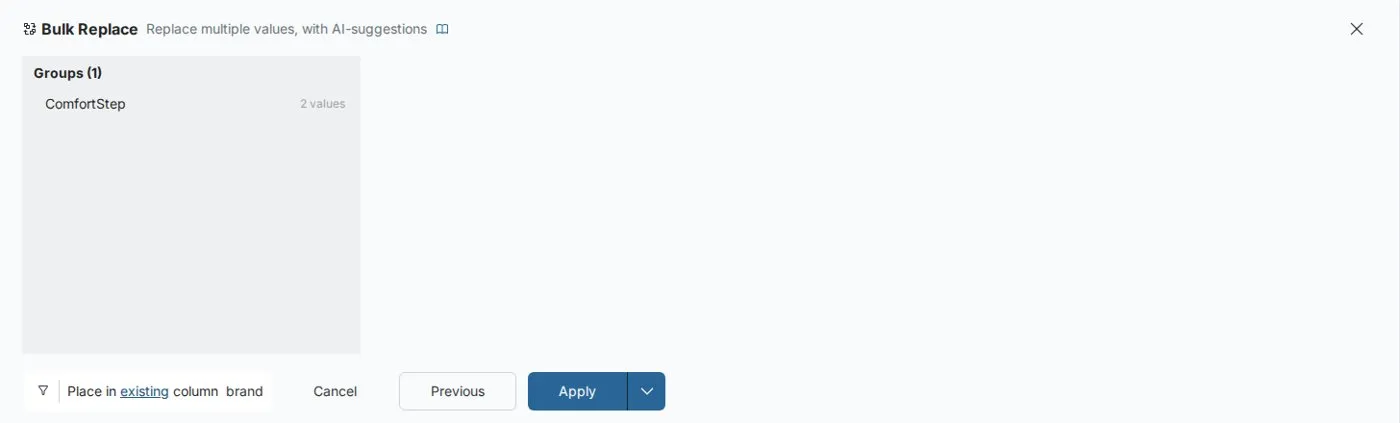
The result is a new column (or the existing column, depending on your choice) with all grouped values replaced by the standardized name you defined.
Use Bulk Replace for company names, product categories, status codes, location labels—any column where the same concept appears in many different forms.
Find & Replace
Find & Replace searches for specific text values in selected columns and replaces them.
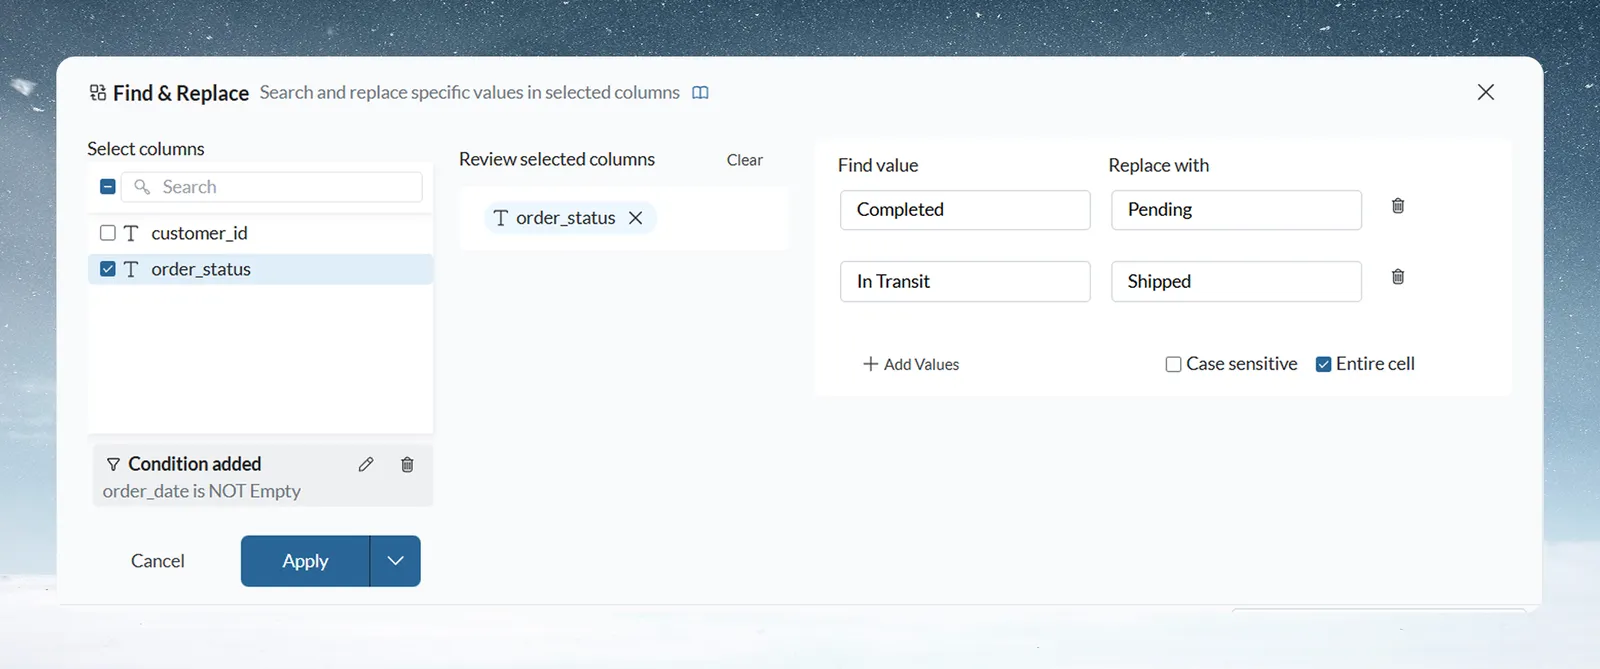
How to configure:
- Select columns—choose one or more text columns to search within.
- Find value / Replace with—enter the value to find and what to replace it with.
- Add Values—add multiple find/replace pairs to handle several substitutions in a single task.
- Case sensitive—when checked, only exact case matches are replaced.
- Entire cell—when checked, only cells whose entire content matches are replaced. When unchecked, partial matches within a cell are also replaced.
- Add Condition—optionally restrict the replacement to rows that meet a condition.
Use Find & Replace for direct, known substitutions. Use Bulk Replace when you have many variations of the same value to consolidate.