Creating a project
This page is for Workspace Owners and Workspace Members who need a new project. It covers creating a project, then leaving or deleting one. Any workspace member can create a project, and you are automatically assigned Project Admin on projects you create.
Prerequisite: You are a member of the workspace.
How to create a project
Step 1: Open the project selector
In the Data Library, click the down arrow next to the current project name in the breadcrumb at the top of the page. The project selector opens, showing all projects you have access to.
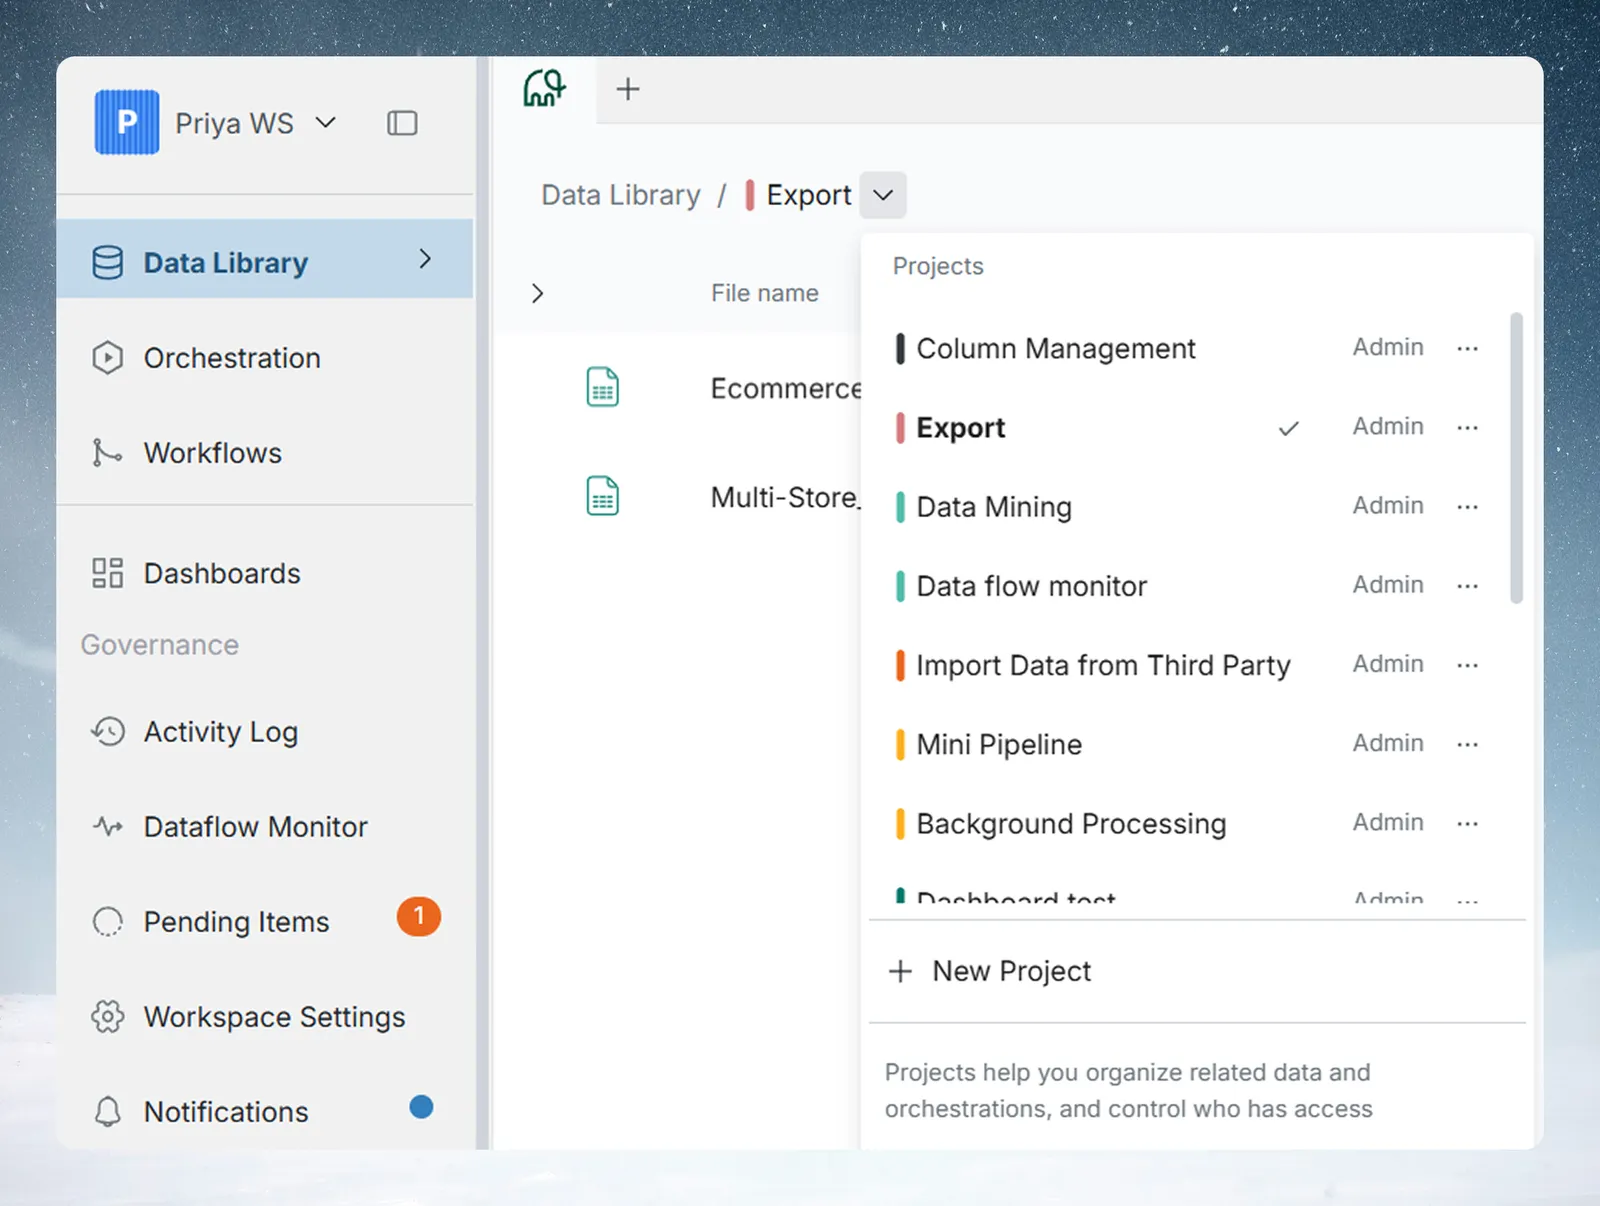
Step 2: Click New Project
Below the project list, click New Project. The New Project modal opens.
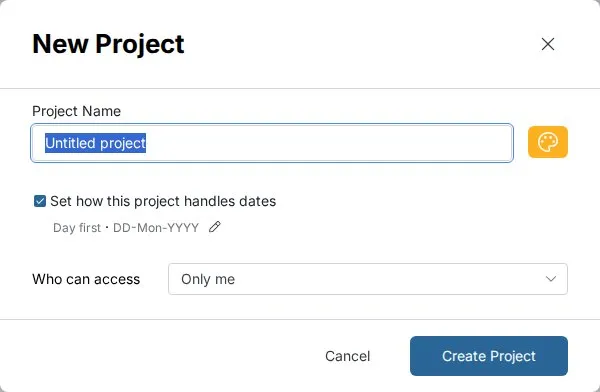
Step 3: Configure the new project
Fill in the fields in the creation modal:
| Field | Details |
|---|---|
| Project Name | Required. Up to 63 characters. A descriptive name helps teammates identify the project. Pre-filled with "Untitled project". |
| Color | Select from 8 preset colors. A random color is pre-selected each time you open the modal. Use color to visually differentiate projects in the project selector. |
| Set how this project handles dates | Checked by default on a new project. Choose how Mammoth reads ambiguous dates in uploaded files (Day first or Month first) and the starting display format for new date columns (default DD-Mon-YYYY). Month first is preselected if your browser time zone is in the US, otherwise Day first. Clear the checkbox to skip date settings. See Project Settings. |
| Who can access | Set initial visibility. New projects start as Only me. See Access levels below. |
Step 4: Add members (if applicable)
If you select "Some people in this workspace" for access, a user list appears. Search for workspace users, assign each a role (Project Admin or Project Editor), and they will be added when you create the project.
Step 5: Create the project
Click Create Project.
Expected result: The project is created immediately and you are switched into it.
Access levels
Set who in the workspace can see and work in the project:
| Option | Who has access |
|---|---|
| Everyone in this workspace | All current workspace members, plus any members added to the workspace in the future |
| Some people in this workspace | Only the users you select—you control the list explicitly |
| Only me | Just you. No other workspace members can access this project until you share it. |
You can change the access level at any time after creation. See Project Settings.
What happens after creation
- You are automatically added as Project Admin.
- The project appears immediately in the project selector dropdown.
- If you chose "Some people in this workspace," the selected users are added in the same operation.
- If you chose "Everyone in this workspace," all current workspace members are added.
- You can start adding datasets and automations right away.
Project naming tips
Good project names help teammates identify a project quickly.
Clear and descriptive:
- "Marketing Analytics - Q2 2025"
- "Finance Reporting - FY2025"
- "Customer Insights - Product Team"
- "Sales Pipeline"
Avoid vague names:
- "Project 1" or "Test"
- "My Data"
- Single letters or abbreviations without context
Managing a project
Open the project manage menu
Click the More options (three dots) button next to any project in the project selector. The menu shows actions available to you based on your role.
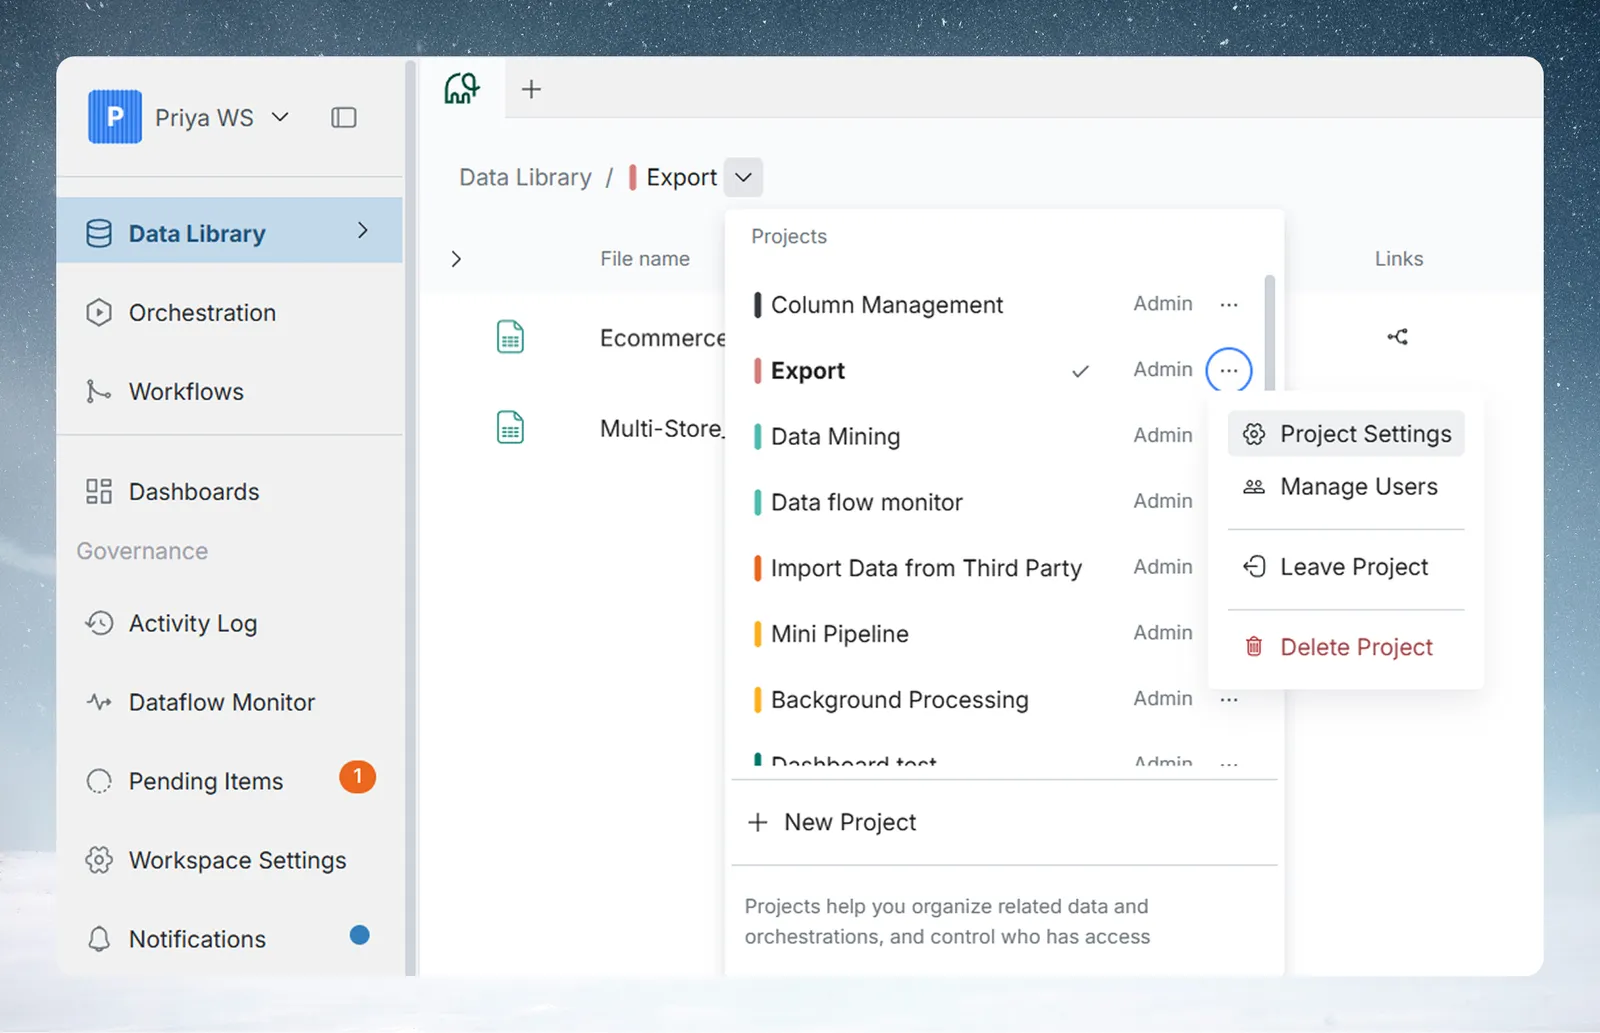
| Menu item | Who sees it | What it does |
|---|---|---|
| Project Settings | Project Admins | Opens the settings modal to rename, recolor, change date settings, or change access |
| Manage Users | Project Admins, Workspace Owners | Opens the user management modal |
| Leave Project | Any project member | Removes your own access to the project |
| Join Project | Workspace Owners who are not members | Adds you to the project as Project Admin |
| Delete Project | Project members (greyed out unless you are a Project Admin) and Workspace Owners | Permanently deletes the project and all its contents |
Leaving a project
Prerequisite: You are a member of the project.
- Open the project selector dropdown.
- Click More options (three dots) next to the project.
- Click Leave Project.
- Confirm in the dialog: "Are you sure you want to leave {project name}? You will lose access to the Project and its contents."
- Click Leave.
Expected result: Your access is removed immediately.
Deleting a project
Deleting a project permanently removes it and all its datasets, automations, and contents for all users.
This action is irreversible. There is no undo.
Prerequisite: You are a Project Admin on the project or a Workspace Owner.
- Open the project selector dropdown.
- Click More options (three dots) next to the project.
- Click Delete Project (shown in red).
- In the confirmation dialog, type
DELETE(all caps) to confirm. - Click Delete.
Expected result: The project and its contents are permanently removed.
Who can delete a project
- Project Admin on that project
- Workspace Owner (even without being a project member)
If you see the Delete Project option greyed out with the tooltip "You need to join the project as an admin to delete it", you do not currently have the required role.
Frequently asked questions
Q: Can all workspace users create projects?
A: Yes. Workspace Owners and Workspace Members can both create projects.
Q: What role do I get on a project I create?
A: You are automatically assigned Project Admin on any project you create.
Q: Can I change the project name or color after creation?
A: Yes. Open the project manage menu, then click Project Settings to edit name, color, date settings, and access at any time.
Q: What is the project name character limit?
A: 63 characters.
Q: What do the date settings do?
A: Reading dates in uploaded files tells Mammoth how to interpret ambiguous dates (for example, 06/12/2025) in CSV, Excel, and PDF files uploaded to this project: Month first reads it as 12 June, Day first as 6 December. Showing dates sets the starting format for new date columns.
Related articles
- Project settings: Edit name, color, date handling, and access
- Sharing a project: Add teammates and manage their roles
- Project roles and permissions: What each role can do
- Projects overview: Understanding projects in Mammoth
Need help? Check the troubleshooting guide or contact Mammoth Support.