Sharing a project
This page is for Project Admins and Workspace Owners who manage who can work in a project. Sharing a project adds workspace users to it, giving them access to all datasets and automations inside. You can assign each person a role (Admin or Editor) and adjust or remove access at any time.
Prerequisite: You are a Project Admin on the project or a Workspace Owner.
Open the Share Project modal
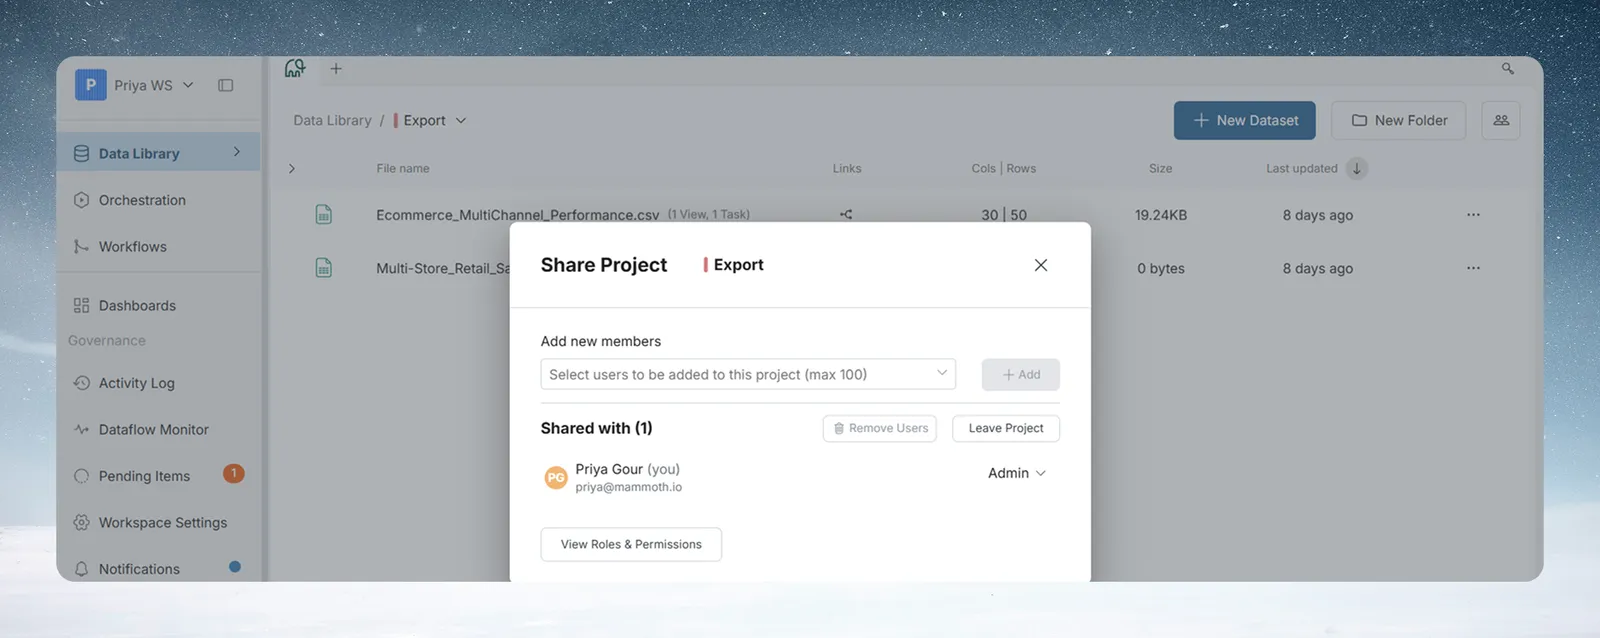
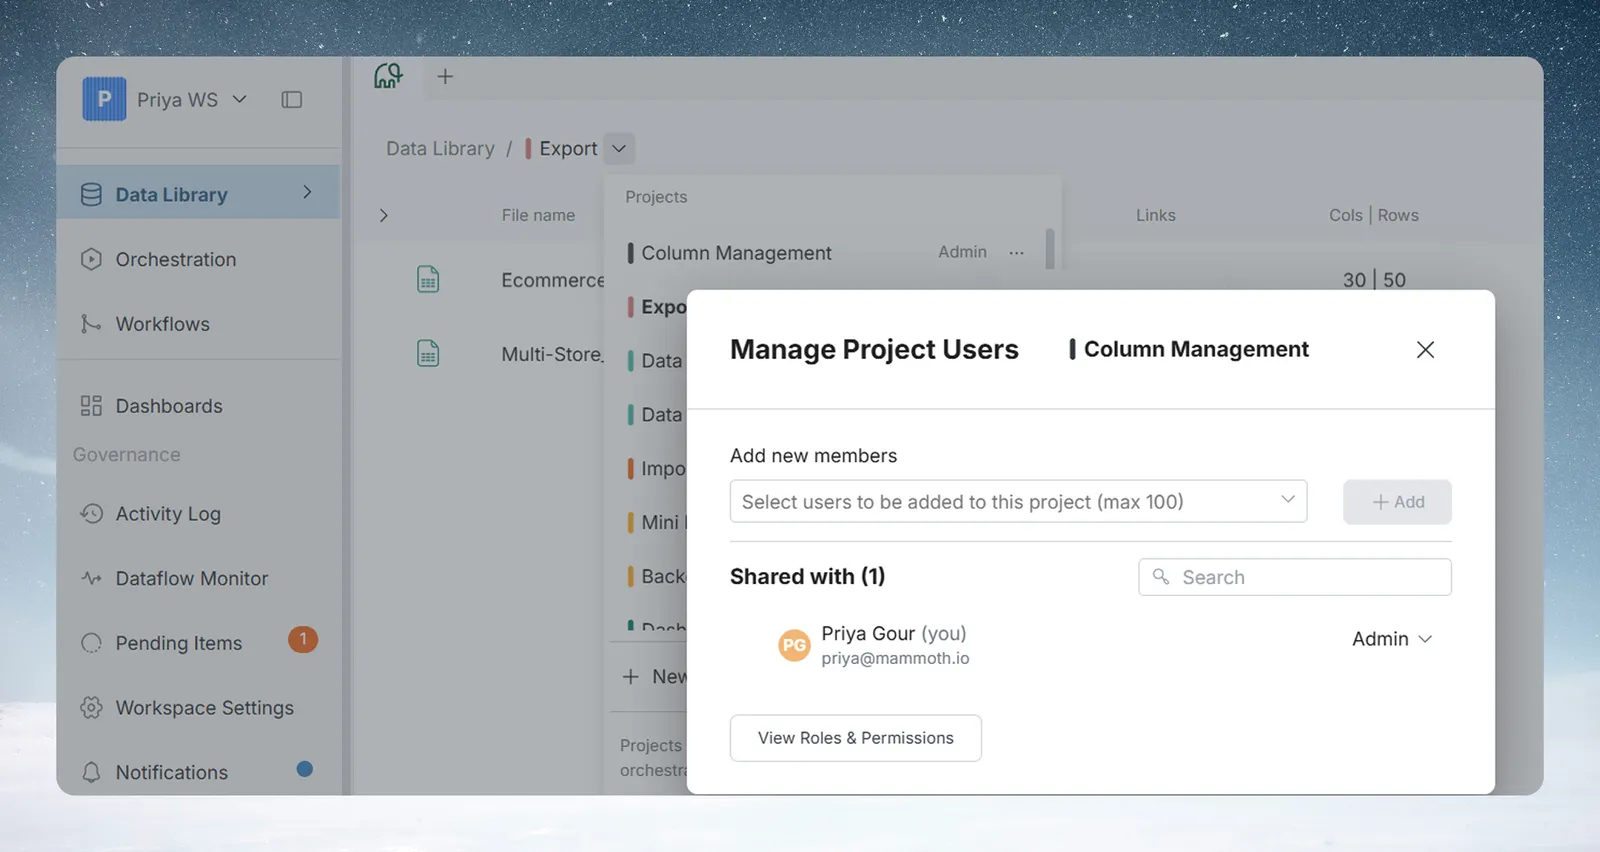
There are two ways to open project sharing. Both open the same modal with the same fields and actions. Only the title in the header differs:
| Entry point | How to access | Modal title shown |
|---|---|---|
| Share button | Click the Share icon in the top-right of the Data Library header | "Share Project" |
| Manage Users in project menu | Project selector → More options (three dots) next to the project → Manage Users | "Manage Project Users" |
What the modal contains
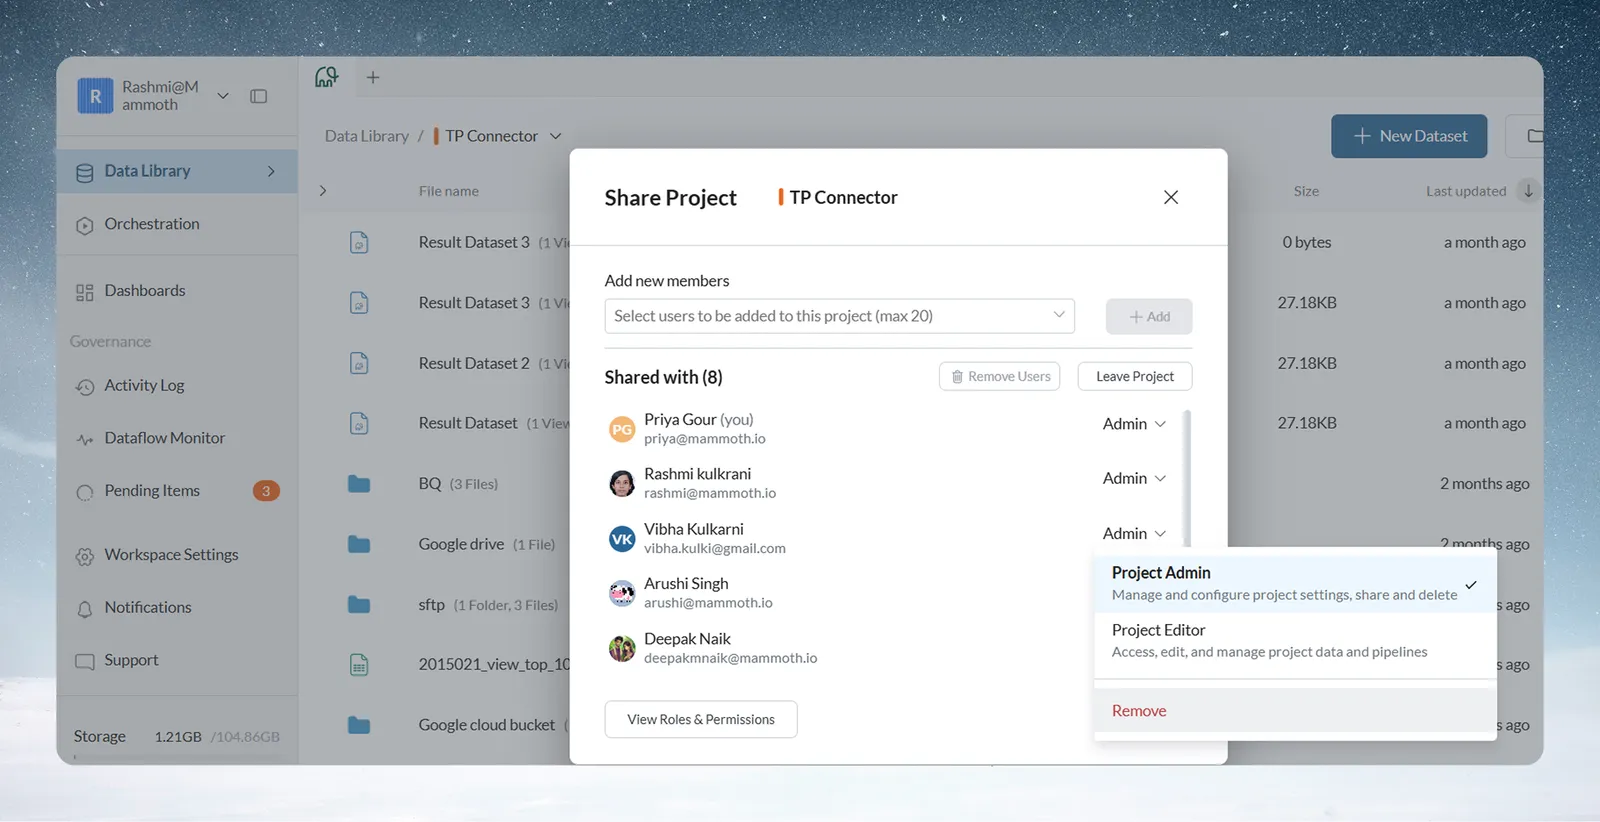
- Add new members by typing names or email addresses. The field placeholder shows the maximum number of users your plan allows.
- View all current members with their roles
- Change individual roles (Admin/Editor) via dropdown
- Remove individual users via the role dropdown Remove option
- View roles and permissions reference
Note: This modal removes users one at a time from either entry point; there is no multi-select removal. A bulk, checkbox-based user picker does exist in Mammoth, but it's part of the Project Settings modal's "Some people in this workspace" configuration, not here. See Project settings.
When to use: Add or adjust access for individual people. Use the header Share button while you're actively working in the project; use the project menu's Manage Users when you want to get there without leaving the project selector.
Adding users to a project
Add existing workspace members
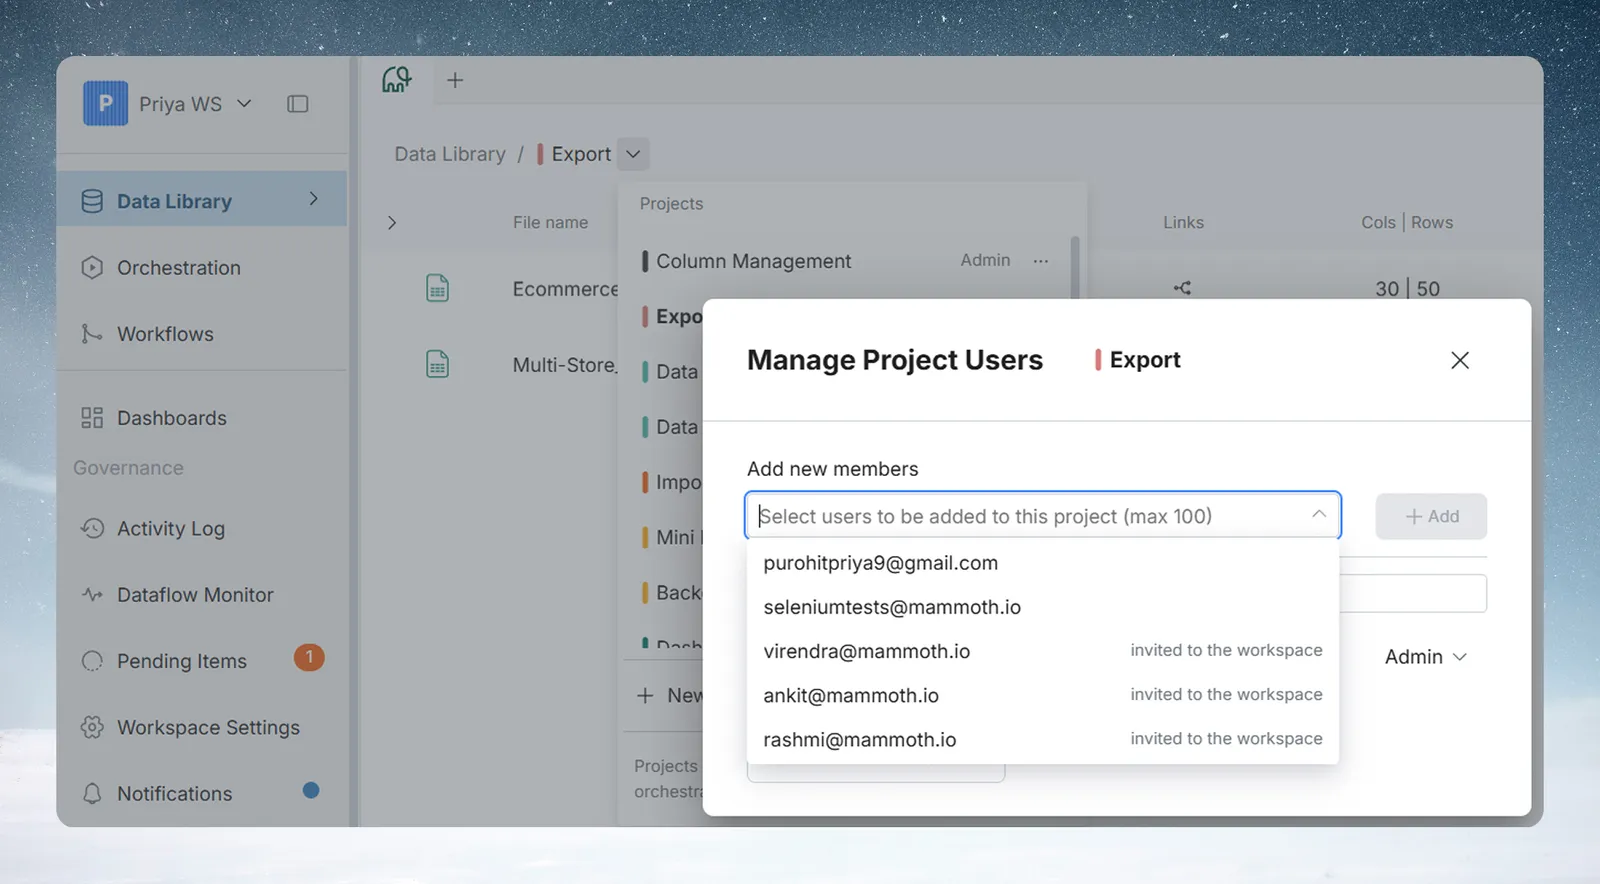
- In the Add new members field, type a user's name or email address.
- Select them from the auto-complete list of workspace users.
- Optionally add multiple users, separated by a comma, semicolon, space, or new line.
- Click Add.
- The user appears immediately in the "Shared with" list with the Editor role by default.
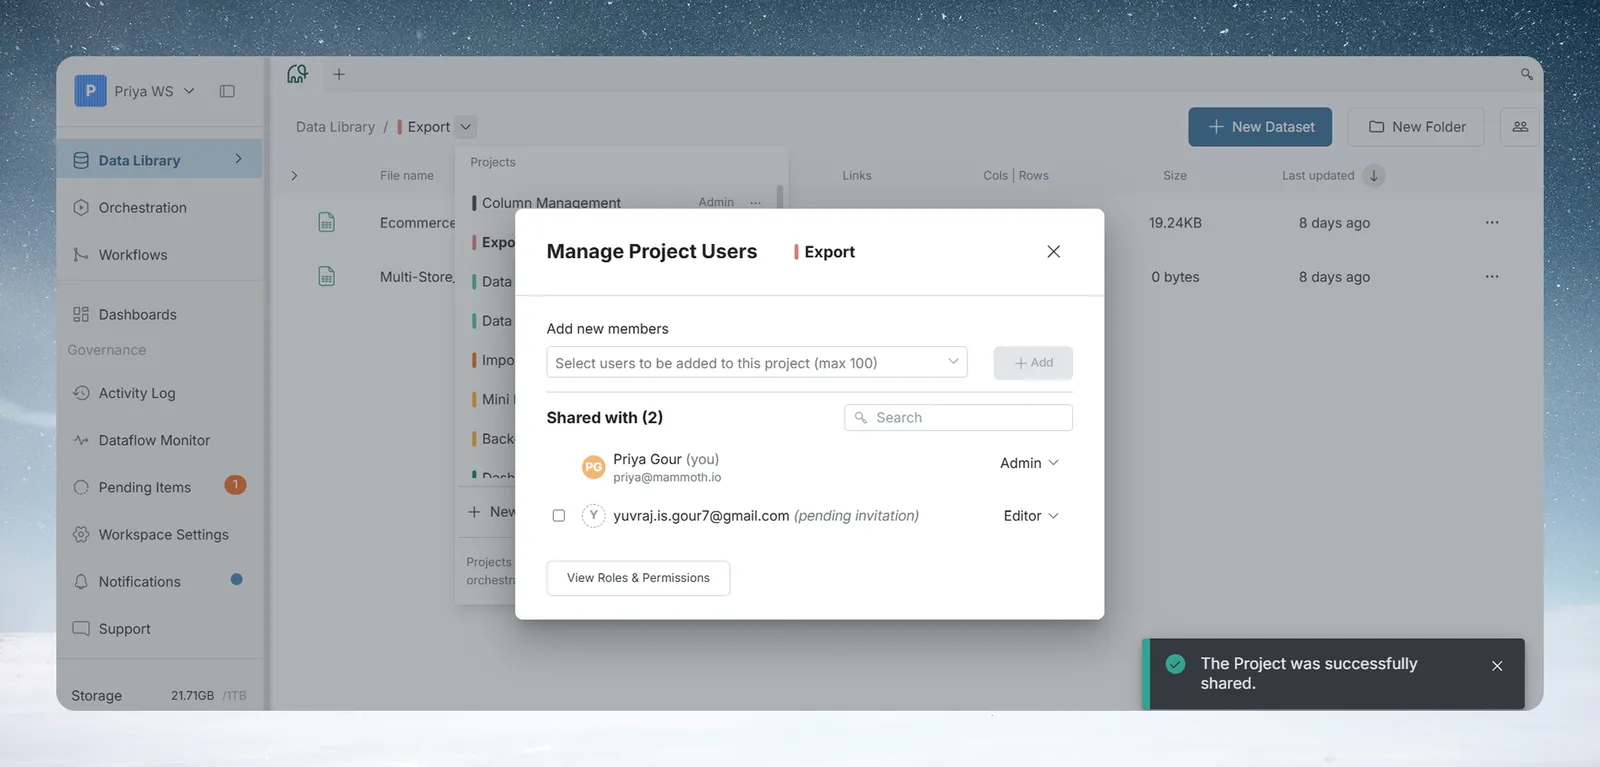
Expected result: A success toast confirms: "The Project was successfully shared."
Invite someone who is not yet in the workspace
If the person you want to add is not yet a workspace member:
- Type their email address in the Add new members field.
- Click Add.
- Mammoth sends them a workspace invitation and adds them to the project in the same operation.
- They appear in the "Shared with" list as (pending invitation) until they accept.
Important: Only users whose role allows inviting external users (Workspace Owners and Project Admins) can invite people who aren't yet in the workspace. If your role doesn't allow it, you will see the message: "Only workspace owners can add new users. You can only add existing users to this project."
User limit
The maximum number of users depends on your plan. The Add new members field placeholder shows it (for example, "Select users to be added to this project (max 10)"). If adding new users would exceed your plan's limit, Mammoth shows a seat-limit warning and blocks the addition.
Changing a user's role
- Find the user in the "Shared with" list.
- Click the role dropdown next to their name (shows Admin or Editor).
- Select the new role.
- The change takes effect immediately.
See Project roles and permissions for what each role can do.
Removing users
Removal works the same way from both the Share Project and Manage Project Users modals, one user at a time:
- Click the role dropdown next to the user's name (shows Admin or Editor).
- Scroll to the bottom of the dropdown menu.
- Click Remove (shown in red).
- The user is removed immediately.
Expected result: The user no longer appears in the "Shared with" list.
Note: On your own row, the last dropdown option reads Leave Project instead of Remove. It starts the same leave flow as the project menu.
Pending invitations
Users who have been invited to the workspace but have not yet accepted appear in the list as:
User Name (pending invitation)
Their role is already assigned and will take effect when they accept the invitation. You can change their role or remove them before they accept.
Leaving or joining a project
Leaving a project
Leave Project is a menu item in the project manage (three dots) menu—see Leaving a project for the full flow. In the Share Project and Manage Project Users modals, the same option appears on your own row.
Joining a project
Workspace Owners who are not currently project members see a Join Project menu item in the project manage menu. Joining adds them to the project as Project Admin.
Viewing roles and permissions
At the bottom of the Share Project modal, click View Roles & Permissions to open an in-app reference showing what Project Admins and Project Editors can do.
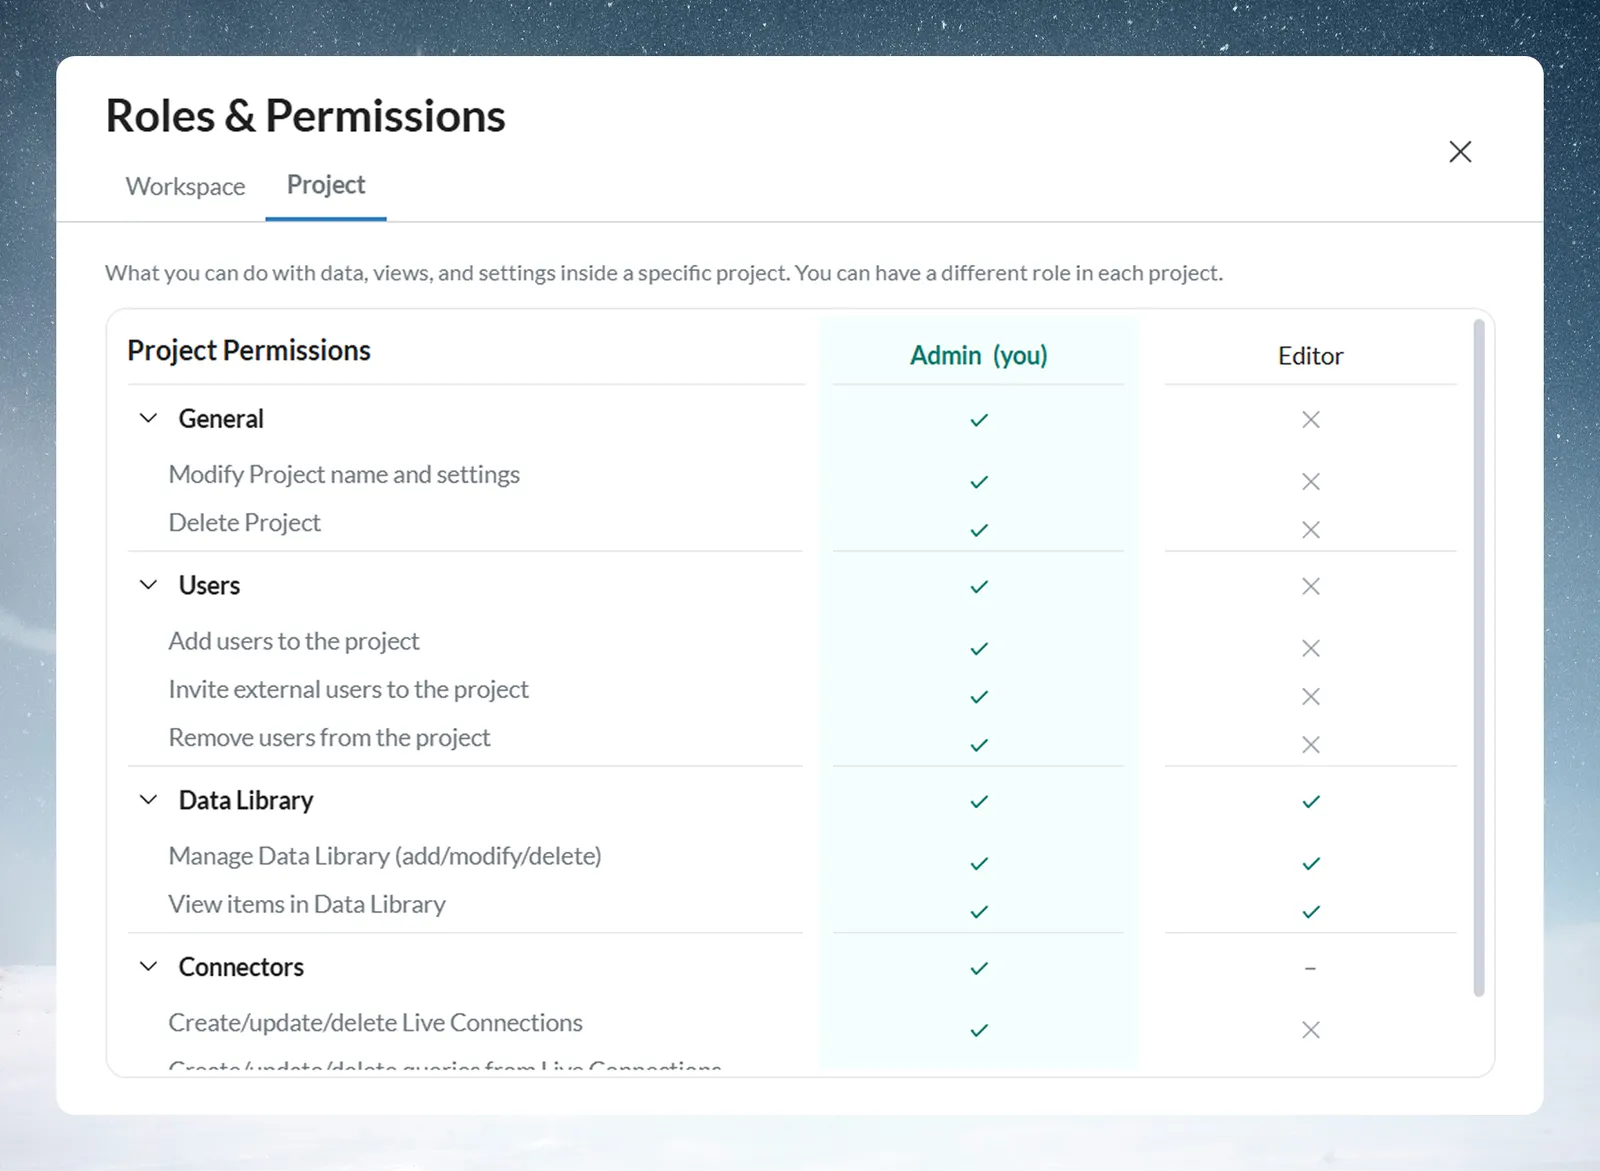
For the full reference, see Project roles and permissions.
Workspace Owner override
Workspace Owners can:
- Add any user to any project, even if they are not a Project Admin
- Manage users on any project from the project manage menu
- View all project names in the workspace
- Delete any project (even if not a Project Admin)
How sharing works behind the scenes
| Operation | What happens |
|---|---|
| Add existing workspace user | User is added to the project |
| Invite new user + add to project | Workspace invitation sent and project membership set |
| Change role | Role updated |
| Remove user | User's project access is removed |
Frequently asked questions
Q: Can I share a project with someone outside my workspace?
A: You can invite external users by email. Mammoth sends them a workspace invitation and adds them to the project. Workspace Owners and Project Admins can invite external users.
Q: I don't see the "Add new members" section—why?
A: The section is only visible to Project Admins and Workspace Owners. If you are a Project Editor, you can view the member list but cannot add users.
Q: What happens to a user's data if I remove them from a project?
A: Their access is revoked, but the datasets and automations they contributed remain in the project. Removing a user does not delete their work.
Q: Can I set a user's role when first adding them?
A: The role defaults to Editor when you add someone. Change it using the role dropdown immediately after they appear in the list.
Q: Why does the user count in "Shared with (N)" include me?
A: The count includes all members, including you. Your own entry is marked with "(you)".
Q: Can I transfer Project Admin to someone else?
A: Yes. Change another user's role to Admin using the role dropdown. There is no limit on the number of admins a project can have.
Related articles
- Project roles and permissions: Detailed permission breakdown for Admin and Editor
- Project settings: Change project access level (Everyone, Some people, or Only me)
- Creating a project: Add initial members during project creation
- Projects overview: Understanding projects in Mammoth
Need help? Check the troubleshooting guide or contact Mammoth Support.