Dataset Refresh
Dataset Refresh automatically re-fetches data from a cloud source on a schedule, keeping your dataset current without any manual intervention.
When you connect a dataset to a third-party source—such as Google Sheets, Salesforce, or a database—it captures a snapshot of the data at that moment. Dataset Refresh replaces that snapshot with the latest data from the source at the interval you set.
Before you start
The datasets you want to refresh must already be connected to a cloud source. If a dataset was created by uploading a file rather than connecting to a live source, it cannot be refreshed with this automation.
Creating a Dataset Refresh automation
Step 1: Open the creation wizard
Automations can be created from many places in the app — the Data Library header, a folder or dataset's context menu, the preview panel's Automation section, or the Automations list — not only from a dedicated Automations page. Triggering any of these opens the create automation modal.
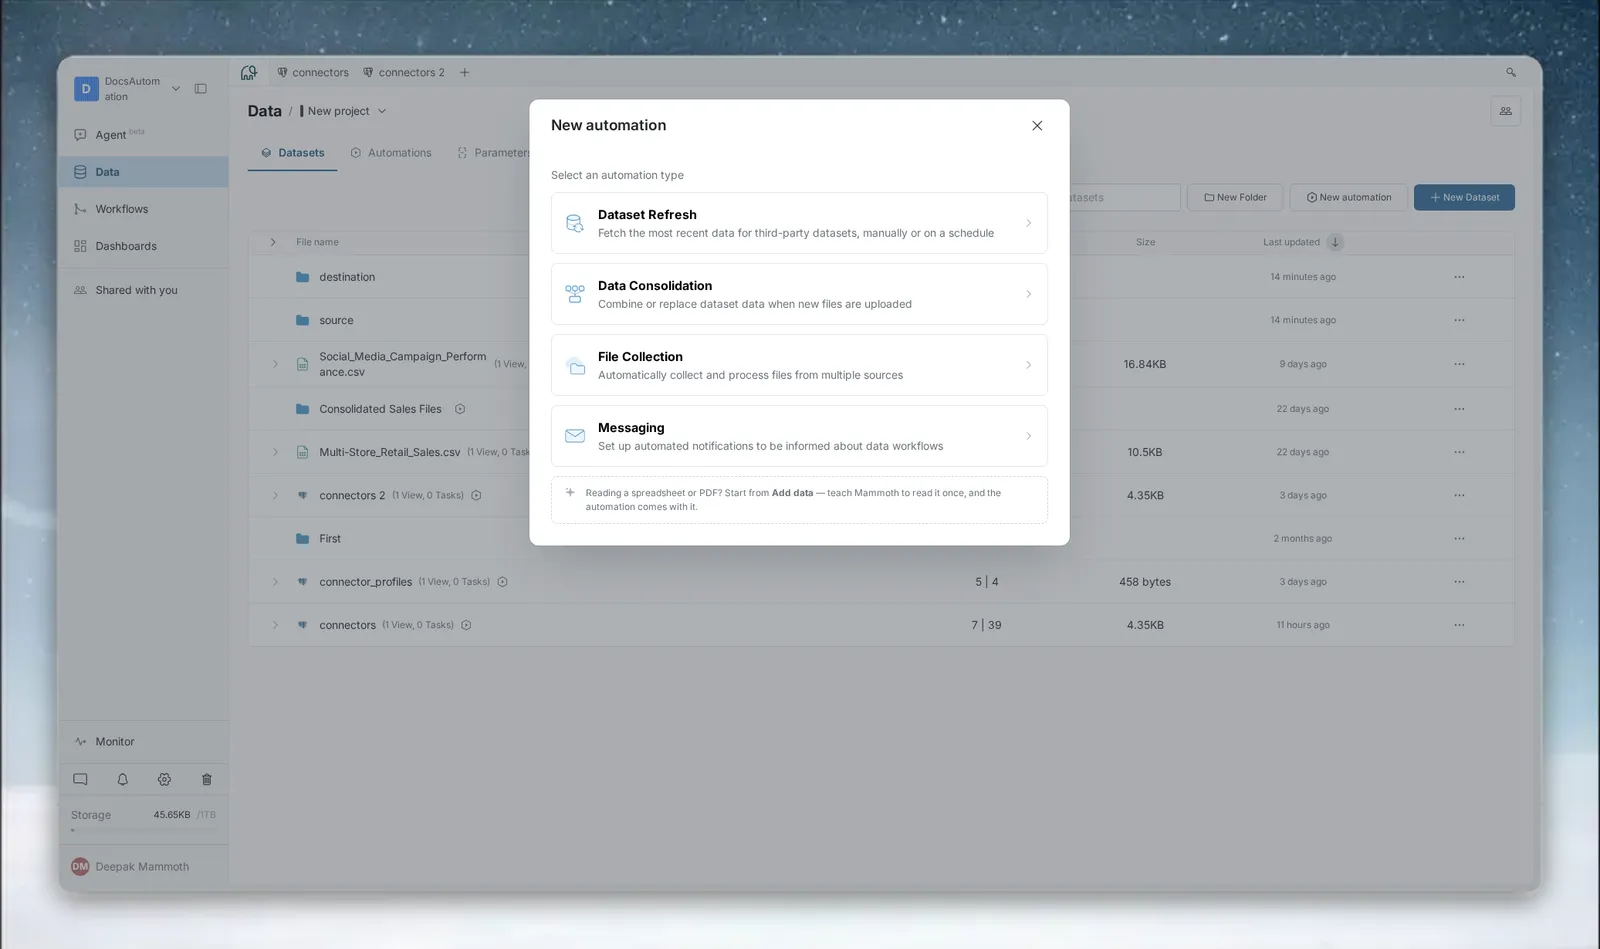
In the type picker, select Dataset Refresh. The wizard then shows a step indicator across the top (e.g. "Select datasets" → "Set Schedule" → "Review & save") and advances to the first Dataset Refresh step.
Step 2: Select datasets to refresh
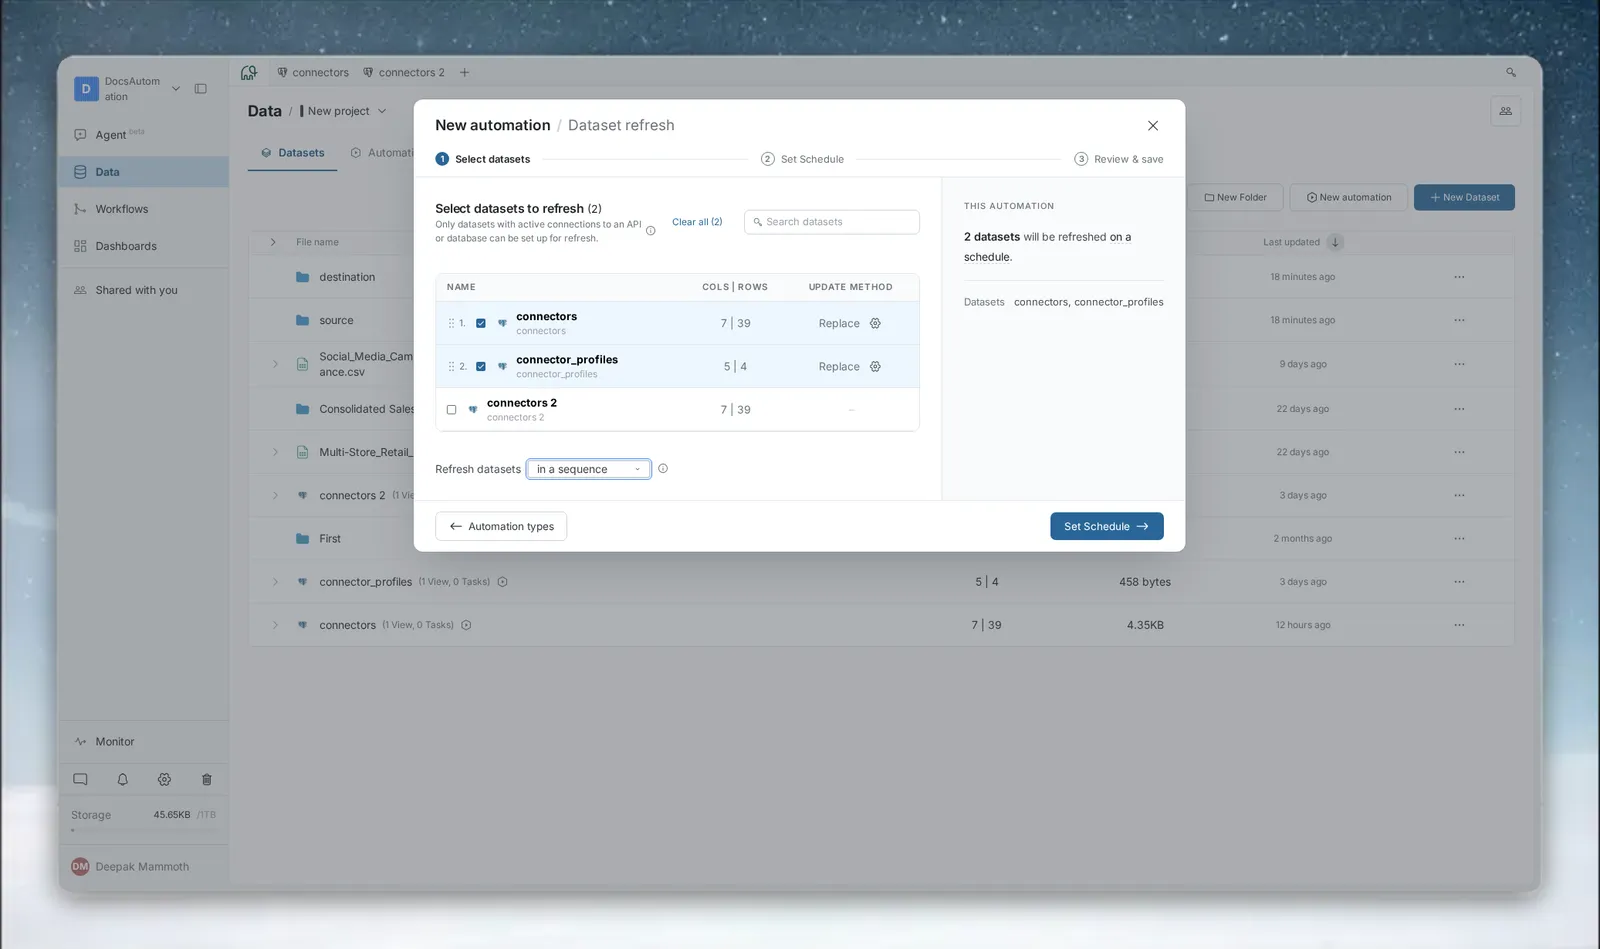
In the Select datasets to refresh step, choose which datasets this automation should refresh. Only datasets connected to an API or database are listed; a tooltip clarifies that databases, cloud apps, and APIs can be re-pulled on a schedule, but uploaded files can't.
- You can add multiple datasets to a single automation—they will all refresh on the same schedule.
- When you add several datasets, choose In parallel to refresh them all at once, or In a sequence to refresh them one after another in the numbered order shown next to each dataset. Drag datasets using the handle to reorder them.
- Each selected dataset shows its Update method, which controls how incoming data is merged (Combine or Replace), editable inline from the same row.
Refresh methods:
| Method | Behavior |
|---|---|
| Combine | Appends new data to existing rows in the dataset |
| Replace | Overwrites the dataset with the latest data from the source |
Step 3: Configure the schedule
In the Set Schedule step (also referred to as Schedule), choose between two cards: On schedule (you can still run it manually at any time) or Manual only, which has no automatic runs — the automation then runs only when you trigger it manually or via the API.
For On schedule, set Repeat every (a frequency unit and a number) and, under More options, the start and end of the schedule.
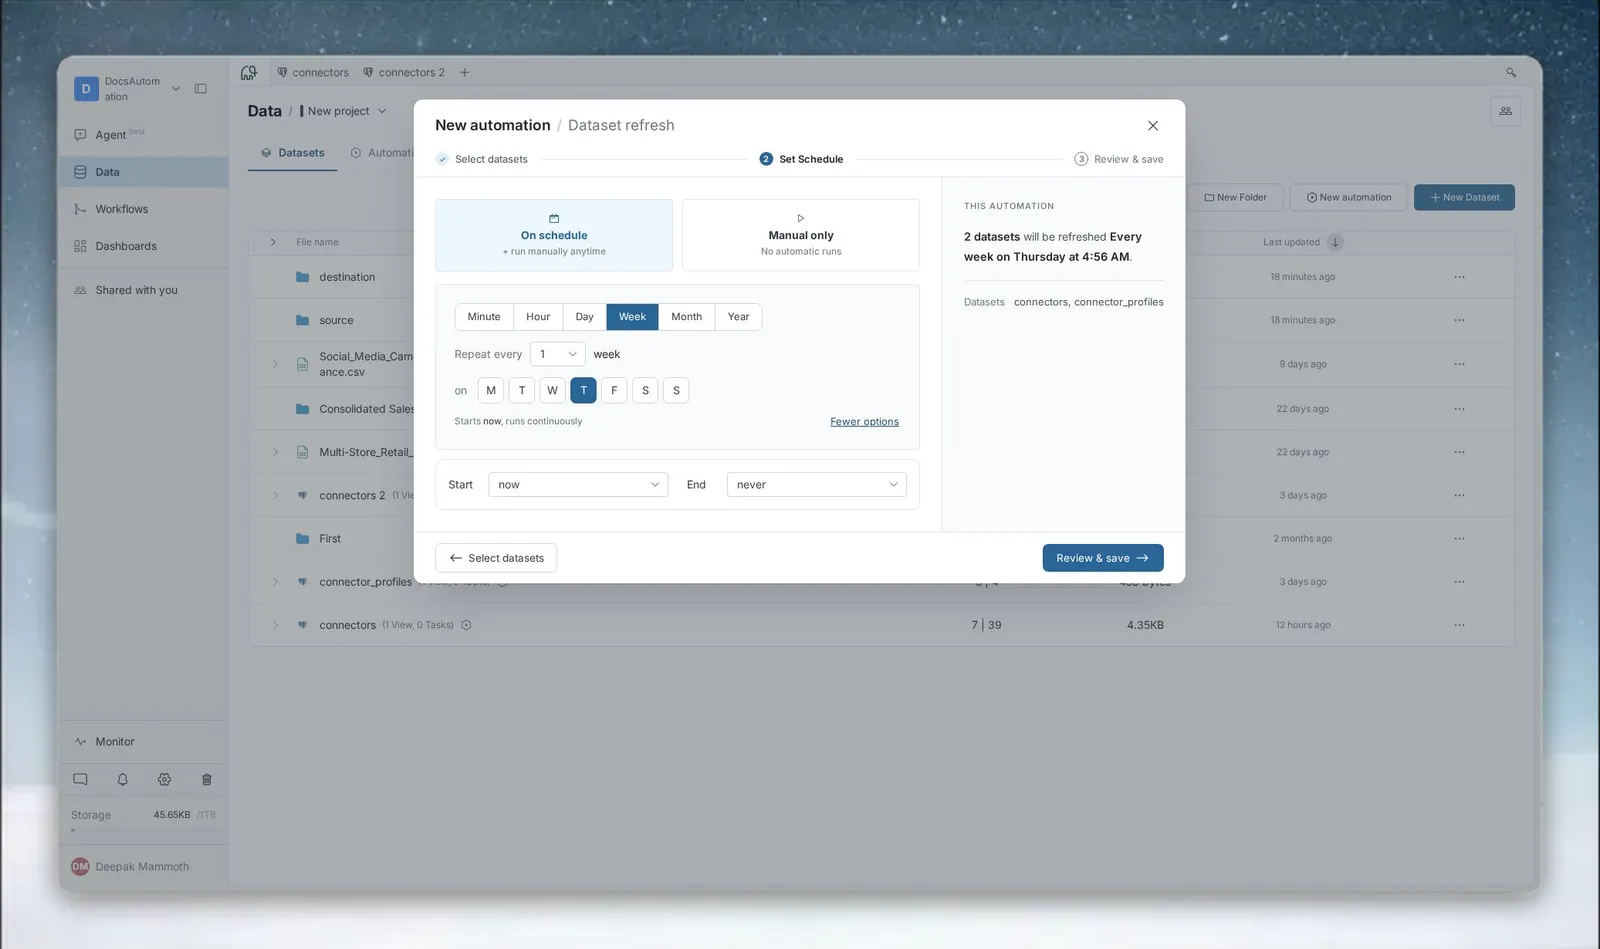
The frequency units, the intervals available on each plan, and the start and end options are the same for every automation type. See Scheduling for the full reference. If you change none of the schedule options, the automation starts immediately and runs indefinitely.
Step 4: Review and save
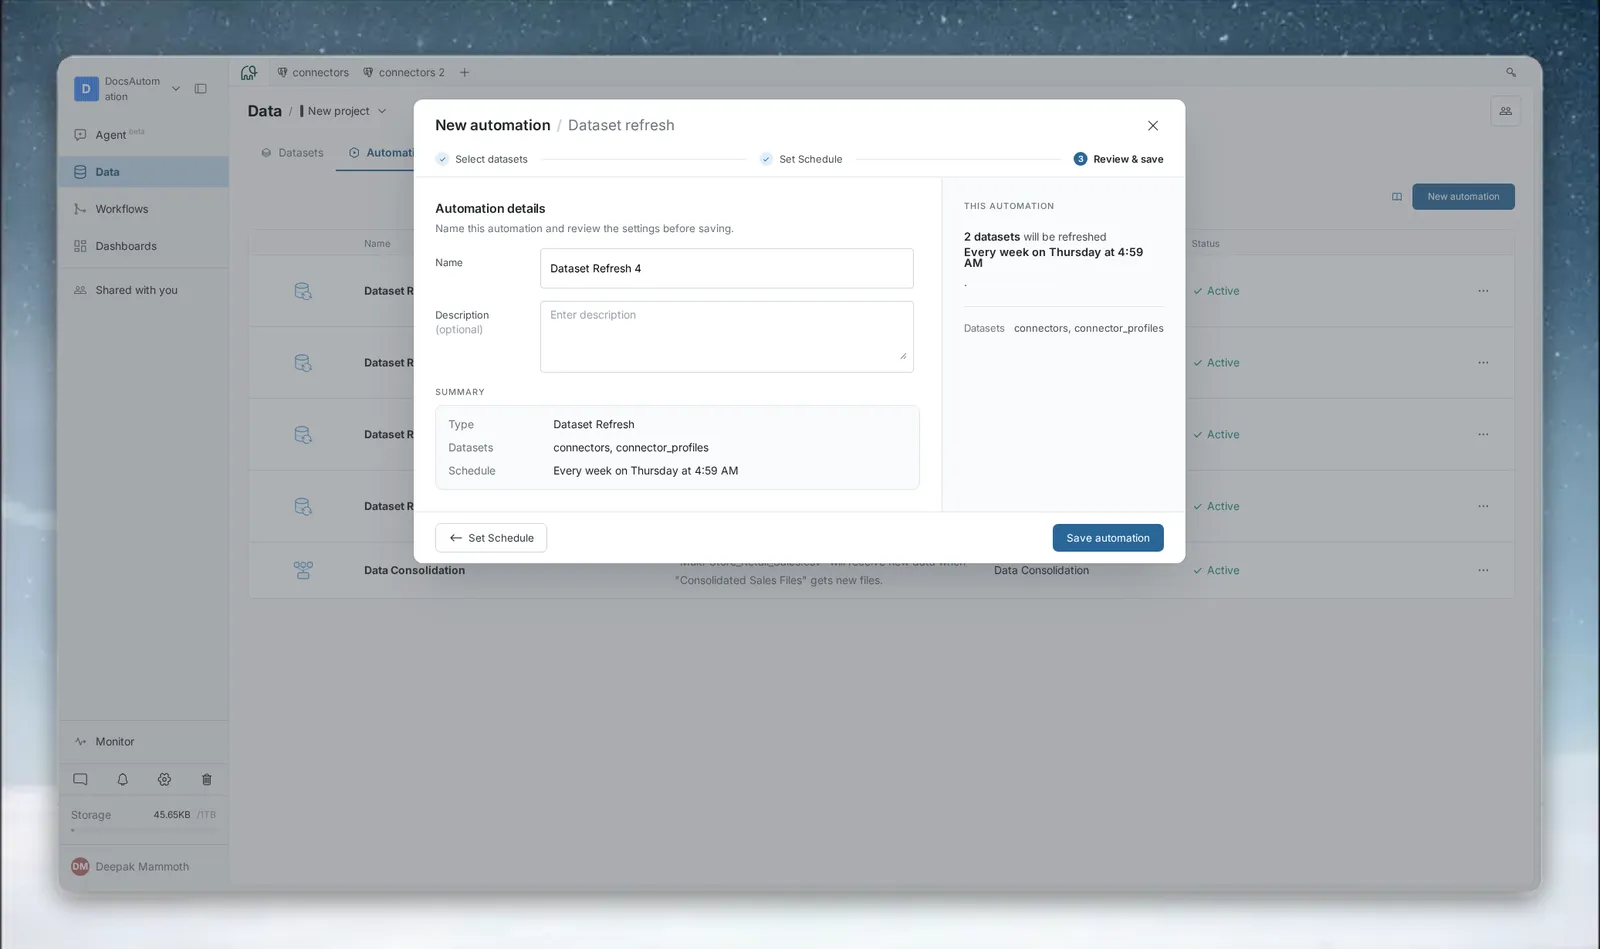
On the Review & save step, enter a descriptive name and optional description, review the automation summary (datasets, schedule, and type), and click Save automation.
After creation
The automation appears in the list with status Active. The Details column shows a summary like: "Dataset 'products' will be refreshed every 3 hours."
The automation will execute at each interval. You can also trigger it manually at any time using Run now from the detail panel or three-dot menu.
Viewing refresh status
Click the automation row to open the detail panel. The Automation Summary section shows:
- Refresh method—The schedule (e.g., "On schedule, every 3 hours")
- Next run—When the next refresh is scheduled
- Ends—End date, or "Never"
- Dataset—The datasets being refreshed
Editing a Dataset Refresh automation
Open the automation from the Automations list (or from a dataset's preview panel Automation section) and choose Edit from the three-dot options menu. This opens the automation edit modal directly over whatever page you're currently on — there is no separate edit page to navigate to.
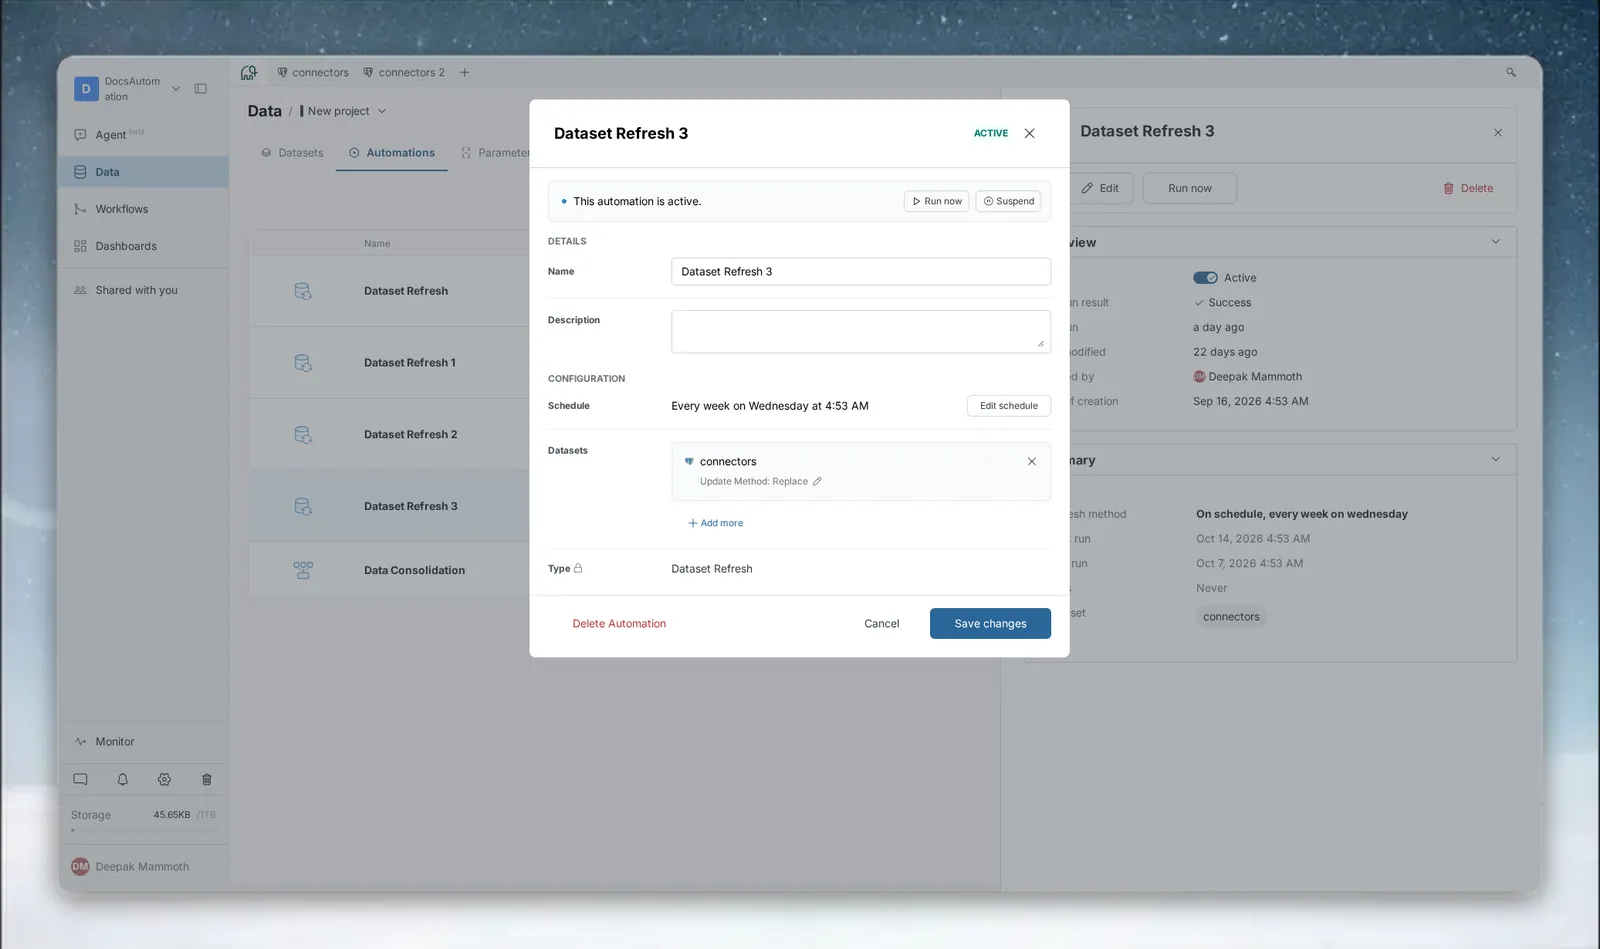
Status and quick actions
At the top of the modal, a banner shows the automation's current status:
- Active — the automation is running on schedule. You can click Run Now to trigger an immediate run, or Suspend to pause scheduled runs.
- Suspended — scheduled runs are paused. Click Resume to reactivate the automation.
- Error — the automation has an error.
Making changes
In the DETAILS section you can:
- Rename the automation
- Update its description
In the CONFIGURATION section you can:
- Click Schedule → Edit to expand the schedule editor and change the frequency, interval, weekday selection, and start/end dates
- Add datasets to the refresh list via Add more, or remove a dataset from the list
- When multiple datasets are selected, drag to reorder them and choose whether they refresh In parallel or In a sequence
- Adjust each dataset's update method inline
- The automation Type is shown for reference but cannot be changed
Click Save changes to apply your edits, or Delete Automation to move the automation to Trash. Changes take effect from the next scheduled run.
Troubleshooting
Status shows Error
Cause: The source connection expired or changed, or the source data structure changed in a way that is incompatible with the existing schema.
Fix: Re-authenticate the connection in your Data Library. If the structure changed, check the source columns against the dataset schema.
Automation runs but data doesn't change
Cause: The source has not updated since the last refresh. This is expected: the automation pulls whatever the source currently contains.
Fix: Check the source for new data, or use Run now after the source updates.