File Upload
Upload files from your computer to create datasets in Mammoth. Mammoth detects the structure and column types after you submit. You can upload a single file, several files, or a whole folder.
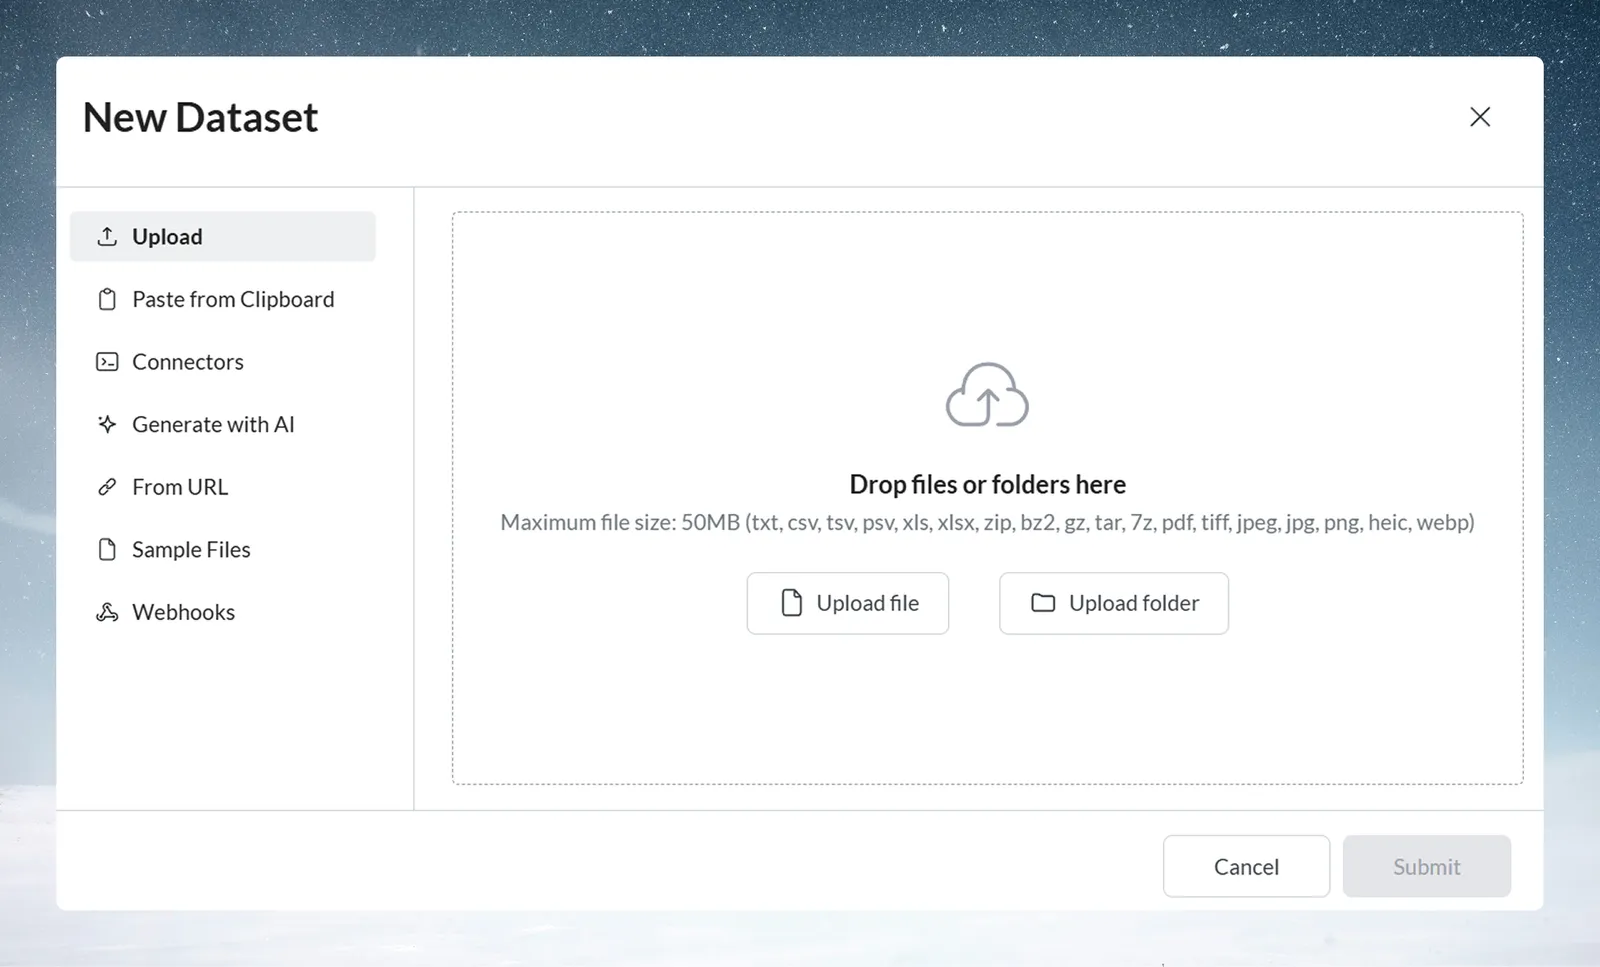
Supported file formats
Mammoth supports the following file types:
Data files
These formats are parsed directly into structured datasets with automatic column and type detection:
| Format | Extension | Notes |
|---|---|---|
| Plain text | .txt | Delimiter auto-detected |
| Comma-separated values | .csv | Most common data format |
| Tab-separated values | .tsv | Tabs as delimiters |
| Pipe-separated values | .psv | Pipes as delimiters |
| Microsoft Excel | .xls, .xlsx | Files with multiple sheets show an Extract sheets action after upload |
| XML | .xml | Converted to structured tabular data |
Compressed files
Mammoth automatically extracts compressed files during upload. The extracted contents are processed as if uploaded directly:
| Format | Extension |
|---|---|
| ZIP archive | .zip |
| Bzip2 compressed | .bz2 |
| Gzip compressed | .gz |
| Tar archive | .tar |
| 7-Zip archive | .7z |
Documents and images
These formats are processed using AI-assisted extraction, converting unstructured content into structured datasets. They appear only when enabled for your workspace:
| Format | Extension |
|---|---|
.pdf | |
| TIFF image | .tiff, .tif |
| JPEG image | .jpeg, .jpg |
| PNG image | .png |
| HEIC image | .heic, .heif |
| WebP image | .webp |
CSV files are processed fastest and most reliably. When exporting from other systems, choose CSV over Excel when possible for better performance.
How to upload files
Upload a single file
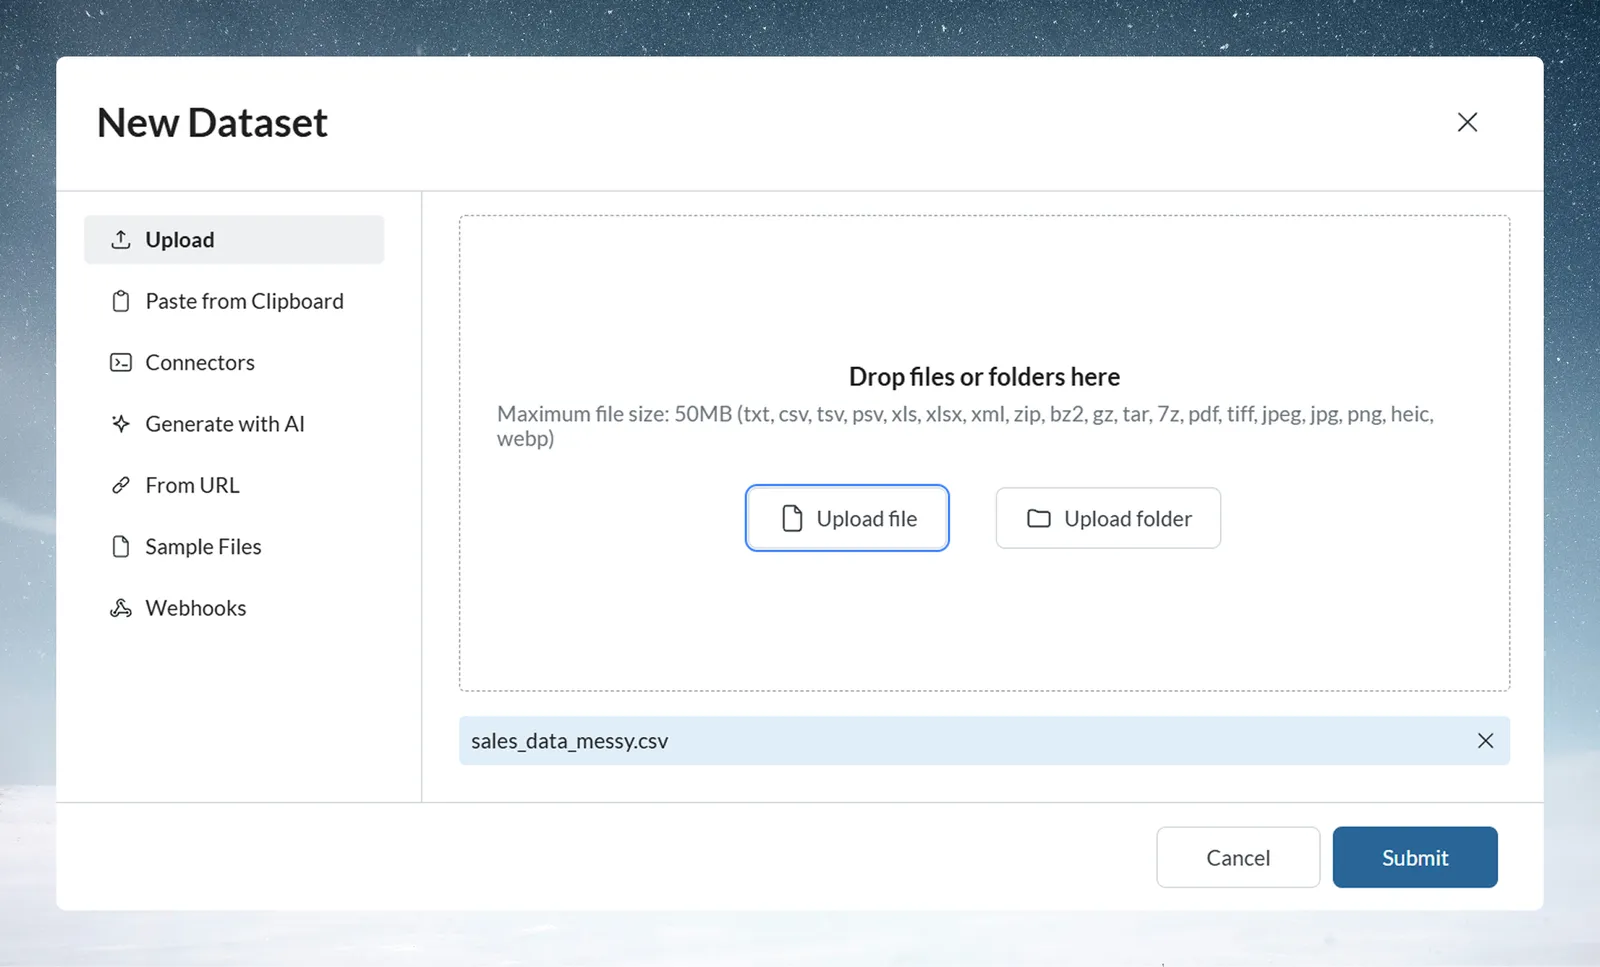
This is the most common workflow for ad-hoc analysis:
- Click + New Dataset in your Data Library
- Select Upload (this is the default option)
- Either drag your file into the upload area OR click "Upload file"
- Click Submit
The dialog closes right away and the file appears in the Data Library as a pending item. Mammoth then reads the file, scans it for security risks, and creates the dataset. A progress header shows the upload count ("Uploading N items", then "Upload complete"), and you can cancel uploads that are still running.
If you select several files individually, each file becomes its own dataset.
After upload: what you will see
Open the new dataset from the Data Library to see the Dataset Detail Panel. It summarizes what was ingested and lets you configure how future data additions are handled.
The panel contains these sections:
- Overview—Views associated with this dataset, plus a preview of a sample of your data
- Settings—Controls for Update method, Schema handling, and Cell editing for future batches
- Batches—Version history of all data uploaded to this dataset
- Automations—Automations that use this dataset
See Dataset Detail Panel for details.
When Mammoth needs your input
If Mammoth can't finish creating the dataset on its own, the dataset's panel shows an Action needed section. Which action appears depends on the file:
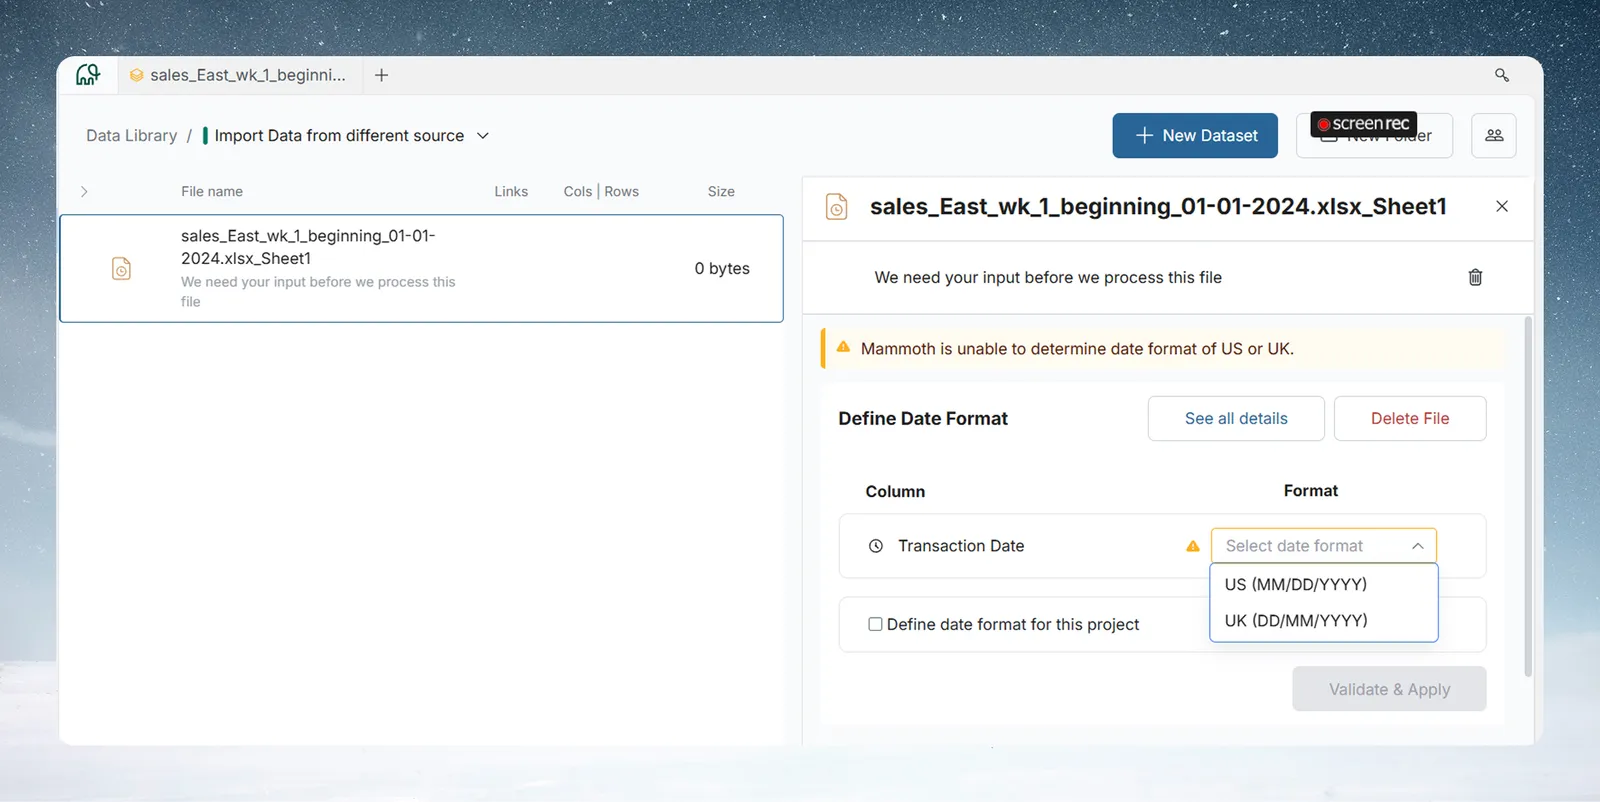
- Define Date Format—Mammoth can't tell whether dates are US or UK format. See Upload validation prompts.
- Review & Fix—The file has more than one plausible way to be read. The review dialog shows how Mammoth read the file and has an instruction box where you describe how it should be read. Choose Looks right to accept, or Import as is to skip the interpretation. On the save step you name the dataset and choose whether to refresh it manually or automatically by watching a folder, then click Create dataset or Create dataset + automation.
- Extract sheets—An Excel file has multiple sheets. Pick the sheets or tables to import, optionally tell Mammoth how to read each sheet, and click Save N datasets. You can also choose Import as is.
- What to import (PDF)—Choose All content, Only tables, or a custom instruction describing what to extract.
- Password-protected files—Mammoth asks for the password before it can read the file.
- Corrupt files—The panel shows "This file seems to be corrupt" and lets you delete the file.
If the virus scan flags a file, it is rejected as a dangerous file and isn't imported.
Upload a folder
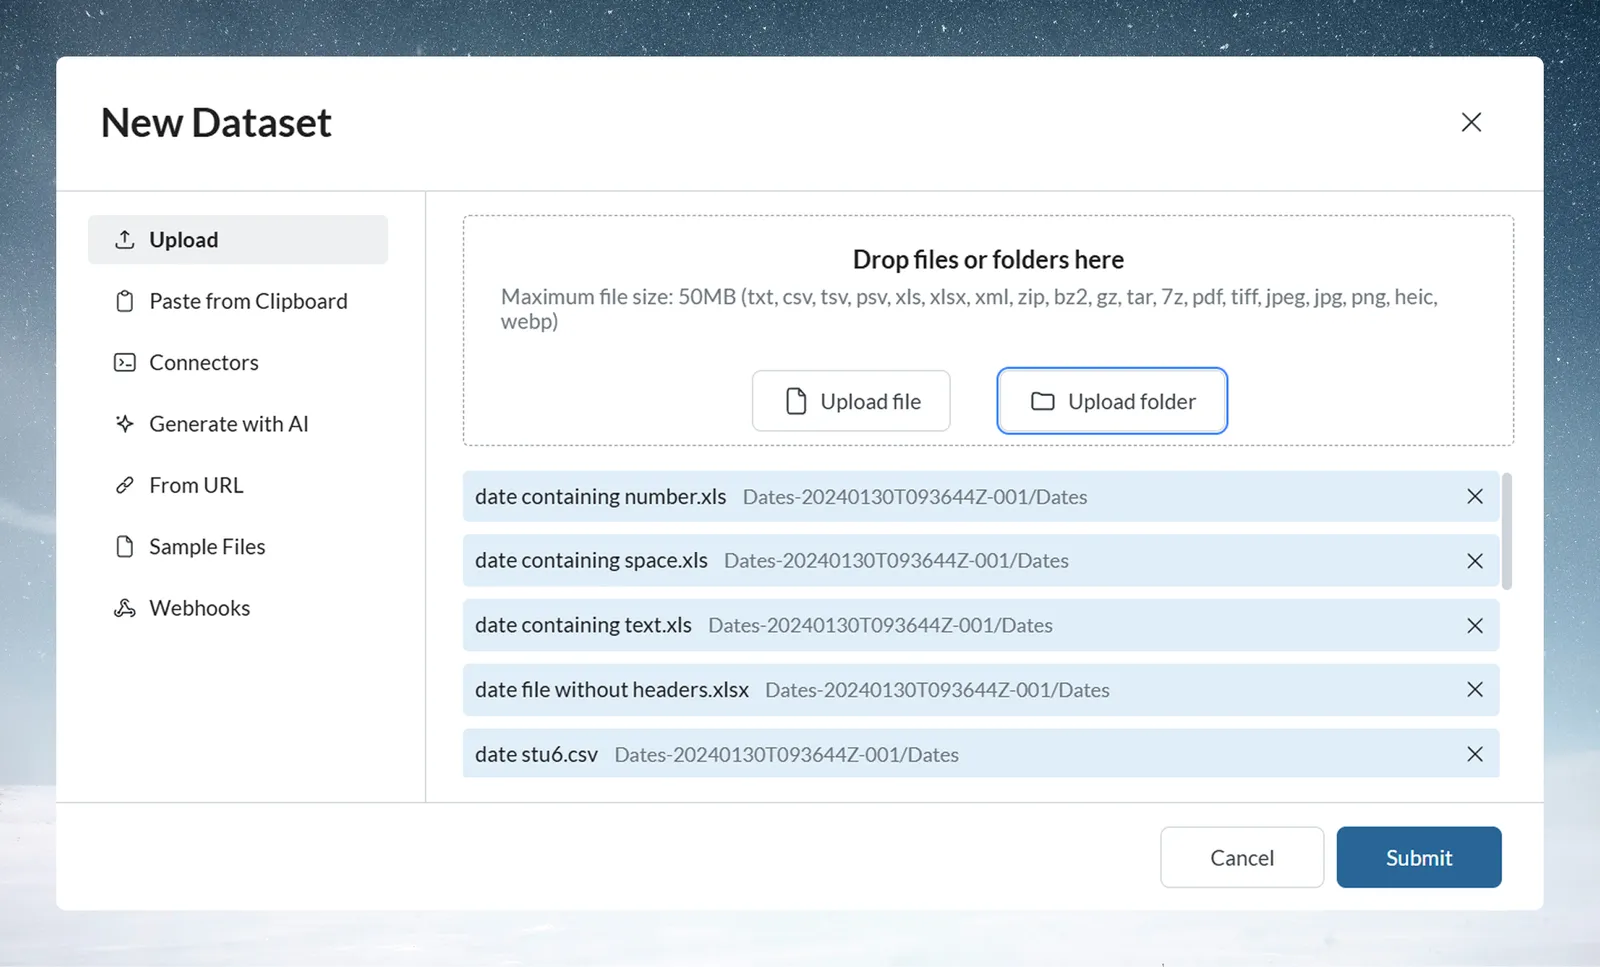
When you have multiple related files to upload at once, use the folder upload option instead of selecting files individually.
Steps to upload a folder
- Click + New Dataset → Upload
- Click Upload folder and select the folder from your system
- Click Submit
A folder becomes one dataset, with all its files combined.
Folder upload requirements
- The whole folder must be under 50 MB, because it is uploaded as a single request
- Files should share a consistent schema (matching column names and types)
- Only supported file types can be added
Best for: Monthly batch files, multi-location data consolidation, large grouped exports
Advanced upload features
Upload validation prompts
If your file has issues, Mammoth pauses processing and provides specific guidance directly in the Data Library. Common scenarios include:
- Date format ambiguity—Mammoth cannot determine US (MM/DD/YYYY) or UK (DD/MM/YYYY) format. The Define Date Format table in the Action needed section lists each affected column with a sample value and a format dropdown. Choose the formats, optionally select Define date format for this project, and click Validate & Apply.
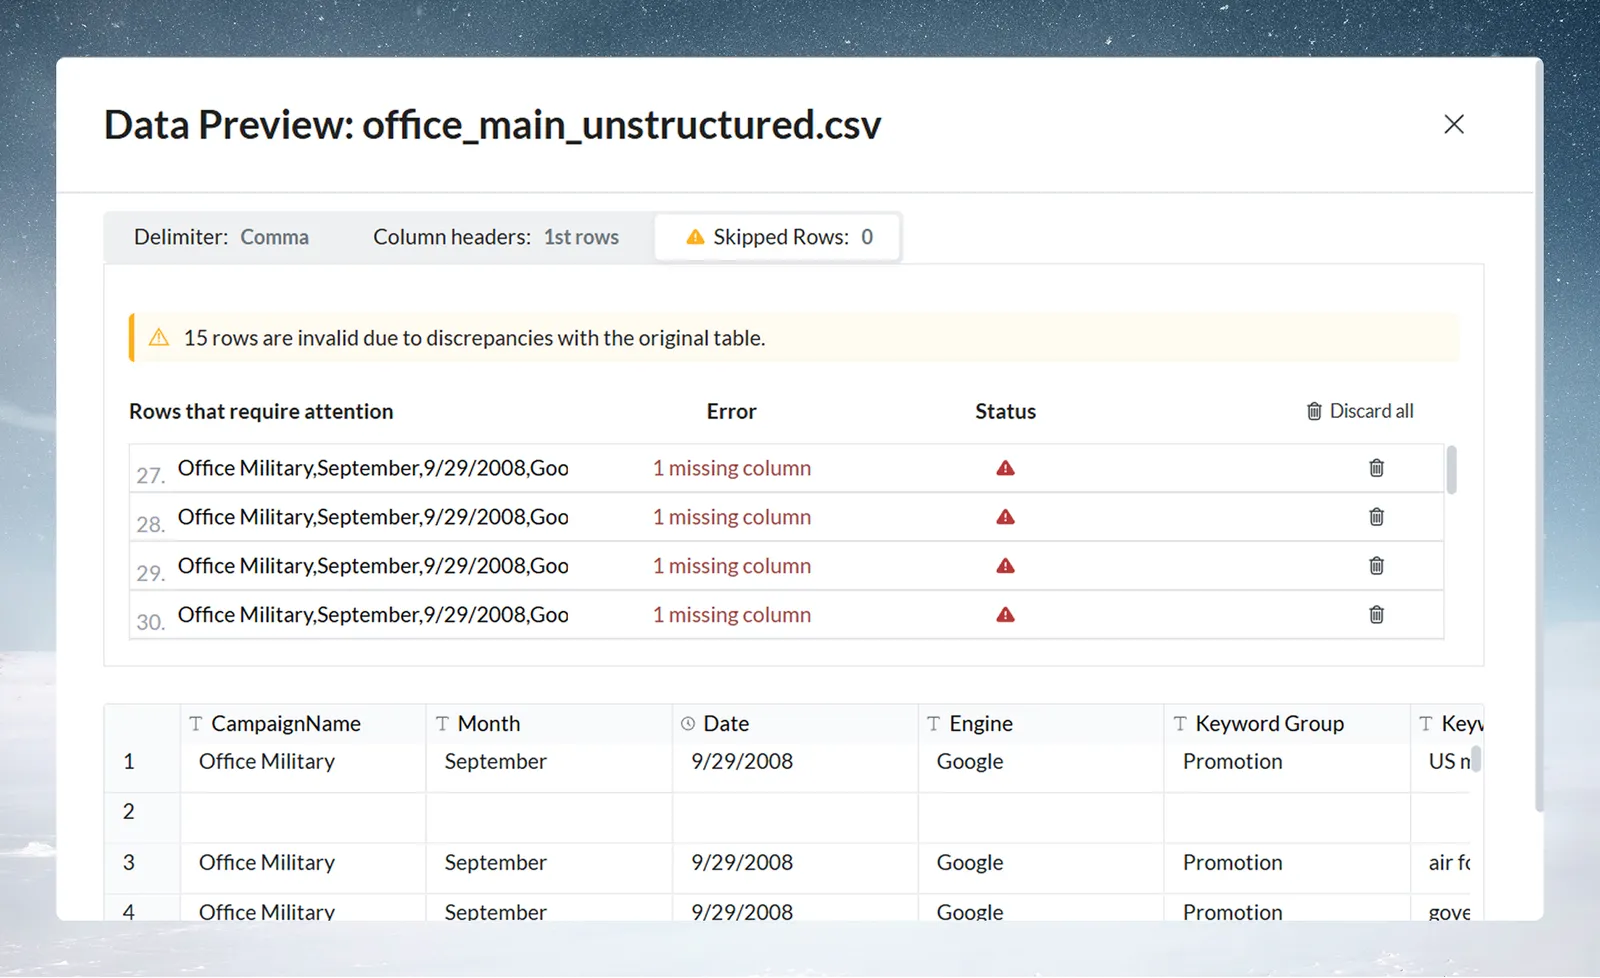
- Column mismatches—Rows in the new file have fewer or extra columns than the existing dataset schema. Mammoth flags each invalid row with a specific error (e.g. "2 missing columns","3 extra columns") and lets you discard them individually or all at once.
- Delimiter and header row—If columns appear merged or column names appear as data values, open the Data Preview modal (See all details, or Data settings in the Settings section of the dataset panel). There you can set the delimiter, the column header row, the number of initial rows to skip, and the date format.
File size and performance
Size limits
- Upload size: 50 MB maximum per upload request, so a folder counts as one upload of 50 MB in total (see limits and quotas)
- Files per upload: Up to 1,000
For files larger than 50 MB, use a connector to your database or storage instead, or split the file.
When to use file upload
Best for:
- Ad-hoc analysis - Quick exploration of vendor files
- Historical data - Loading archives for trend analysis
- External data - Partner-provided files, government data
- Initial exploration - Testing before setting up Live Connections
- Small teams - Shared files via email or cloud storage
Consider alternatives when:
- Daily updates needed - Use Live Connections with Dataset Refresh
- Uploads over 50 MB - Use a connector
- Real-time requirements - Use Live Connections
- Complex automation - Use Data Consolidation or a connector
Troubleshoot file upload
Upload fails or times out
Problem: "Upload failed" error or loading spinner never completes
Solutions:
- Check the upload is under 50 MB in total
- If the file is flagged as a dangerous file, it failed the security scan and can't be imported
- Verify file format is supported (see format list above)
- Try downloading and re-uploading file (may be corrupted)
- Check internet connection stability
- Contact support if file is known-good format under size limit
Columns not detected correctly
Problem: Column headers missing or wrong, data appears in single column
Solutions:
- Ensure first row contains column headers
- Check file encoding (save as UTF-8 if special characters)
- Verify delimiter is consistent (comma, tab, pipe, etc.)
- Look for embedded commas in CSV (should be quoted: "Company, Inc.")
Wrong data types assigned
Problem: Numbers show as text, dates as text, text as numbers
Solutions:
- Preview sample data to verify detection
- Use Define Date Format or the Data Preview modal for date and delimiter problems
- You can change data types later using the Convert Column Type task
- Common fixes: Account numbers (Number → Text), Dates (Text → Date), ZIP codes (Number → Text)
Multiple files create multiple datasets
Problem: You selected several files and got one dataset per file, but you wanted one combined dataset
Solutions:
- Use the "Upload folder" button instead of "Upload file" to combine files into one dataset
- Ensure all files have identical column structure
- Check that file formats are consistent (all CSV or all Excel)
- Verify files aren't corrupted or empty
File upload best practices
File preparation
- Standardize templates for recurring uploads
- Include column headers in first row
- Use consistent data formats (dates, numbers, text)
- Remove empty rows at top or bottom of files
- Save as UTF-8 if file contains special characters
Naming conventions
- Dataset names: Descriptive and searchable ("Q4 Sales Reports", not "Data")
- File names: Include dates or versions for batch tracking
- Column names: Clear and consistent (
Customer_Name, notCust)
Data quality
- Validate before upload - Check for obvious errors
- Use consistent values - "Yes/No" vs "Y/N" vs "True/False"
- Handle null values - Decide on blanks, "NULL", "N/A", etc.
- Preserve data types - Format numbers and dates consistently
Tip: Create a "staging" project for testing file uploads before processing in your main project. This lets you validate structure detection and data quality without affecting production datasets.
Next steps
After uploading your files:
- Explore your data using Explore Cards to understand distributions and quality
- Transform if needed using Visual Pipelines to clean, join, or reshape data
- Automate recurring uploads with Data Consolidation automation
- Create dashboards with AI-powered visualization
- Export results to your preferred format or destination