Email a report from Mammoth on a schedule
A Messaging automation emails one or more Dataset Views as CSV attachments to a list of recipients on a schedule. Create one from Automations > New automation > Messaging, under Send data out, or with Send this view by email on a schedule on a View. Your plan can cap how many Messaging automations the workspace has.
Use it for weekly KPI reports to executives, daily sales summaries, or any data stakeholders need in their inbox. To email a dashboard's headline numbers instead of a View's rows, use Email updates on the dashboard.
Before you start
- The Dataset Views you want to attach must already exist in your project.
- You need the email addresses of all the recipients.
- Check your Messaging cap. When your plan has one, the type picker shows a counter next to Messaging, for example "2/5 used". The counter counts the Messaging automations in the project you're in, but the cap is checked across the whole workspace when you save. So saving can fail even when the counter shows room left. Once the cap is reached, choosing Messaging shows an upgrade prompt instead of the wizard.
Set up a Messaging automation
Open New automation from the Data Library (for example the Data Hub header, a folder's empty state or an item's menu), or from the preview panel's Automation section. Under Send data out, select Messaging.
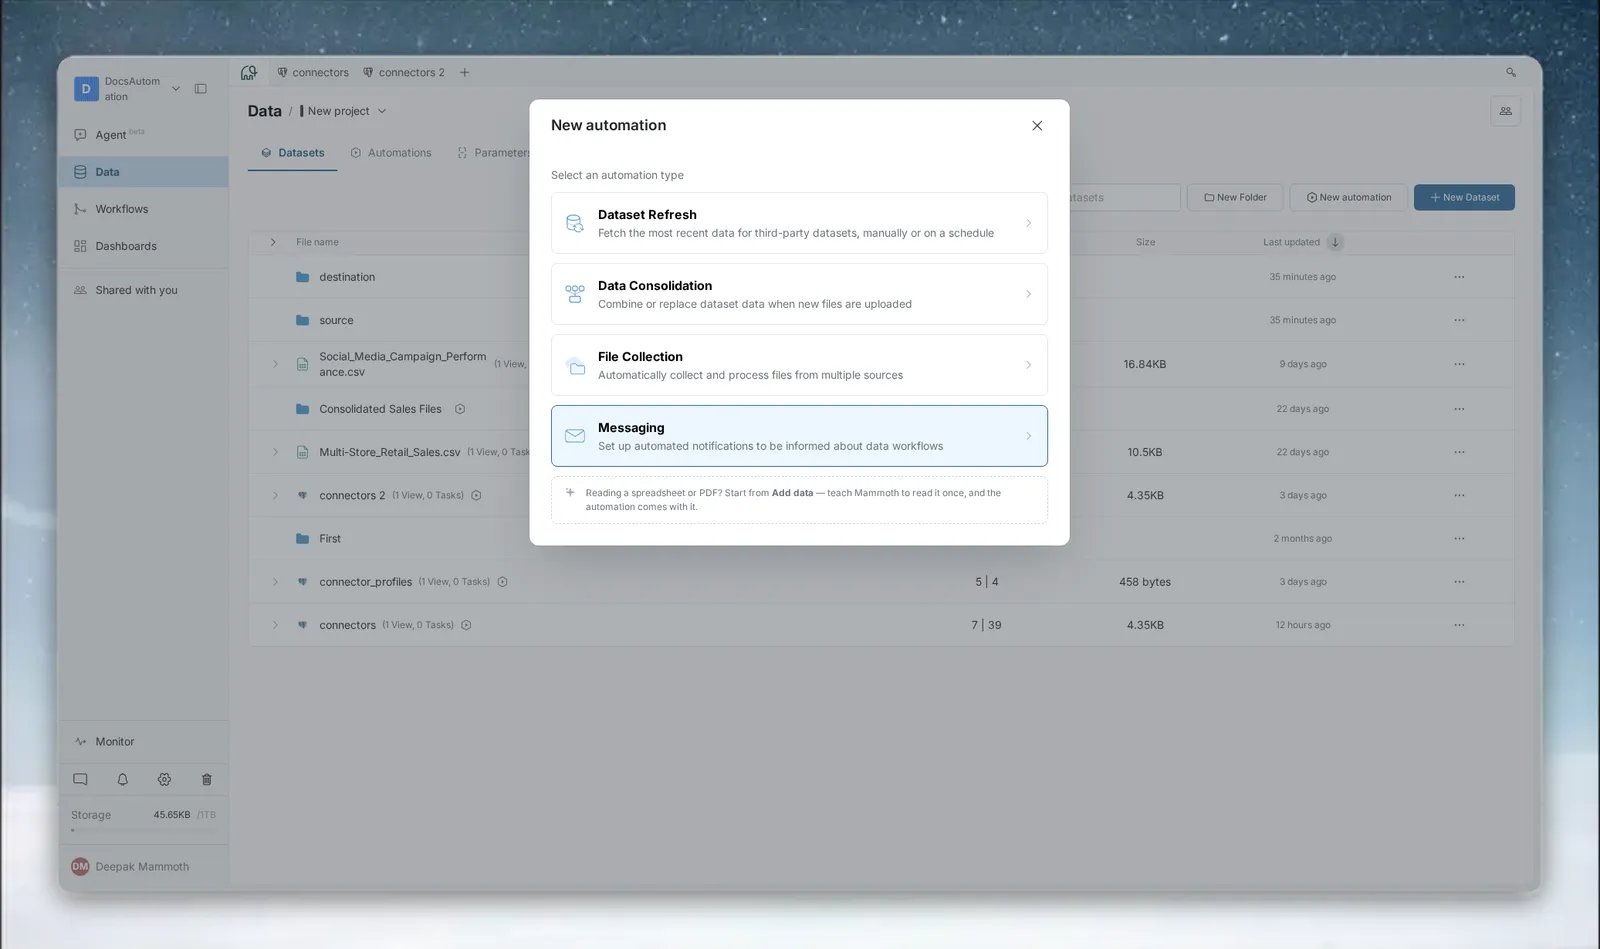
The steps are Write message, Set trigger and Review & save. The step indicator at the top shows your progress and lets you jump back to a previous step.
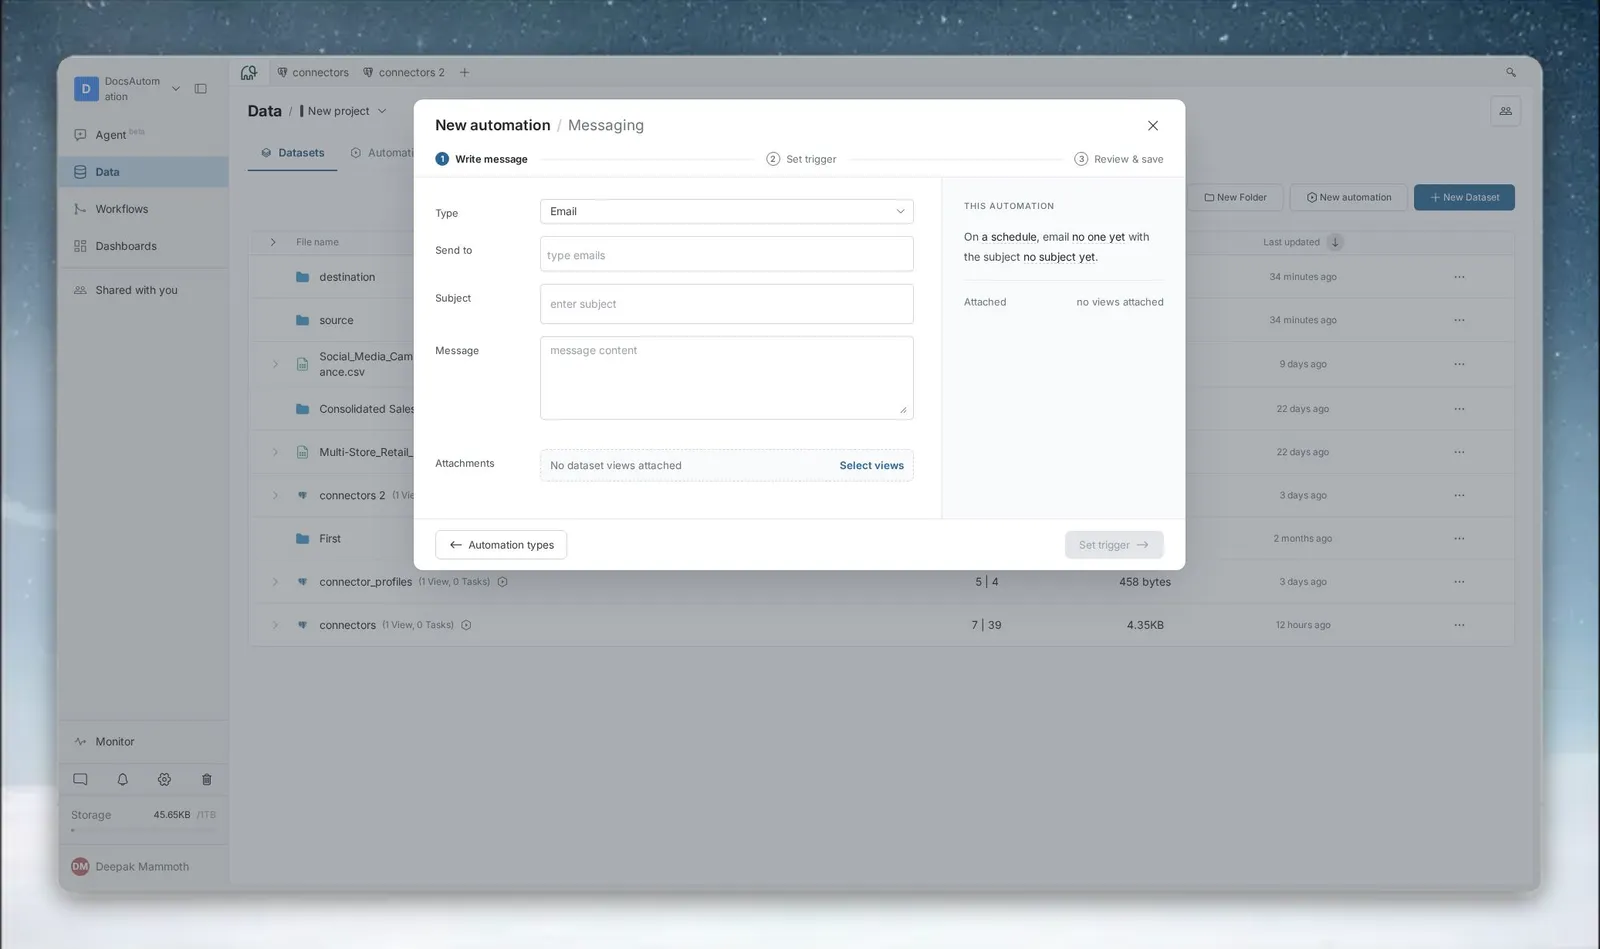
Write the email
On the Write message step, fill in:
| Field | Required | What it holds |
|---|---|---|
| Type | Yes | Message type (currently only Email) |
| Send to | Yes | One or more recipient addresses. Placeholder: "type emails" |
| Subject | Yes | The email subject line. Placeholder: "enter subject" |
| Message | Yes | The email body. Placeholder: "message content" |
| Attachments | Yes | One or more Dataset Views to export and attach |
Add recipients by email or workspace member
- Type an address in Send to and end it with a comma, semicolon, space, tab or Enter to turn it into a recipient. You can also paste a list separated by any of those characters.
- As you type, the field suggests active members of your workspace as name and email (for example "Alex Kim (alex@example.com)"). Typing part of either finds them. Pick one to add it.
Members already in the list aren't suggested again. You can still type any other address: suggestions only save you looking one up. An address that isn't a valid email shows "The email address is not valid" under the field.
Attach Dataset Views as CSV files
- Until you attach a View, the Attachments row reads "No dataset views attached". Click Select views.
- Pick one or more Views in the finder, and confirm.
Each attached View appears as a pill you can remove with its x. Each is exported as a CSV file and attached to the email. The Write message step can't continue until at least one View is attached.
The attached Views can total at most 100,000 rows. The wizard marks any single View over that size in red and shows "View exceed 100000 row limit. Please use a smaller view." When you save, Mammoth also checks the combined row count of all attached Views, and refuses to save if they total more than 100,000 rows.
If an attached View was deleted, its pill turns red and the step can't continue. The summary also shows, for example, "1 view not found". Remove the View and pick another one.
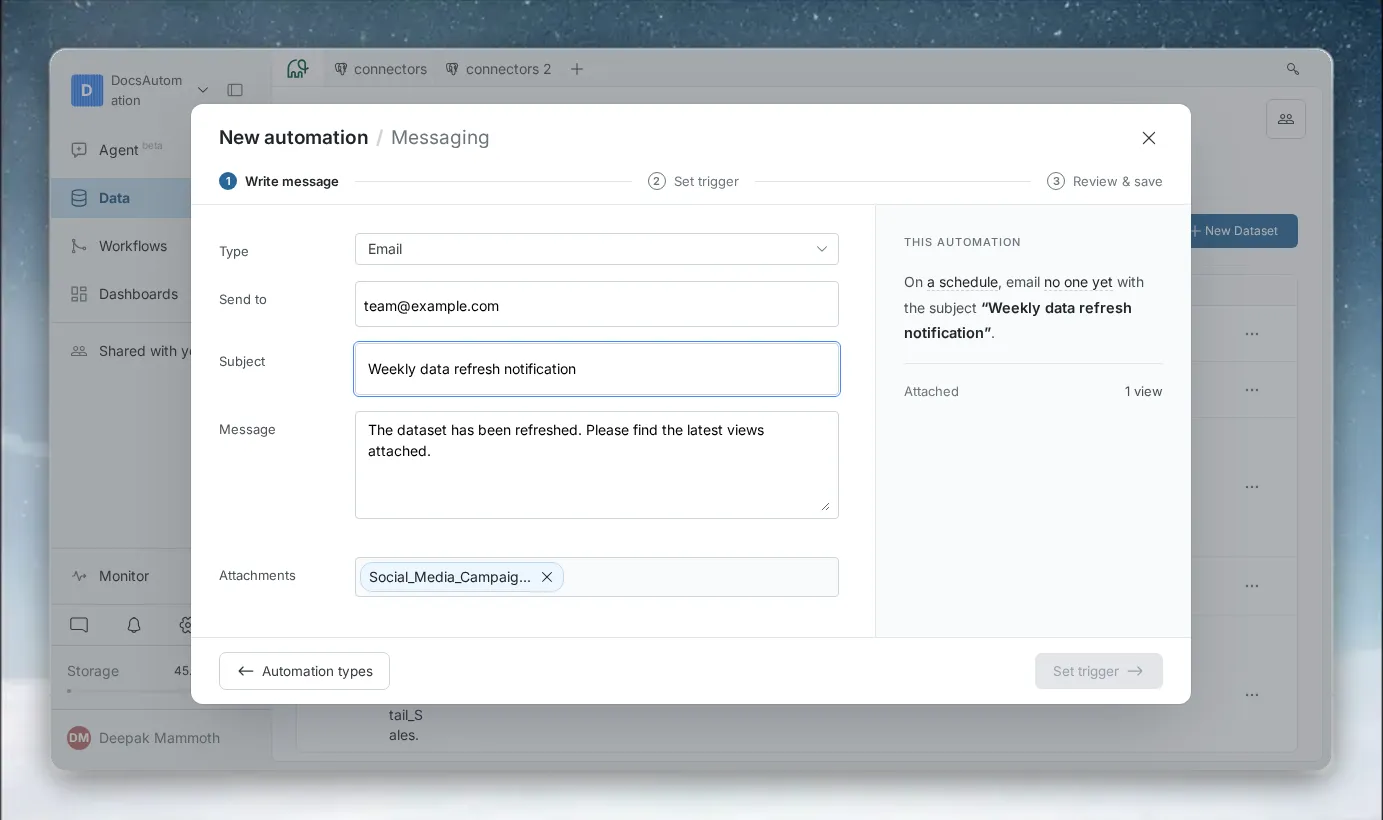
Click the next step's button to continue.
Set when the email is sent
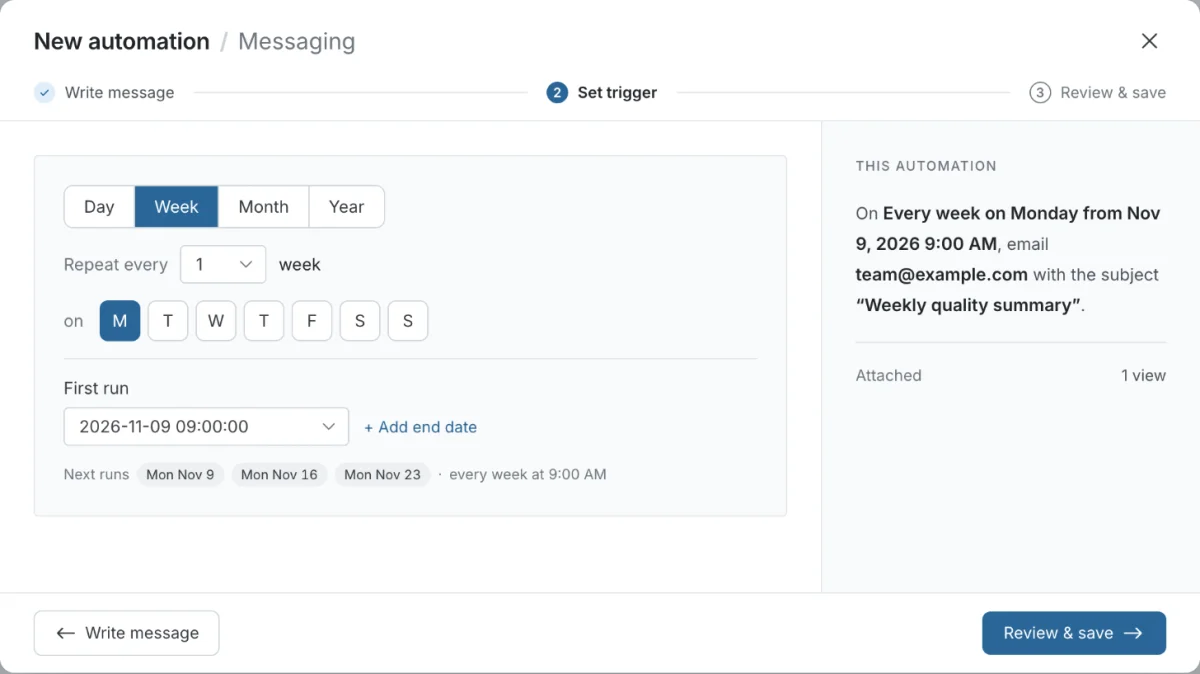
On the Set trigger step, set the schedule. Messaging always sends on a schedule, with no manual-only option.
| Setting | What it does |
|---|---|
| Unit and Repeat every | Day, Week, Month or Year, and how many between sends (your plan can limit the units). For Week, also pick the weekdays |
| First run | The date and time of the first email |
| End date | Optional. Click + Add end date to stop sending after a date |
The Next runs preview lists the upcoming send times. See Schedules and triggers for every option.
Send a test email, then save
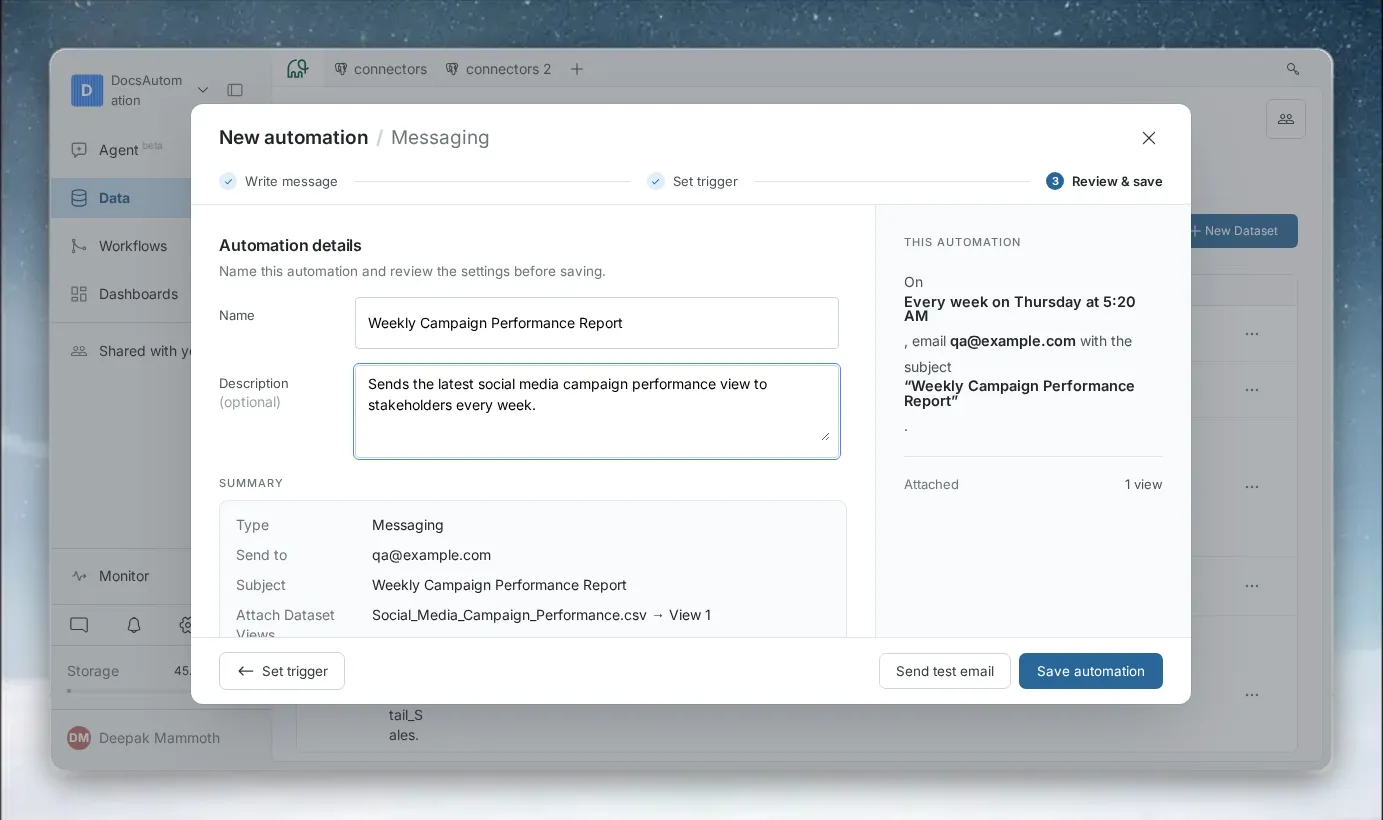
- On Review & save, enter a name and an optional description.
- Review the summary: type, recipients, subject, attached Views and schedule.
- Optional: click Send test email in the footer. It sends a test to the configured recipients straight away, even before you save. A toast confirms "Test email sent successfully." If it fails, you see "Couldn't send test email, please try again."
- Click Save automation.
The test checks that recipients get the email, the attachments are generated, and the subject and body look right.
After you save a Messaging automation
The automation appears with status Active. The Details column shows a summary like "ops@example.com will receive an email message with 1 attached view every day at 8:00." The first email sends at the First run time.
You can reopen it at any time to edit the message, recipients, schedule, name or description, or to suspend, resume, run or delete it. See Manage automations.
The detail panel's Summary section shows the schedule (for example "On schedule, every week"), the next send time, the end date (or "Never") and the recipients. Last run result in the Overview shows whether the last email was sent.
How recipients unsubscribe
Recipients can click the unsubscribe link in the email footer. A recipient who unsubscribes is removed from future sends for that automation.
The link opens a Mammoth page that reads You’re Unsubscribed and "You will no longer receive automation notifications in your email." If the automation was deleted since the email was sent, the page shows "This link to stop automation notifications isn't valid any more." instead.
To update the recipient list, open the automation and click Edit.
Limits
| Item | Limit |
|---|---|
| Rows across all attached Views | 100,000 (see Limits and quotas) |
| Attachment format | CSV, one file per View |
| Messaging automations | Set by your plan, checked across the workspace |
Troubleshooting
| Symptom | Cause | Fix |
|---|---|---|
| Emails are not arriving | A recipient unsubscribed, the email went to spam, or an address is wrong | Check recipients haven't unsubscribed or filtered the email to spam. Check the addresses with Edit |
| Status shows Error | An attached Dataset View was deleted | Check Last run result in the detail panel. Edit the automation and pick a new View |
| You can't attach a View, or saving is refused | One View has more than 100,000 rows, or the attached Views total more | Filter the Views into smaller ones, or attach fewer |
| Saving fails although the counter shows room left | The counter counts this project, but the cap is checked across the workspace | Delete an unused Messaging automation elsewhere, or upgrade the plan |
Related
- Schedules and triggers: every schedule option and time zones.
- Export on a schedule: run any export step, including an email export, at fixed times.
- Manage automations: edit recipients, suspend, run or delete.
- Email updates: email a dashboard's headline numbers.
- Notifications: alerts in the app rather than by email.
Something wrong? support@mammoth.io