Copy, move and delete datasets and folders
Clone dataset makes an independent copy of a dataset, and Move to puts a dataset or folder somewhere else in the same project. Both sit in the dataset panel's icon strip and in each row's ⋯ menu under Data in the left sidebar. You need access to the dataset to clone it, and Update permission on each item to move it.
Clone a dataset
A clone is a new, independent dataset that starts as an exact copy of the original. It has its own name, its own batches and its own Views. Changes to the clone do not affect the source, and changes to the source do not affect the clone.
Clone a dataset when you want to:
- experiment with a dataset's pipeline without touching the version your team relies on;
- keep a snapshot of a dataset at a point in time as a reference copy;
- build a variant of a pipeline that starts from the same raw data and then diverges.
Make a copy of a dataset
-
In the Data Library, click the dataset you want to clone. The dataset panel opens on the right.
-
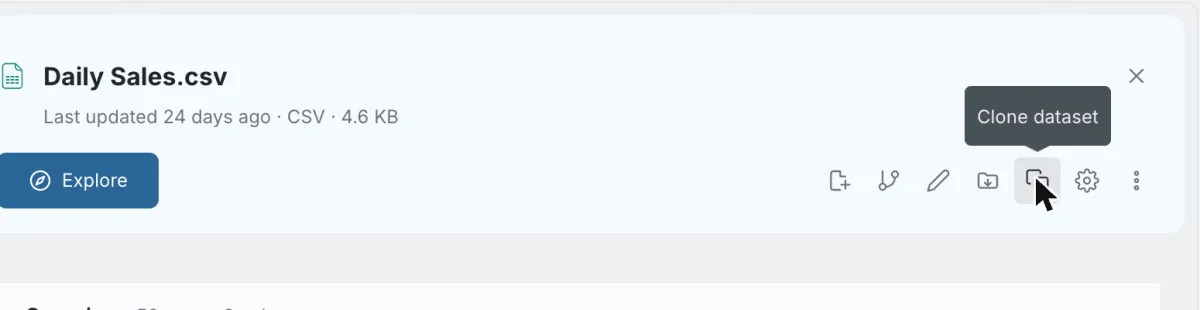
In the panel's icon strip, click the Clone dataset icon (the copy icon). You can also open the dataset's ⋮ menu and choose Clone dataset.
-
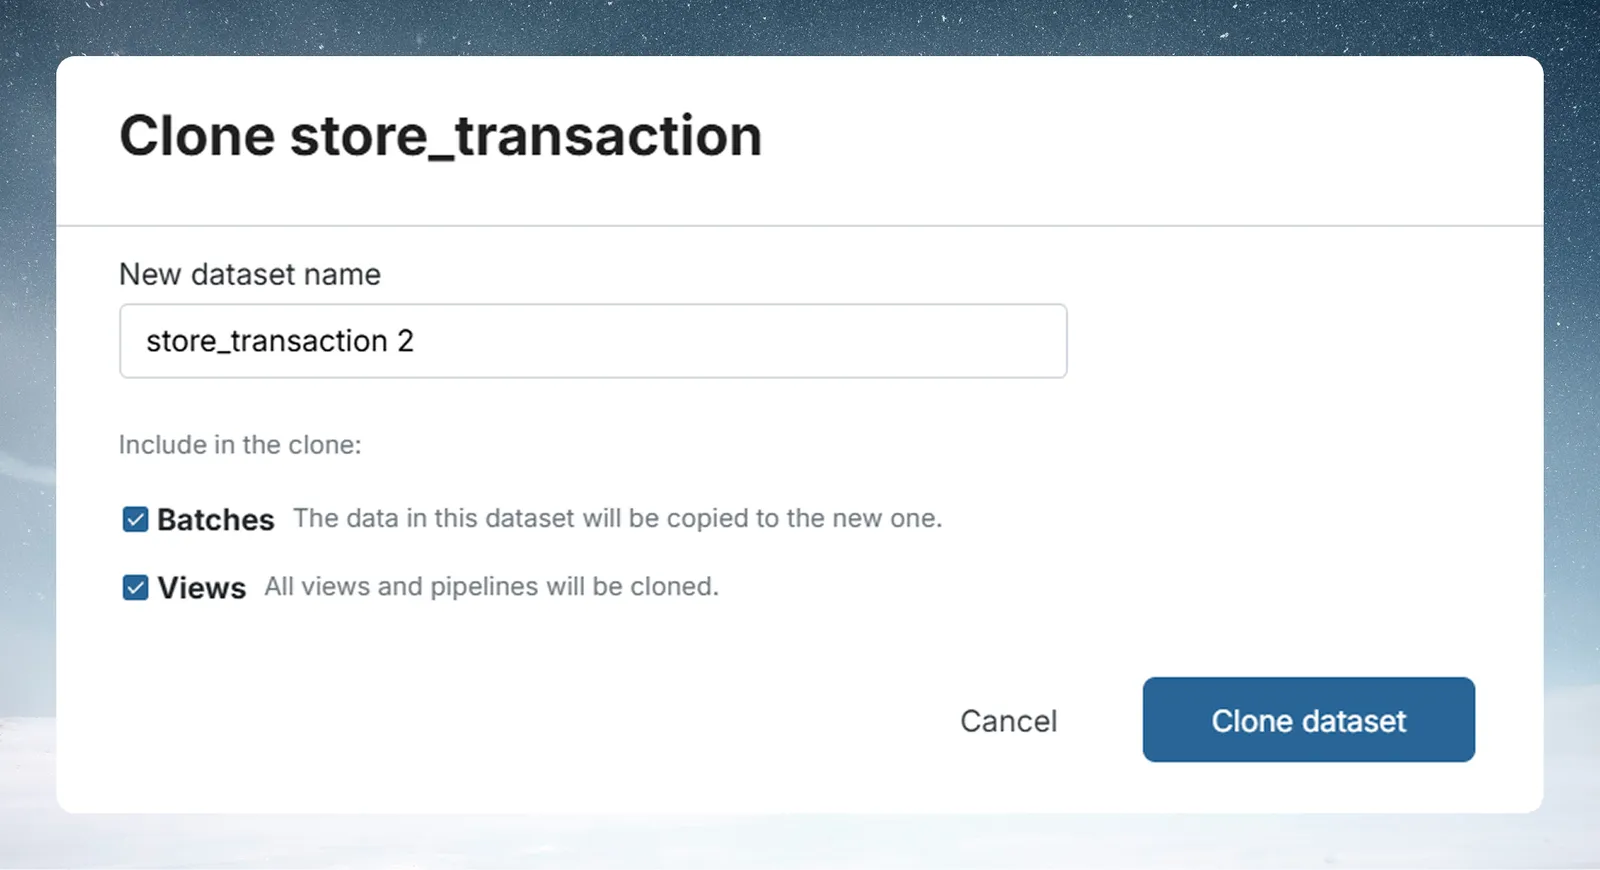
The Clone dataset dialog opens, with the dataset's name under the title. The name field is pre-filled with the dataset's name followed by 2 (for example,
store_transaction 2). Edit it if you want a different name. -
Under Include in the clone, choose what to copy (see the table below).
-
Click Clone dataset. The dialog closes at once. The button is disabled while the name is empty.
| Option | Default | What it does |
|---|---|---|
| Batches | On | Copies all rows from every batch in the source into the clone. Untick it to create an empty dataset with the same columns but no data. |
| Views | On | Copies Views and their pipelines into the clone. If the dataset has more than one View, a dropdown offers Clone all views or Clone selected views; the selected list shows each View's task count. Each cloned View is independent of the source View. |
Why a new clone shows 0 bytes
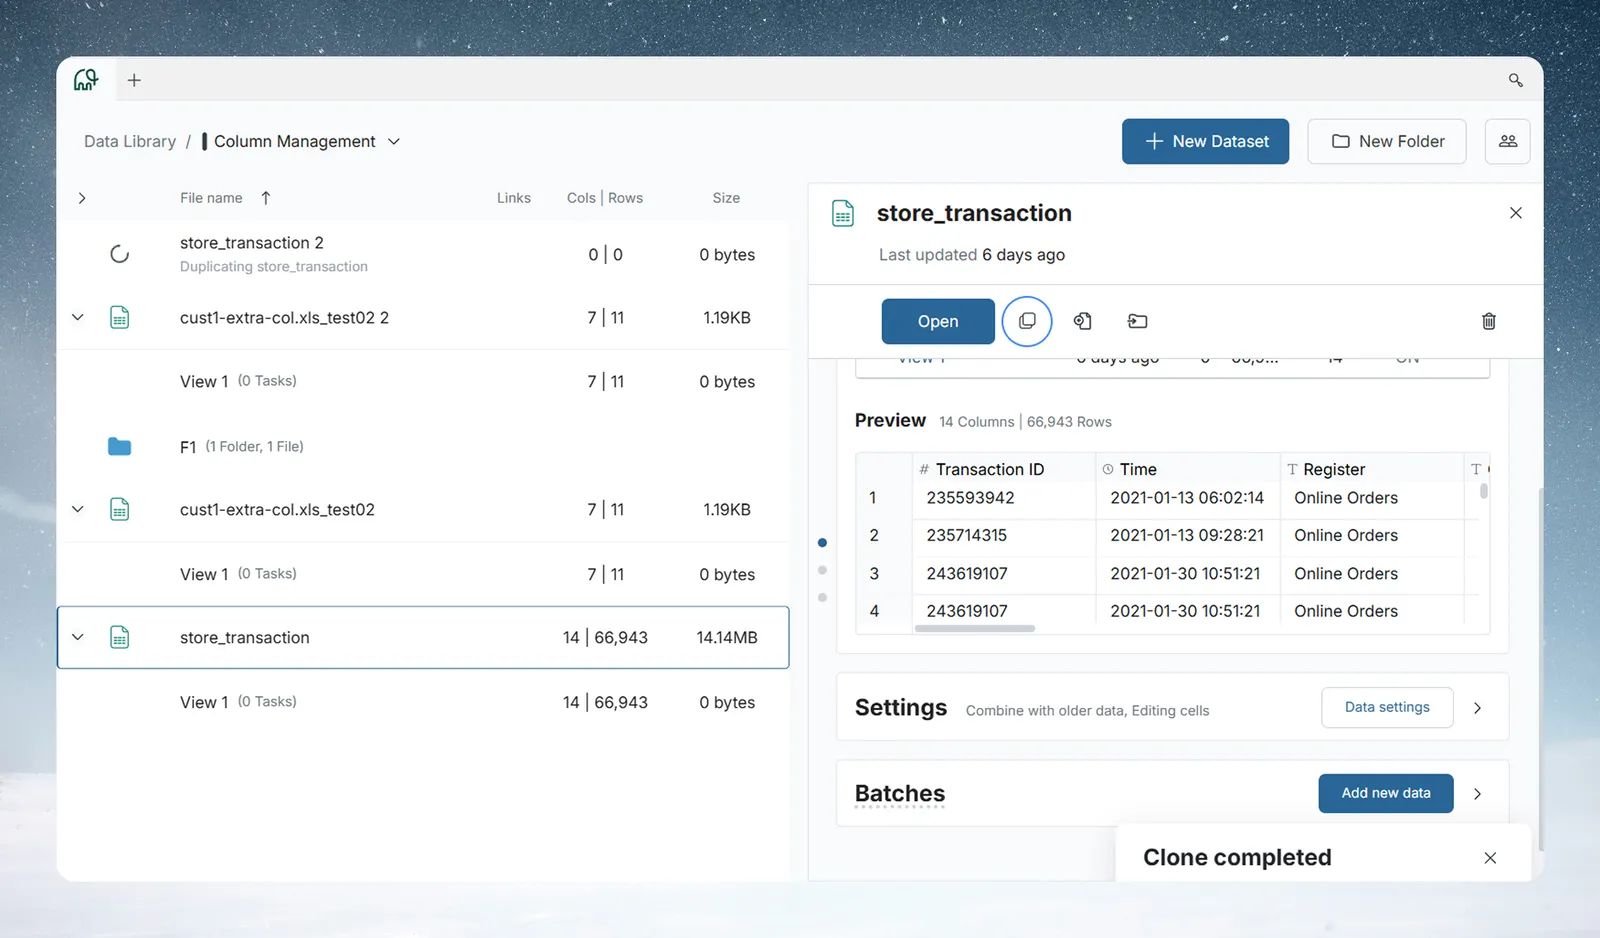
The clone appears in the list straight away, so you can keep working. It shows:
- the name you entered;
- 0 bytes at first. Mammoth creates the dataset record at once, and a background job copies the data. The size updates when that job finishes, usually within seconds to a few minutes depending on the dataset's size;
- the same row and column count as the source, once the copy is complete.
A "Clone completed" message appears at the bottom of the screen when the background job finishes. If the size hasn't updated after a moment, refresh the page.
What a clone includes
| Item | Copied? | Notes |
|---|---|---|
| Column schema | Yes | All columns with their names and data types |
| Row data | Yes (default) | All batches. Untick Batches to skip |
| Display properties | Yes | Column display settings carry over |
| Views and pipelines | Yes (default) | Each View is a fully independent copy. Untick Views to skip |
| Dataset name | You choose | Pre-filled with the source name followed by 2, for example store_transaction 2 |
| Folder location | Same folder | The clone appears in the same folder as the source. A clone made into another project through the API lands at that project's root. |
| Append history (batch order) | Yes | All batches are copied in their original order |
Clone a dataset into another project with the API
The Mammoth app has no option to pick another project in the clone dialog. To clone through the API, send a create-dataset request with ds_creation_type: "clone" and a dataset_spec. The dialog sends the same request.
Field in dataset_spec | What it does |
|---|---|
source_ds_id | The dataset to copy |
ds_name | Name of the clone. If you omit it, the name is the source name followed by copy, for example store_transaction copy (copy, not 2: the " 2" suffix is added by the app). Pass a ds_name if you want a predictable name. |
clone_dataview_ids | IDs of the Views to copy. Defaults to none. |
exclude_data | Set to true to skip the batches. Defaults to false. |
target_project_id | Optional. Clones into another project of the same workspace. Defaults to the source dataset's own project. |
With target_project_id:
- The target project must be in the same workspace as the source.
- You need permission to create datasets in the target project and to read the source dataset.
- The clone lands at the project root, not in a folder.
- If the source was already copied into that project, the request returns the existing copy instead of creating another.
Move a dataset to another folder
Move works within the current project. You can move one item, a folder with all its contents, or several items at once.
-
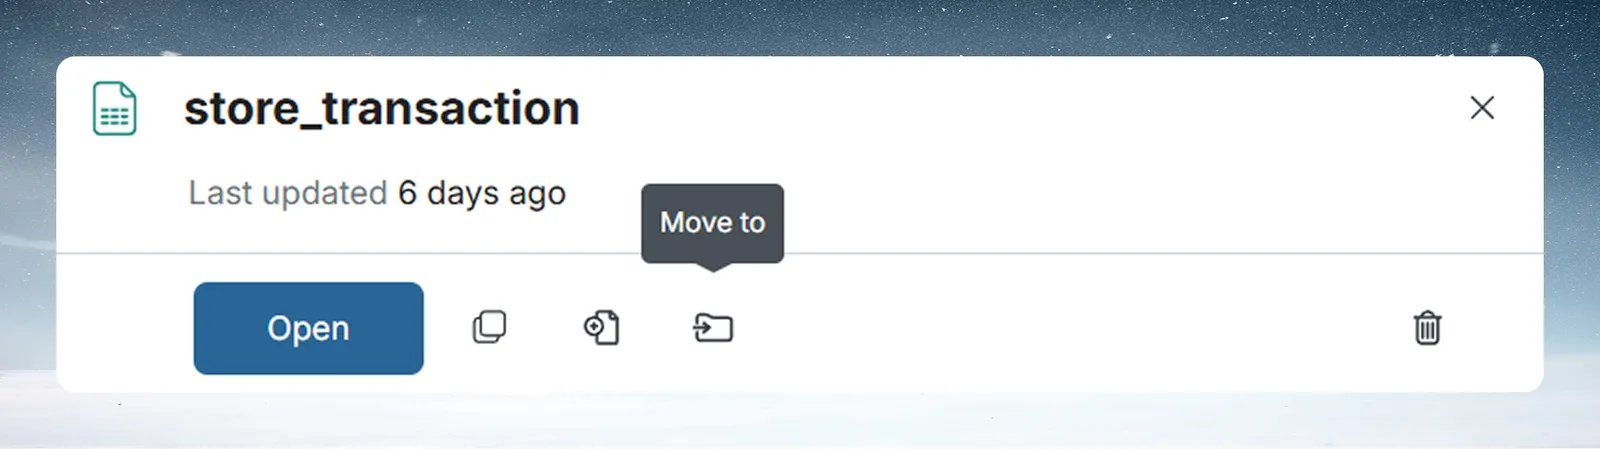
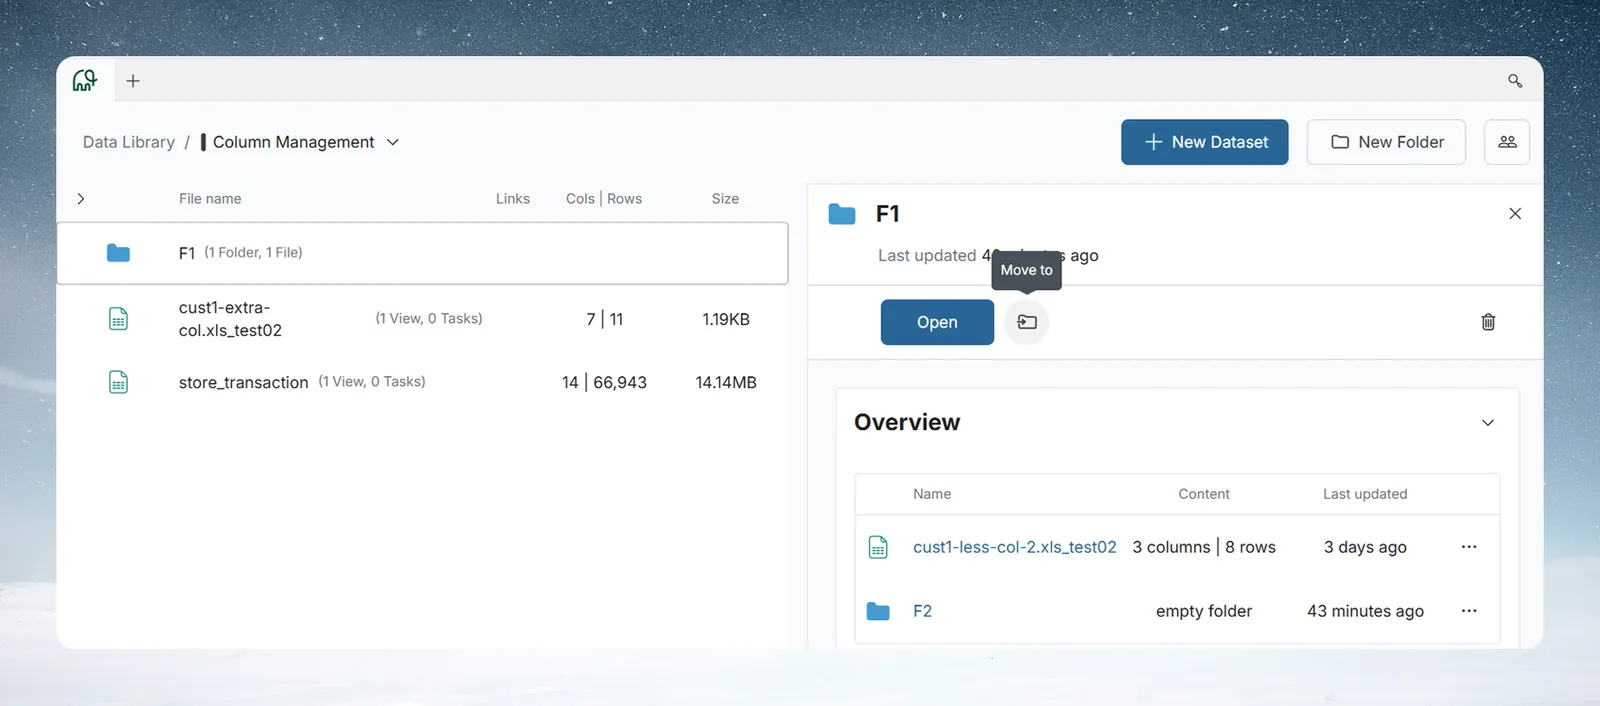
In the Data Library list, click the ⋮ (More options) menu on the right of the dataset row. The dataset panel also has a Move to icon button.
-
Click Move to.
-
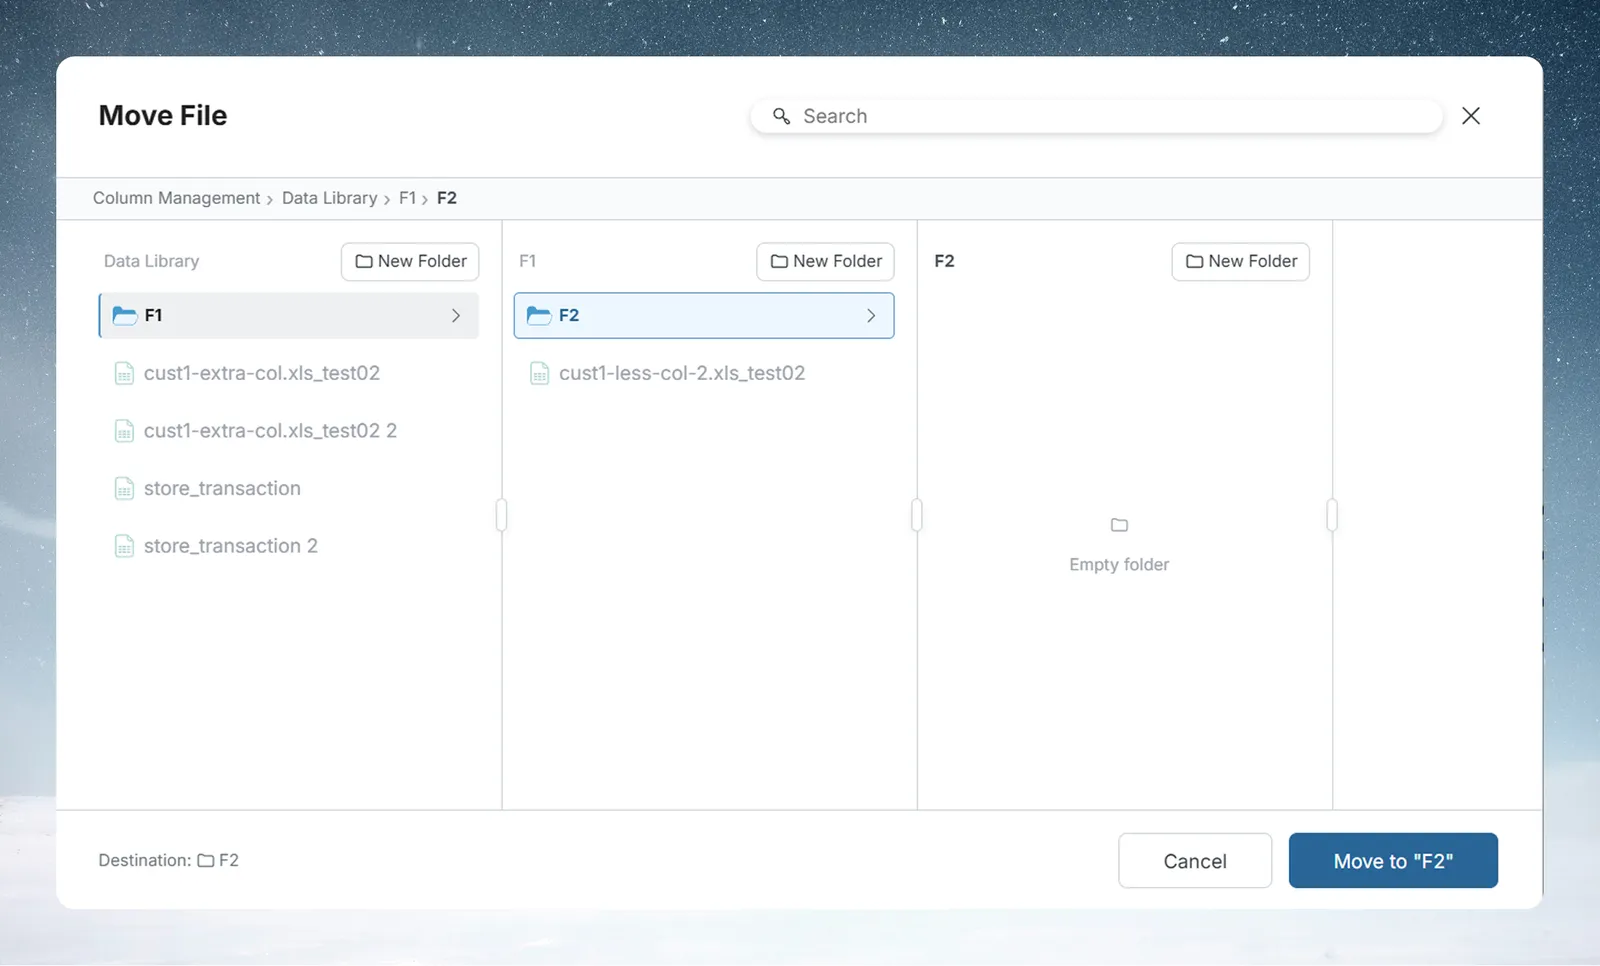
The Move to… dialog opens. It shows a multi-column folder browser with a search box in the header and a breadcrumb. Only folders in the current project are listed.
-
Click through the folder columns to your destination. Each click on a folder opens its contents in the column to the right, updates the breadcrumb, and updates the Destination: bar at the bottom.
-
When the Destination: bar shows the right folder, click the Move to "Sales" button (it names the folder). The button is active only when a valid destination is selected.
The dialog closes. The dataset leaves its current place and appears in the destination folder. The folder's count under its name updates, for example from 1 File to 2 Files. A move made from this dialog has no Undo; to put it back, move it again.
Find a destination folder by name
A search bar sits in the dialog header. Type part of a folder name to filter the folders across all levels. This helps when your Data Library has many nested folders.
Move an item back to the top of the project
- Open the ⋮ menu and click Move to.
- In the column browser, go back to the root level with the breadcrumb at the top.
- When no folder is selected, the Destination: bar shows the root, and you can confirm the move.
Create a folder while you move
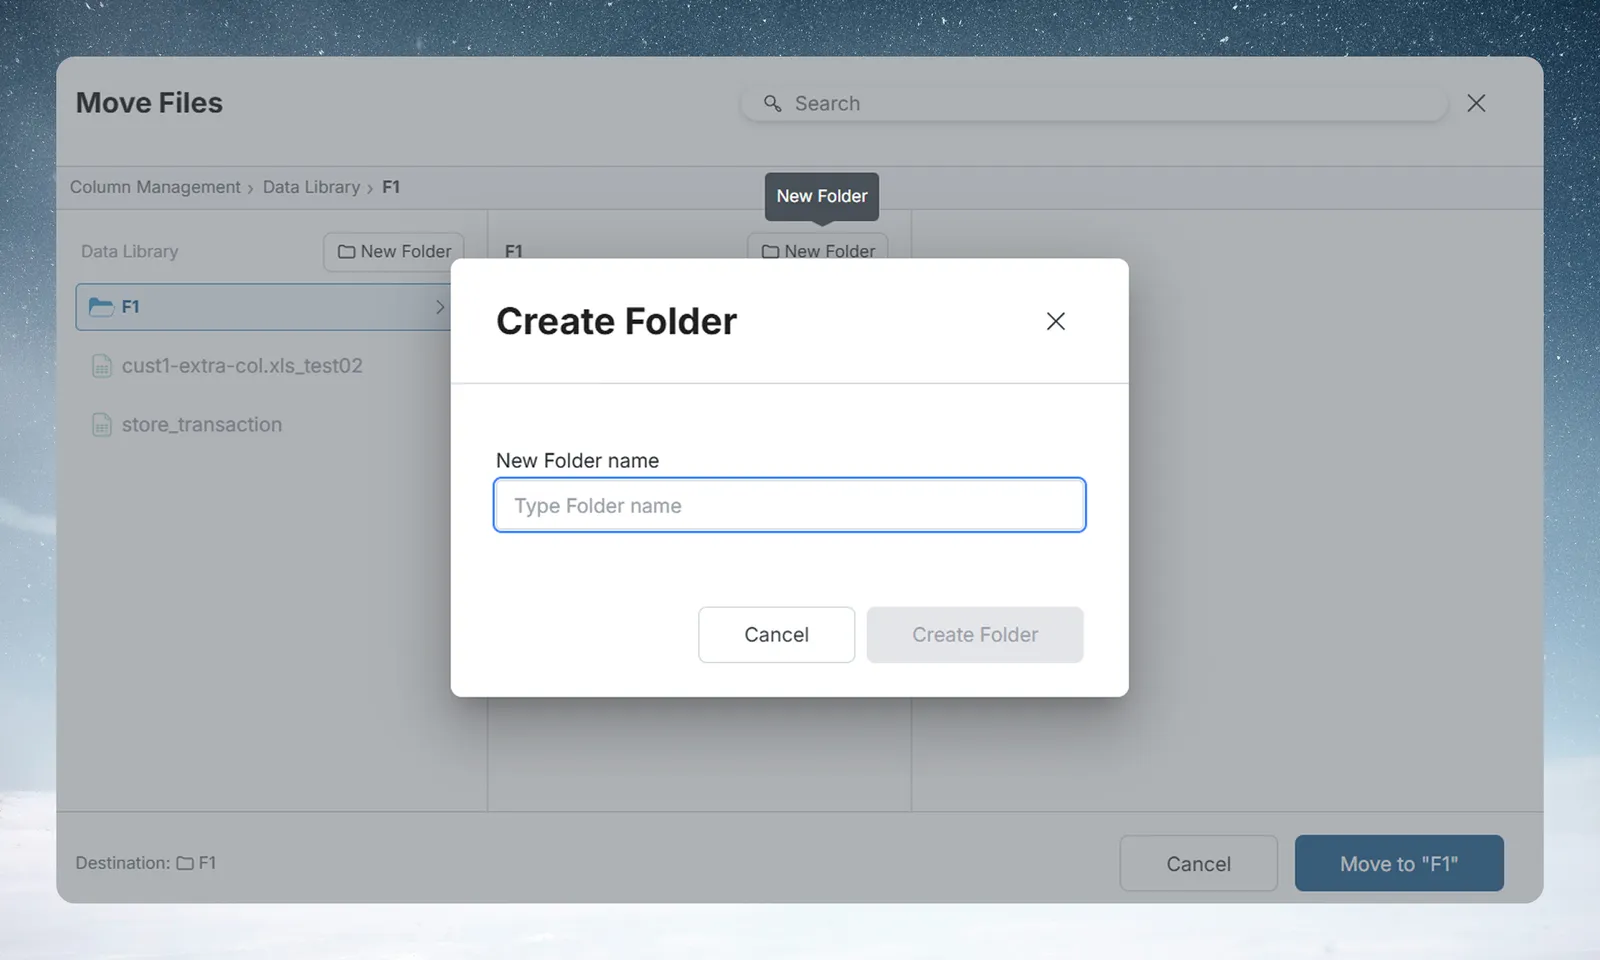
Hover over a folder column to show its New Folder button. Click it, enter a name in the New folder dialog, and click Create folder. Then click into the new folder to set it as the destination before you confirm the move.
Move a folder and everything in it
Moving a folder moves the folder and everything inside it, including all datasets and nested subfolders.
- Click the ⋮ menu on the right of the folder row.
- Click Move to. The same Move to… dialog opens.
- Go to the destination and click Move to "Sales".
You can't move a folder into itself or into any of its own subfolders. Those destinations are disabled in the column browser, and so is the item's current folder.
Move several datasets at once
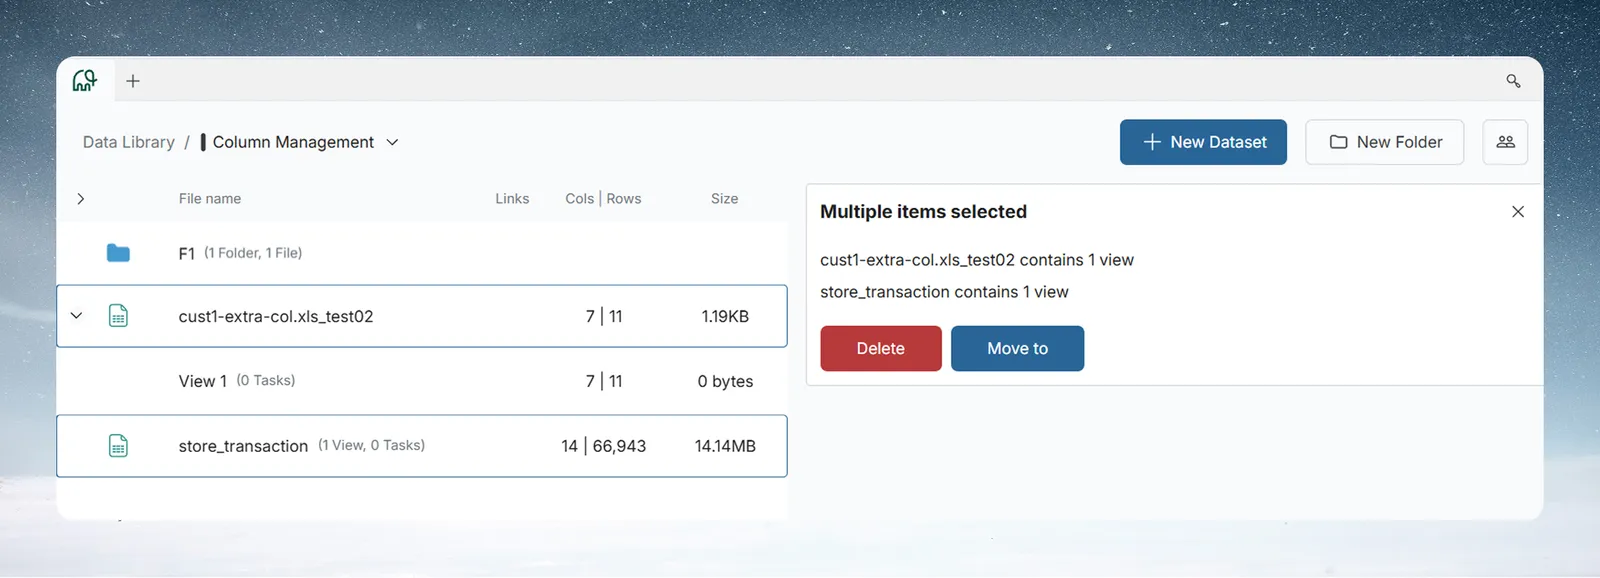
- Tick items with the checkboxes on the left of each row.
- A selection bar appears with the count (for example 3 items selected) and the actions Combine, Move to, Download and Move to trash. You can also right-click a selected row for the same actions.
- Click Move to.
- In the column-browser dialog, go to the destination and confirm.
All selected items move to the same folder in one operation. If the selection includes a View, Move to is unavailable: "A view cannot be moved on its own", it lives with its dataset.
Move ticked datasets in from the folder
- Tick the datasets you want to move in the list.
- Click the destination folder's row, or open its ⋯ menu, and choose Move datasets in ("Tick datasets in the list, then choose this from the folder’s menu.").
If nothing is ticked, Mammoth says "Tick the datasets in the list first, then choose Move datasets in." If the ticked items are already in that folder, it says "Those are already in this folder." A successful move shows the same message and Undo as drag and drop.
Drag and drop datasets onto a folder
Select one or more rows and drag them onto a folder row, or onto a folder in the breadcrumb above the list. A message such as "2 items moved to Sales" (for one item, "“Daily Sales.csv” moved to Sales") appears with Undo for about five seconds. If you click it, Action undone confirms the items are back.
Who can move datasets and how a move runs
To move a dataset or folder, you need Update permission on each item being moved. If you lack permission on any item in a bulk move, the whole operation is blocked and an error is shown.
Like a clone, a move runs in the background. Mammoth accepts the request at once and returns a job ID, and a background job updates the data and metadata. Most moves finish in under a second. For very large bulk moves, folder counts may take a moment to update.
Delete a dataset or folder
To remove items instead of moving them, use Move to trash in the row's ⋯ menu, the dataset panel, or the selection bar. Datasets, Views and a folder's contents go to Trash and can be restored for 30 days.
A raw file that never became a dataset can't go to Trash. Its action reads Delete permanently, and a mixed selection warns "1 item cannot go to Trash and would be deleted for good." See Get things back from Trash.
Limits
| Limitation | Details |
|---|---|
| Move stays in the project | You can't move datasets or folders to a different project. To copy a dataset into another project of the same workspace, use the API clone with target_project_id. |
| No circular moves | A folder can't move into itself or its own subfolder. These destinations are disabled, and so is the item's current folder. |
| Views move with their dataset | Views belong to their parent dataset. Moving the dataset moves its Views with it. |
| Clone location in the app | A clone made in the app appears in the same folder as the source. Move it afterwards if needed. |
| Clones of metric-based Views | If a source dataset has Views whose rules reference metrics, the cloned Views may not behave correctly. This is a known limitation. Review cloned View pipelines before relying on them. |
Troubleshooting
| Symptom | Cause | Fix |
|---|---|---|
| The clone shows 0 bytes | The background copy is still running. | Wait for "Clone completed", or refresh after a moment. |
| "You cannot create datasets in the target project, or it is not in this workspace" | The API clone's target_project_id is in another workspace, or you can't create datasets there. | Use a project in the same workspace where you can create datasets. |
| "You do not have permission to read the dataset being copied" | You can't read the source dataset. | Ask for access to the source dataset. |
| Move to is unavailable | The selection includes a View ("A view cannot be moved on its own"). | Untick the View, or move its dataset. |
| A bulk move is blocked with an error | You lack Update permission on one of the items. | Untick that item, or ask for access. |
| "Those are already in this folder." | The ticked items already sit in the target folder. | Pick another folder. |
Related
- The dataset panel: the icon strip with Clone dataset and Move to.
- Folders and folder rules: create and organise folders.
- Combine datasets: put the rows of several datasets together.
- Get things back from Trash: restore a deleted dataset.
- Add or replace data: append or replace data after a dataset is created.
Something wrong? support@mammoth.io