Create Mammoth API keys and connect AI assistants
The API Keys section of Workspace Settings is where you connect AI assistants and the Mammoth CLI, create API tokens for scripts, add your own AI provider keys and register OAuth apps. Workspace Owners and Workspace Members can use the setup cards and create tokens; only Owners add external keys and register OAuth apps. Connected apps lists the apps you allowed in, with Revoke.
What's on the API Keys section
Two setup cards sit at the top, with three cards below them:
| Card | What it's for | Who can use it |
|---|---|---|
| Connect an AI assistant | The Mammoth MCP URL for AI assistants | Owners and Members |
| Use the Mammoth CLI | Install and sign-in commands for the CLI | Owners and Members |
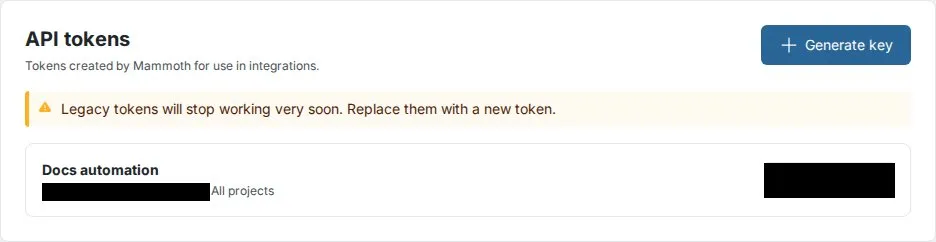
| API tokens | Tokens for scripts, integrations and CI | Owners and Members |
| External API keys | Your own AI provider keys, for example OpenAI | Owners manage; Members view |
| OAuth apps | Apps that use Sign in with Mammoth | Owners register and delete |
If your role can't manage API tokens, the section shows only "You can't view or manage API keys in this workspace. Contact the Workspace Owner."
AI assistants and the CLI sign in with your Mammoth account, and you choose their projects. Keep API tokens for CI and scripts.
Connect an AI assistant to Mammoth with MCP
The Connect an AI assistant card ("No key needed") lets you use Mammoth from an AI assistant: "Add this URL to your assistant, then sign in to Mammoth when asked." Click the card to expand it.
It shows the Mammoth MCP URL, https://mcp.mammoth.io/mcp, with Copy URL, and a short setup step for each client:
| Client | Step shown |
|---|---|
| Claude (web and desktop) | Add a custom connector in Claude's Connectors settings and paste the URL. |
| Claude Code | Run claude mcp add --transport http mammoth https://mcp.mammoth.io/mcp in your terminal. |
| Cursor | Add a new MCP server in Cursor's settings and paste the URL. |
| VS Code | Run "MCP: Add Server" from the Command Palette, choose HTTP, and paste the URL. |
| ChatGPT | Add Mammoth as a custom connector in ChatGPT's connector settings and paste the URL. |
Each client has a Setup guide link. When the assistant connects, you choose the workspace and projects it can use on a consent screen. The same card also appears, always open, in Connected apps. For the full setup, see Mammoth MCP server.
Sign in to the Mammoth CLI
The Use the Mammoth CLI card ("No key needed") is for running Mammoth from a terminal, or letting a coding agent like Claude Code run it for you. Click the card to expand it. Each command has a Copy button.
- Install: run the install command shown in your terminal.
- Sign in: run
mammoth auth login --method oauth. It opens your browser to sign in to Mammoth, and you choose which projects the CLI can use. - Check it: run
mammoth doctorto check the sign-in.
On a machine with no browser, sign in with mammoth auth login --device instead. The card ends with "Running it in CI or a scheduled job? Create an API key below." and a CLI guide link. See Authentication.
Create an API token
API tokens are "For scripts, integrations and CI. AI assistants and the CLI sign in instead." A token starts with mm_ and is sent as Authorization: Bearer mm_.... You need the Workspace Owner or Workspace Member role.
- In the API tokens card, click Generate key.
- In the Create API key dialog, enter a Name so you can recognise the key later, for example ETL pipeline - production.
- Optionally tick Project scoped and select a project. "A token works in every project in this workspace unless you scope it."
- Click Create key.
- In API key created, click Copy secret, store the secret, then click Done.
The key appears as a row in the API tokens card, newest first, with its creator, created date and project scope ("All projects" when unscoped).
Danger: Save the secret before closing
"After this dialog closes, the secret is gone. Copy and store it somewhere safe." To replace a compromised key, remove it and generate a new one.
When an integration targets one project, tick Project scoped. The token then can't reach other projects, even if the secret leaks. For request examples and the base URL, see API authentication.
Edit, remove or copy an API token
Each row shows the last four characters of the key. Its menu offers:
| Option | What it does |
|---|---|
| Edit | Opens Edit token to rename the key or change its project scope |
| Remove | Asks "Are you sure you want to delete this token?" Apps using it stop working |
| Copy key | Legacy tokens only: copies the key |
When the workspace has legacy tokens, the card shows "Legacy tokens will stop working very soon. Replace them with a new token." With no tokens, it shows "You don't have any generated tokens".
Add your own AI provider key (External API keys)
External API keys are "Keys you add yourself, for example OpenAI, for platform features." Mammoth features such as AI on your columns and Extract Text use them on your workspace's behalf. Keys belong to the workspace: all members can see them, but only Workspace Owners can add or remove them. Members see "You can't add external API keys in this workspace. Contact the Workspace Owner."
Supported providers: OpenAI (ChatGPT), Anthropic (Claude), Google (Gemini), xAI (Grok).
- In the External API keys card, click Add external key.
- Select the AI provider from the provider grid and click Next.
- Choose the Model to use with this key.
- Optionally expand Preferences to set provider options.
- Enter a Key Name, a display label that defaults to the model name.
- Paste the API key into the masked field.
- Click Add External Key. Mammoth checks the key when you submit.
The key appears in the card with its creator, created date and last four characters. Its only row action is Remove.
Info: Keys can't be edited
Once a key is added, nothing about it can be changed, including the display name. To replace or rename a key, remove it and add a new one.
The key value is unreadable after creation, so use the name to record what it's for, for example "OpenAI PDF extraction - prod". This makes rotation simpler.
Provider preferences
Expanding Preferences shows optional toggles for the model you picked. Depending on the model, they can include Extended thinking, Reasoning effort, Web search and Batch API. Not every model offers every preference. For model details, see Use AI on your columns.
Register an OAuth app (Sign in with Mammoth)
OAuth apps are "Apps that let people connect their Mammoth account with Sign in with Mammoth." The card lists each app with Name, Client ID (with a copy button), Redirect URIs and Created. With none, it shows "No OAuth apps registered yet."
Only Workspace Owners can register or delete apps. Others see "You can't register or delete OAuth apps in this workspace. Contact the Workspace Owner."
- Click Register app to open Register OAuth app.
- Fill in the form (see the table below).
- Click Register app.
- In Save these now, copy the Client ID and, for apps that aren't public, the Client secret. "The secret is shown only once. Store it securely."
- Click Done.
| Field | Required | Notes |
|---|---|---|
| Name | Yes | Up to 100 characters, for example "Acme Analytics" |
| Redirect URIs | Yes | At least one, up to 10. Use Add redirect URI for more |
| Public app | No | "No client secret. For desktop apps and CLIs." |
| Description | No | Under Optional details. Up to 500 characters |
| Logo URL, Terms of service URL, Privacy policy URL | No | Under Optional details. Each must be an https:// URL |
The app's name, logo, terms and privacy links appear on the consent screen people see when they connect the app.
Redirect URI rules
| Message | Rule |
|---|---|
| "Must be an https:// URL, or an http://localhost, http://127.0.0.1 or http://[::1] URL" | Use https, or a loopback address on your own machine |
| "Must not contain spaces, backslashes or *" | No wildcards |
| "Must not contain #" | No fragment |
Delete an OAuth app
Click the delete icon on its row. "This permanently deletes the app and every user's connection to it stops working immediately."
See and revoke connected apps
The Connected apps section of Workspace Settings lists third-party apps you allowed to access your Mammoth data: "Each connection is limited to the project you chose, or covers all your projects." Everyone can open it.
Each row shows the app, its access (Read only or Read and change), its projects and when you connected it. With none, you see "You haven't connected any apps yet."
Click Revoke on a row to remove an app's access. "The app loses access immediately, including to anything it is doing right now. You can connect it again from the app."
Below the list is the Connect an AI assistant card.
Limits
| Item | Limit |
|---|---|
| OAuth app Name | 100 characters |
| OAuth app Redirect URIs | 1 to 10 |
| OAuth app Description | 500 characters |
| API token secret | Shown once only |
Related
- Security: sign-in, data security and compliance: how tokens and sessions are protected.
- Workspace and project roles, permissions and custom roles: who can manage tokens and keys.
- Use AI on your columns: the features that use external keys.
- Workspace settings: General and Email groups: the other Settings sections.
- Authentication: tokens, the SDK and CLI sign-in for developers.
Something wrong? support@mammoth.io