Connect Microsoft Dynamics 365 to Mammoth
The Microsoft Dynamics connector imports CRM and business data from your Microsoft Dynamics 365 environment into Mammoth as a dataset. It signs in with Azure app credentials (Tenant ID, Client ID, Client Secret), so the connection belongs to an app, not one person's account. Open it from Data Library > New dataset > Connectors and search for Microsoft Dynamics. Project Admins create the connection; Project Editors can start datasets from a connection the project already has. Which connectors you can add depends on your plan.
What you can bring in from Dynamics 365
- The entities (tables) the app's security role can read, and the columns you tick.
- Data you ask for in the Chat. The agent picks tables and columns for you.
The dataset can refresh daily or only when you ask.
Before you connect Dynamics 365
You need an Azure Active Directory app with access to your Dynamics 365 environment. A Microsoft 365 or Dynamics admin usually does this once.
You also need your environment's organization URL, for example https://yourorg.crm.dynamics.com. Use your environment-specific URL, not the Microsoft discovery service URL (organizations.crm.dynamics.com).
Register the Azure AD app for Dynamics
- Go to Azure Portal → Azure Active Directory → App registrations.
- Click New registration, name it (for example
Mammoth Dynamics), and click Register. - Copy the Application (client) ID. This is your Client ID.
- Copy the Directory (tenant) ID. This is your Tenant ID.
- Go to Certificates & secrets → New client secret, add a description, set an expiry, and click Add.
- Copy the secret Value at once; it won't be shown again. This is your Client Secret.
- In your Dynamics 365 admin center, add the app as an application user with a security role that can read the entities you want.
Connect Microsoft Dynamics to Mammoth
- Go to the Data Library, click New dataset, and choose Connectors.
- Search for Microsoft Dynamics and click its tile. The connector workspace opens with the Chat connecting Dynamics.
- Fill in all four fields below in the chat's card and connect. There's no sign-in step, because the connector uses the app credentials.
If you already have a Dynamics connection, pick it under Your connections in the launcher instead. See Connect a database or app for the shared steps.
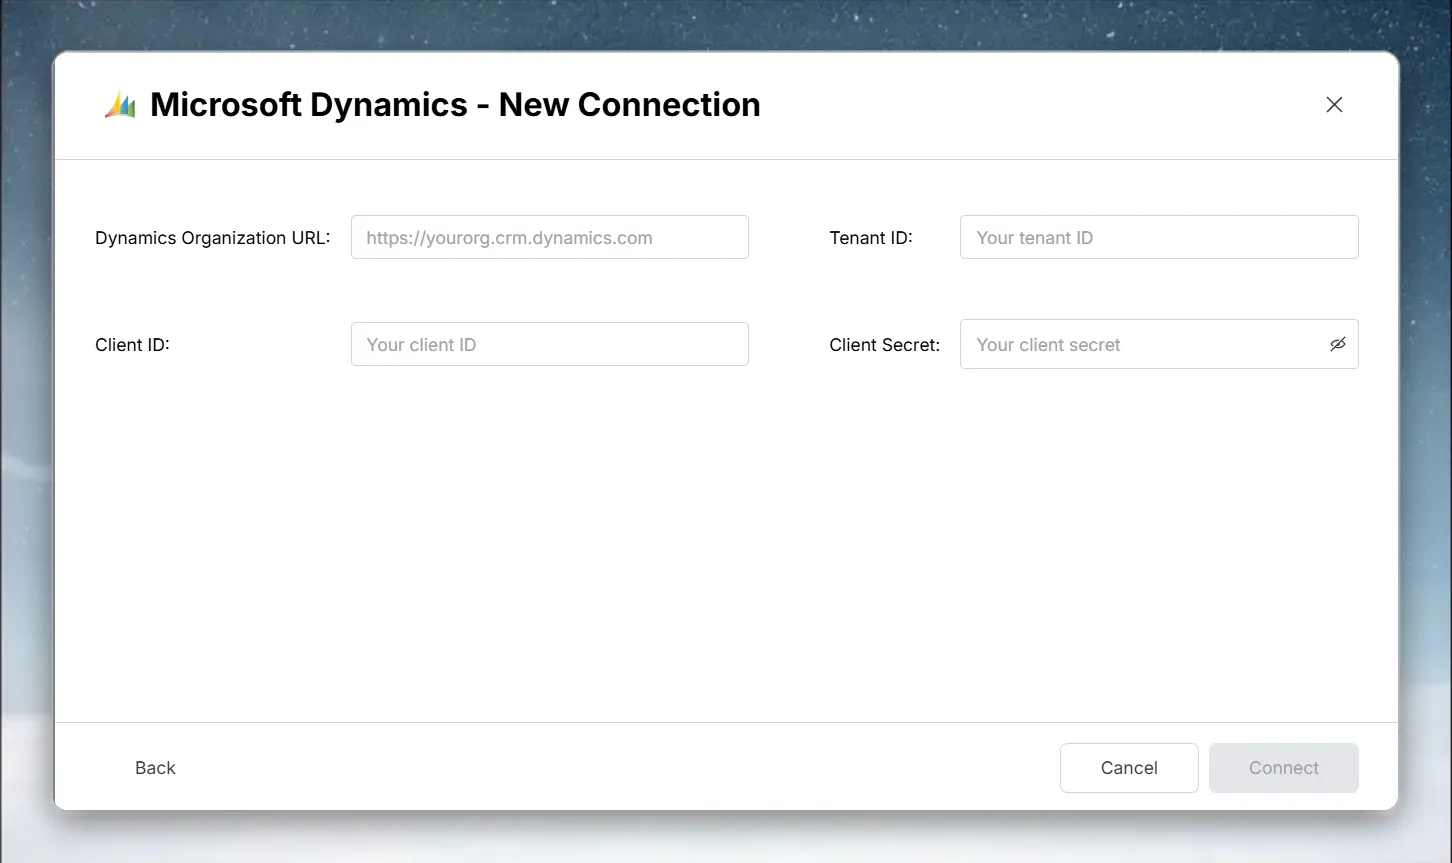
| Field | What to enter | Example |
|---|---|---|
| Dynamics Organization URL | Your Dynamics 365 environment URL | https://yourorg.crm.dynamics.com |
| Tenant ID | Azure AD Directory (tenant) ID | xxxxxxxx-xxxx-xxxx-xxxx-xxxxxxxxxxxx |
| Client ID | Azure AD Application (client) ID | yyyyyyyy-yyyy-yyyy-yyyy-yyyyyyyyyyyy |
| Client Secret | The app secret value you created |
Pick Dynamics entities and columns
- In Tables, click an entity to see its columns and sample rows.
- Tick the columns you want. They gather in Your table.
- Click Preview 100 rows to check the result.
Save Dynamics data as a dataset
- Click Save as dataset.
- Enter a Dataset name and pick the folder under Save in.
- Under Keep it up to date, choose Daily or Manual.
- Click Save.
Refresh Dynamics data and choose an update method
Choosing Daily creates a Dataset Refresh automation that you can reschedule later.
After the dataset is saved, its Update method offers only two options:
| Update method | What it does |
|---|---|
| Replace all data | Rebuilds the dataset from the source on every refresh |
| Add to existing data | Adds every row the refresh brings in to the rows you already have |
Dynamics refreshes don't use a key column, so Mammoth can't add only new rows.
Troubleshoot Microsoft Dynamics connections
| Symptom | Likely cause | Fix |
|---|---|---|
| "Authentication Failure. Please check your Microsoft credentials." | A value is copied wrong | Check Dynamics Organization URL, Tenant ID, Client ID and Client Secret |
| Mammoth says the Organization URL appears to be the Microsoft Discovery Service URL | You entered the discovery URL | Replace it with your environment URL, for example https://yourorg.crm.dynamics.com |
| Access denied (403) | The app isn't an application user | Add the app registration as an Application User in Dynamics 365 with the required security role |
| Authentication stops working later | The client secret expired | Generate a new secret in Azure Portal, then update the connection in Data → Connections with Edit connection |
| An entity isn't in the list | The security role can't read it | Give the application user a security role with read access to that entity |
Related
- Connect a database or app: the shared connector workspace steps.
- Manage saved connections: update the connection when a secret expires.
- Refresh a dataset: change when the dataset refreshes.
- Salesforce: import CRM data from Salesforce.
- Connector reference: every source Mammoth connects to.
Something wrong? support@mammoth.io